What do I need to know before I create a test?
- Show or hide: Students can't see a test until you choose to show it. On the Course Content page, students can see when the test is set to be available. You can set up conditional availability rules to make the test available based on date, time, and a student's performance on other course content.
- Test settings: Select the Open Test Settings icon to provide the test's details and information.
- Due dates: Due dates appear on the calendar and in the activity stream. Late submissions appear with a Late label in the course gradebook.
- Class conversations: You can allow conversations within a test, and anyone can contribute.
- Grading schema: From the Grade using menu, select an existing grading schema such as Points. A test's score consists of the sum total of all the questions' points. You can change the grading schema at any time.
- Goals and standards: You can align a test to one or multiple goals.
- Optional description: The description appears with the test title on the Course Content page.
How do I create a test?
You can create tests alongside your other content. When you create a test, a gradebook item is created automatically.
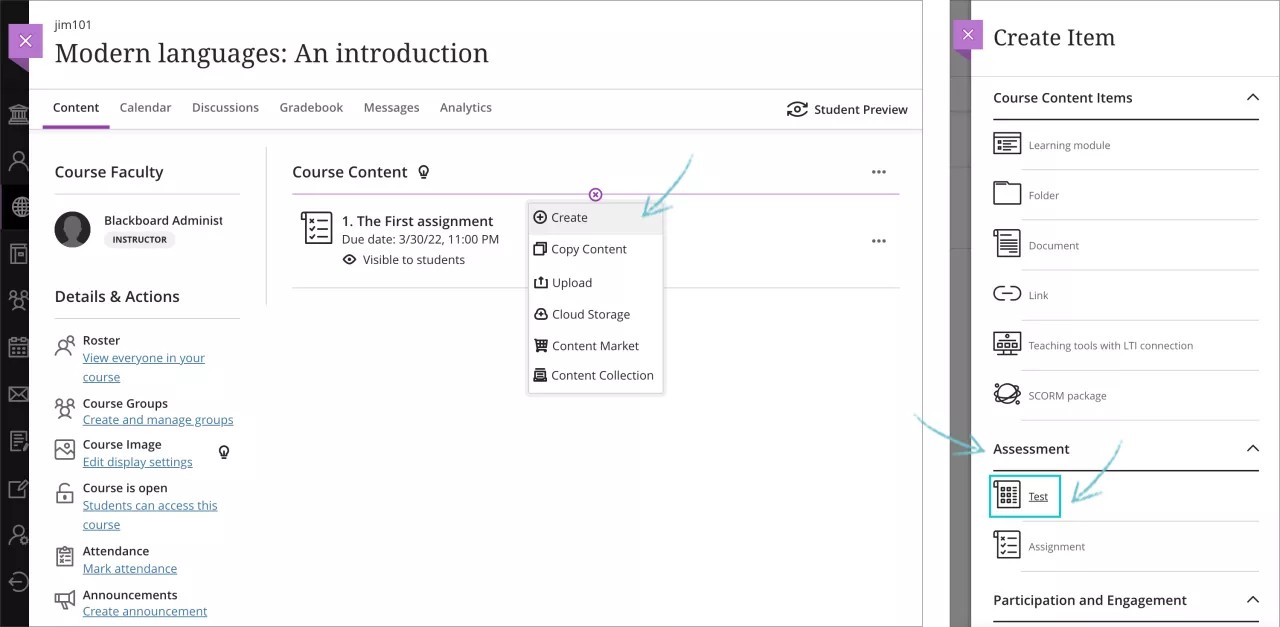
On the Course Content page, select the plus sign wherever you want to add a test. In the menu, select Create to open the Create Item panel and select Test. The New Test page opens.
You can also expand or create a folder or learning module and add a test.
A student says they took the test but I don't see it. How can I know they took the test?
We know there are times when students believe they submitted their work only to find out later that it wasn't sent at all, or it wasn't sent successfully. After a student submits an assignment or test, a modal window with a submission confirmation number appears. Student are encouraged to copy and save this number as proof of their work, and evidence for academic disputes.
Instructors can search for a receipt confirmation number at the top of the gradebook submission view. This helps instructors find student submissions when extra verification is needed. Using this receipt confirmation number, the instructor can find the following information:
- assessment name
- assessment grade
- the number of attempts for an assessment the student who submitted the assessment
- the size of any file included with the submission; this allows the instructor to insight into what a student has attached for marking
- submission date and time stamp
This information appears on the peek panel for all submitted attempts.
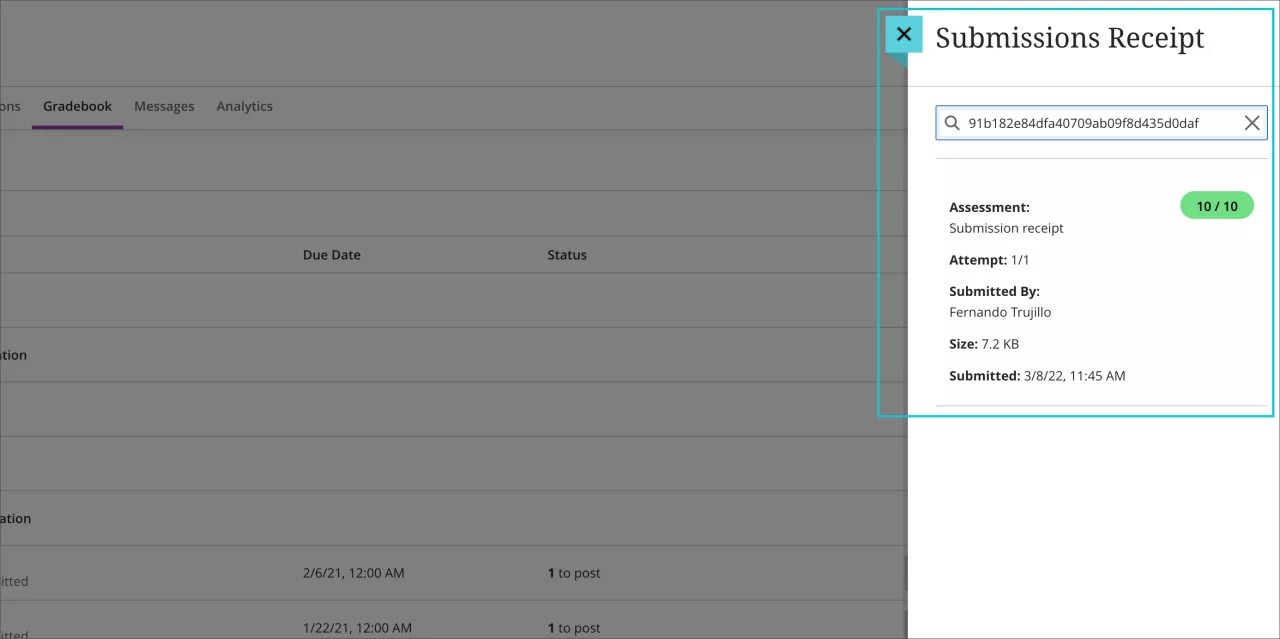
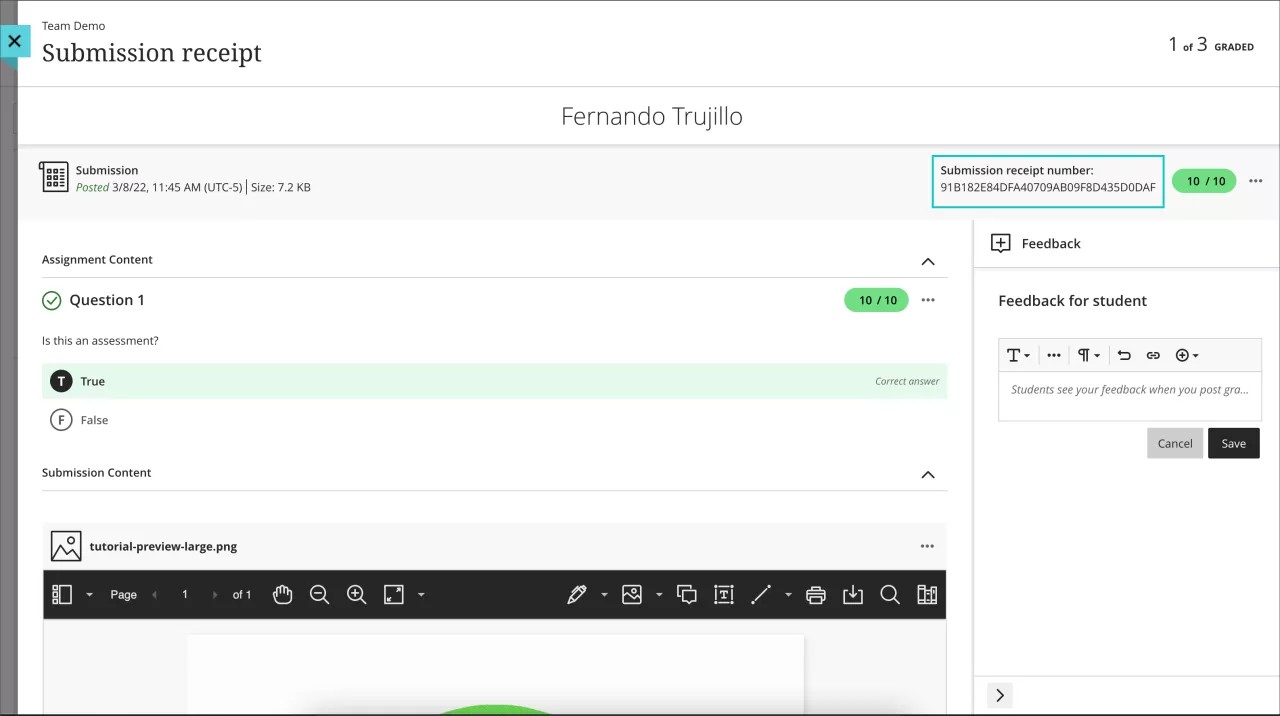
The receipt number and size of any attached files appears at the top of the submission view.
Watch a video about submission receipt enhancements
The following narrated video provides a visual and auditory representation of some of the information included on this page. For a detailed description of what is portrayed in the video, open the video on YouTube, navigate to More actions, and select Open transcript.
Video: Submission receipt enhancements shows expanded submission receipt functionality for instructors and students.