This information applies only to the Ultra Course View.
This information applies only to the Ultra experience.
Course content search
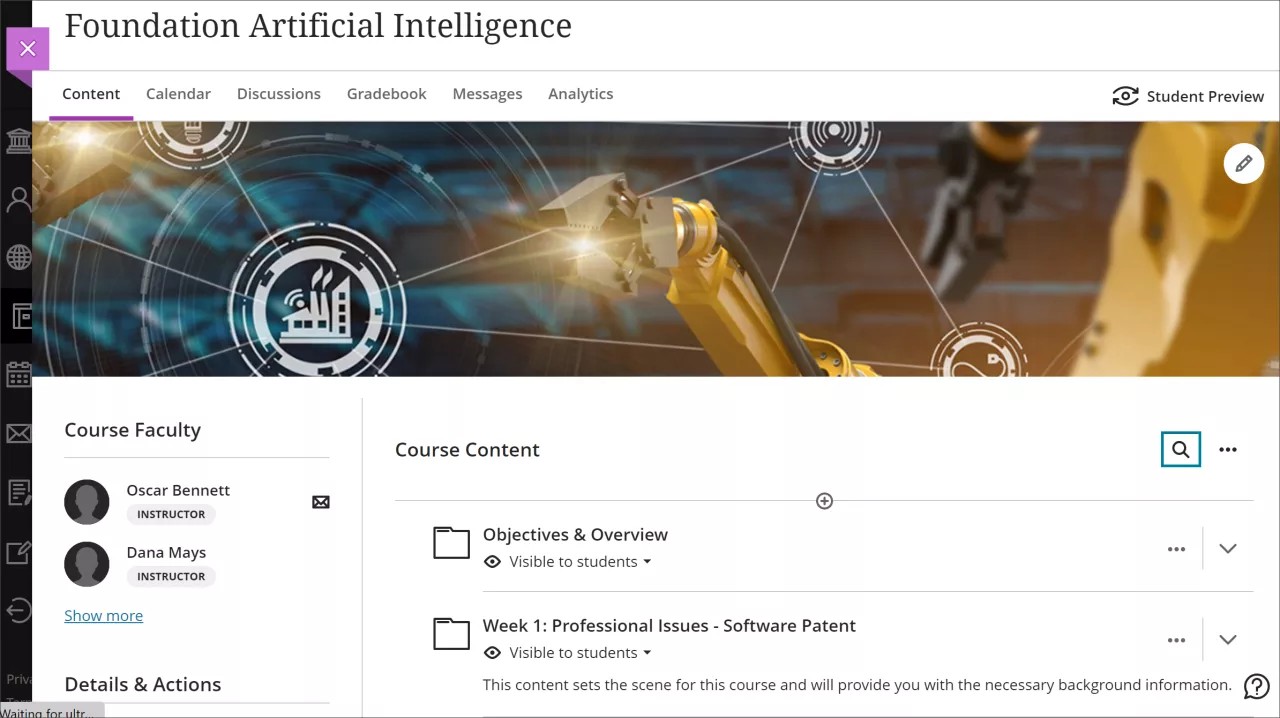
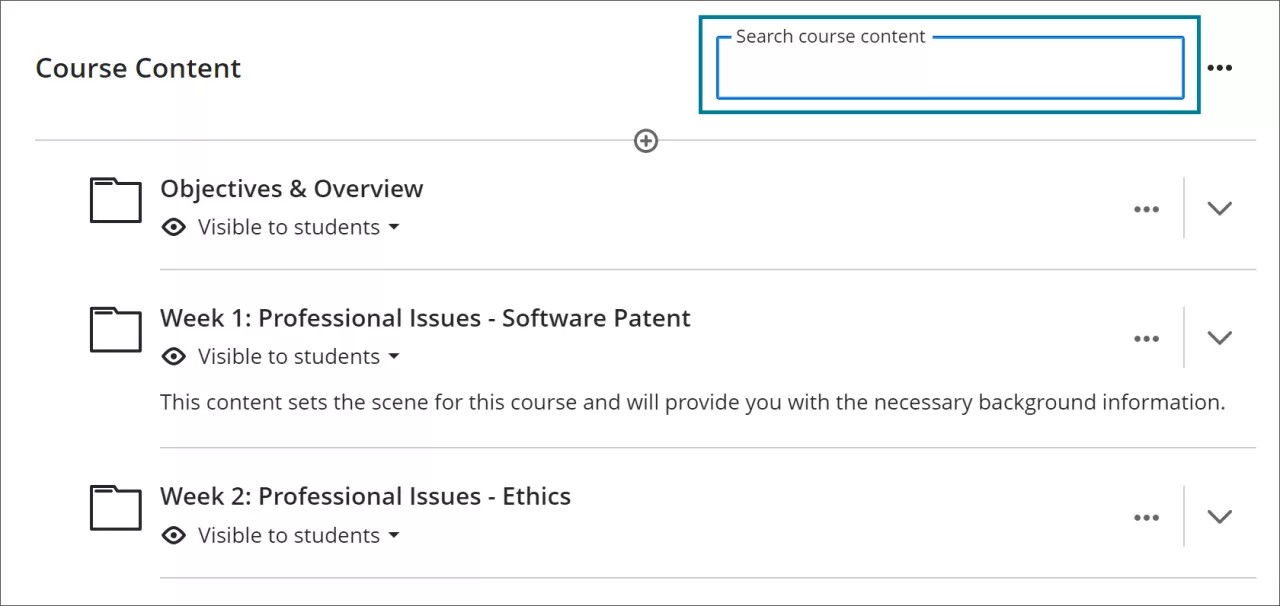
You can search for items by title on the Course Content page. Select the magnifying glass located at the top of the Course Content page to expand the magnifying glass into a search bar.
In the search bar, enter letters of the keyword related to the item of your search.
The course search function displays the titles of matched items as you type in letters. Select the item from the list to open the corresponding content.
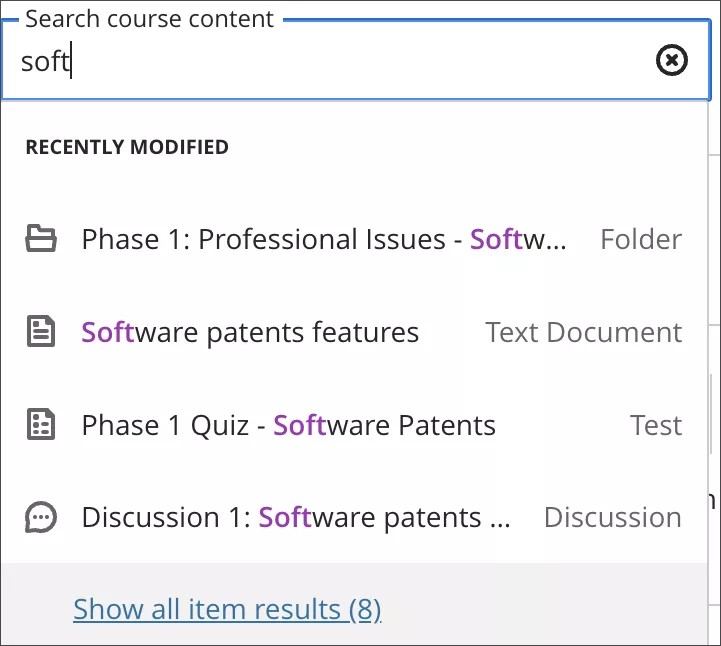
Select Show all item results at the bottom of the list to display a detailed view of all matched items. Select the desired item to view.
To do another search, select X inside the search bar to clear your previous entry. You can also delete the search bar contents and enter a different keyword.
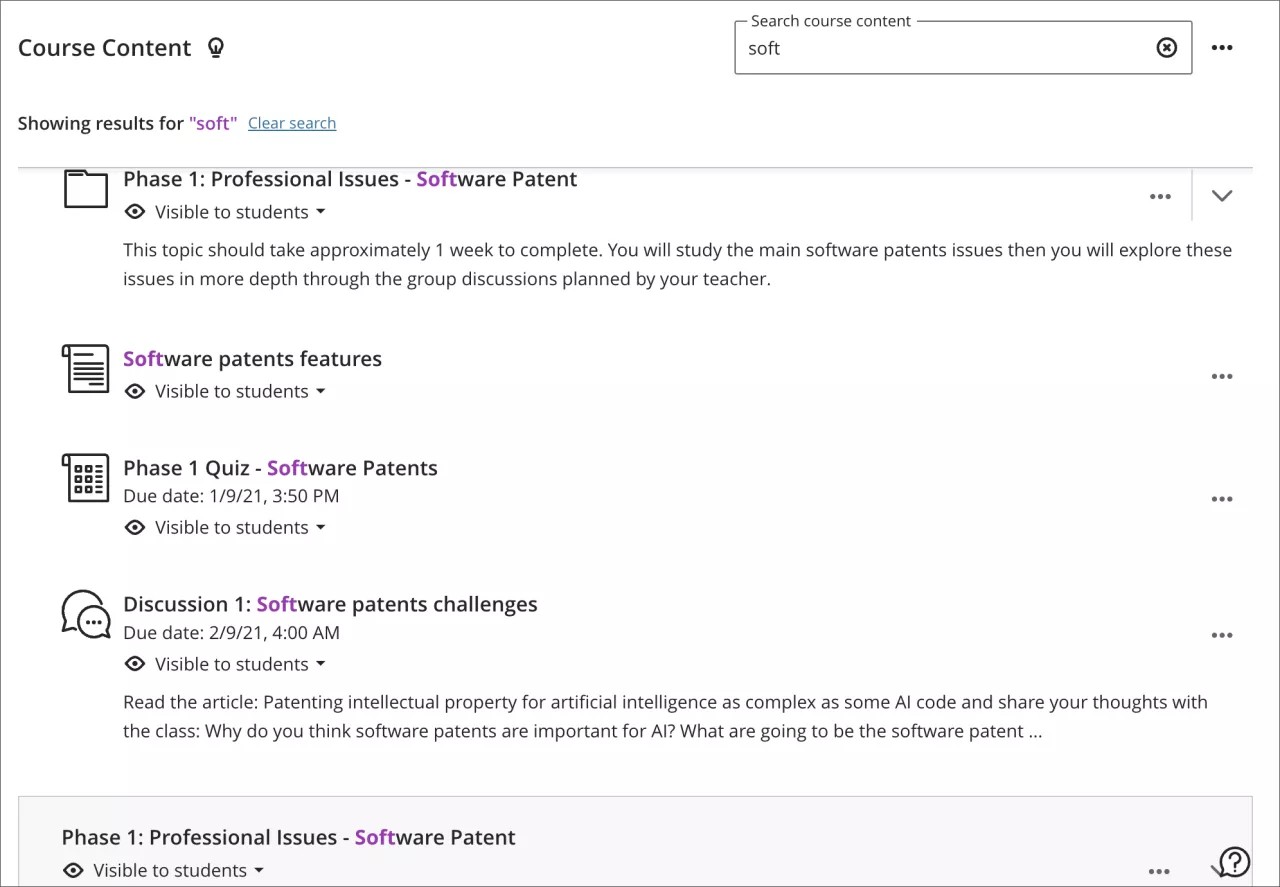
Select Clear Search near the top of the list to clear the detailed list of search results. You'll return to the full Course Content page.

The search display functions in a different way when the browser is not in full screen.
Unused files management tool
Course roles will need Course/Organization >Files Manage Files privileges to access the Unused Files tool.
You can easily locate and delete unused course files in your course. Select the ellipsis (three dots) menu at the top of the Course Content page and then select Unused Files.
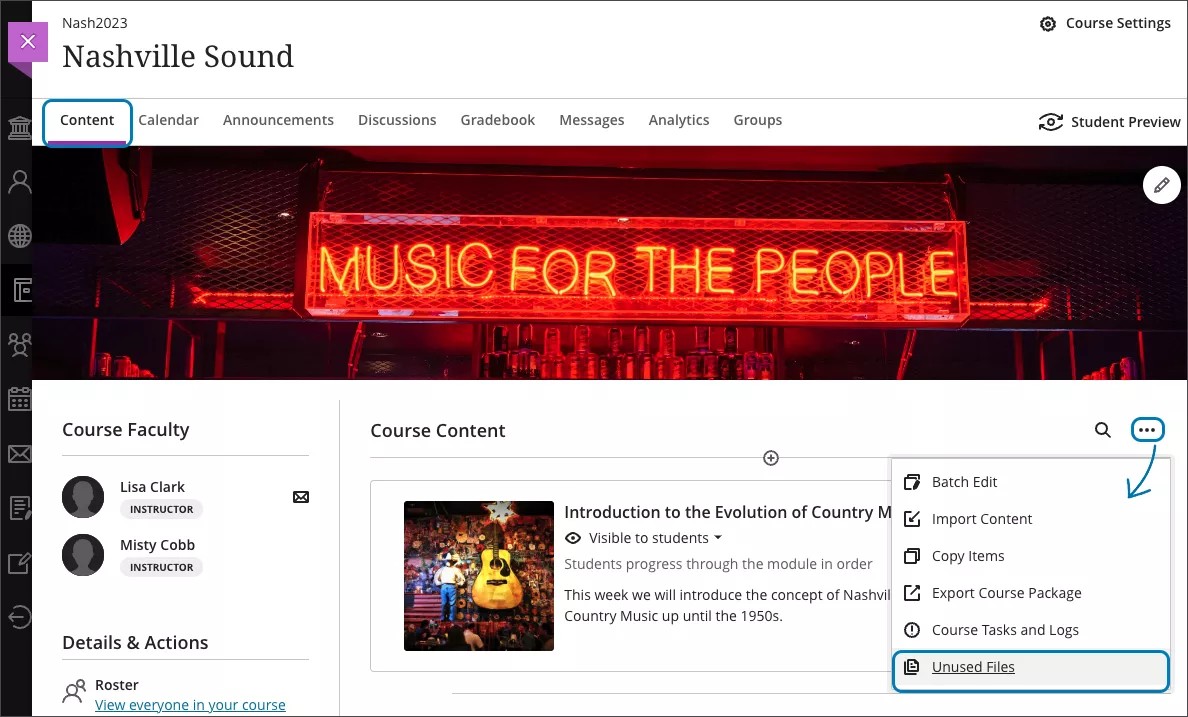
There are two views available on the Unused Files page: unused files (default view), which displays files that have never been opened in your course, or all files, which displays all files in your course. The file name, upload date, and file size are displayed along with an option to download a copy of the local file.
Simply select the files you want to delete and then select Delete Files.
For administrators: A new configuration option is available from the Configure option in The Ultra Experience is here! module on the Administrator Panel. In the Available Features section, locate Unused files management. The default state is on.
Edit, replace, delete and reorder content
Edit, replace, and delete
You can make changes to existing content items on your Course Content page. In an item's row, select the ellipsis (three dots) to access Edit and Delete.
Edit or replace files. To edit or replace files, select the ellipsis button on the right-hand side of the item you wish to work with. This opens a panel that allows you to edit:
- Display name. Select the display name at the top of the panel to edit the name that appears on the Course Content page for your item.
- Add goals and standards. You and your institution can use goals to measure student achievement across programs and curricula. After you successfully upload a file to your course, you can align one or multiple goals. Select the ellipsis button on the right-hand side of the item you wish to work with and select Edit. In the panel, select Align with goals to search for available goals to align with the file.
Students can't see the goals you align with a file.
- Replace the file. Use this option to substitute one file in place of another. For example, you may find a higher resolution version of an image you've uploaded. If the file in question is being displayed in multiple locations in the course, a prompt asks if you wish to replace the file in all instances or this single instance. The old file is not retained when replaced by the new version, unless you are replacing it in one instance only. This frees up storage space for your institution.
- Add a description. The description appears beneath the display name on the Course Content page. This is where you can provide students with more information about the item. The maximum length of a description is 750 characters. A warning will appear below the description field when 75 characters or less remain.
- Edit student access to file. You can edit students' ability to download or view the file.
Delete files. You can delete an item from your course or hide it from students to preserve the information. Students can't access hidden items on the Course Content page. If you delete a folder or learning module that has content, the content is also removed from the Course Content page.
Reorder content on the Course Content page
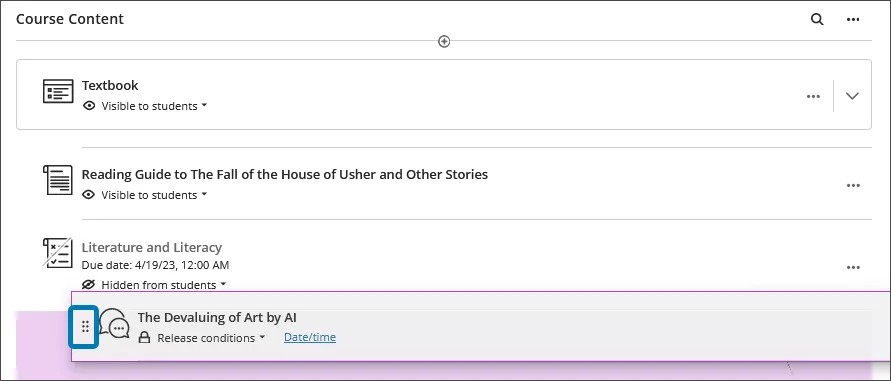
Select the row of the item you wish to move and drag it to a new location. You can also move content into a folder. Expand the folder and drag the item to the area below the folder's title.
Learn Ultra supports up to three levels of hierarchy for content nesting on the Course Content page. For example, a folder within a folder is two levels. A folder within a folder within a learning module is an example of three levels. Your institution has the option to add one additional level of content nesting in courses across the institution. Ask your Ultra administrator whether your institution uses this option.
With your keyboard, you can move an item to a new location and move an item into a folder.
- Tab to an item's move button (the button is two vertical arrows: one pointing up, one pointing down).
- Select Enter to activate move mode.
- Use the arrow keys to choose a location.
- Select Enter to drop the item in the new location.
In an item's row, open the menu to access the Edit and Delete functions.
Control availability of content
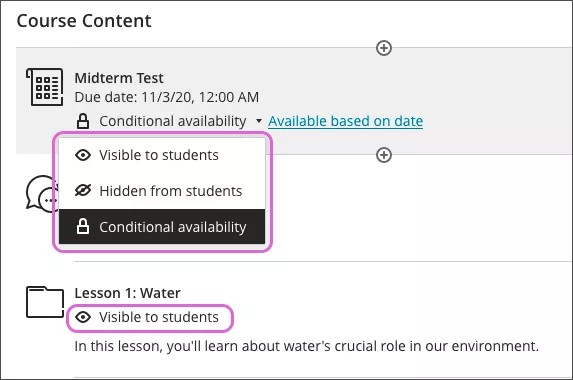
You can easily set each piece of course content as visible or hidden from students. You can make this setting when you create each piece of content, or you can make a change after the content appears in your course.
By prominently displaying the visibility of each item, you can be confident you aren't showing students content that isn't quite ready. You have the flexibility to experiment with content before you release it to students. For example, you might show only the first week of content—and keep the rest hidden as you refine it.
With your keyboard, tab to the visibility list and press Enter to open the menu. Use Alt/Option + the up and down arrows to select an option.
Students can't access items set to appear on future dates, but they can see them in the list. You can also create rules to release content based on how a student performs on other items in your course.
Ally ב-Learn Ultra - מרצה
ULTRA: הצגה ושיפור של נגישות תוכן
לא נראה מוכר? עבור אל העזרה של "Original" אודות שיפור נגישות תוכן.
המוסד שלך קובע אילו כלים זמינים.
הכיתה שלך מלאה בתלמידים מגוונים בעלי יכולות למידה ייחודיות. מתן תוכן נגיש יותר לתלמידים פירושו שכל אחד יכול לבחור תבניות שמתאימות לו בצורה הטובה ביותר. אם המוסד שלך משתמש ב-Blackboard Ally, באפשרותך להשתמש בכלי שיעזור לוודא שתוכן הקורס שלך נגיש לכל תלמיד.
מחווני ניקוד נגישות ותבניות חלופיות מופיעים לצד מסמכי קורס ומבחנים.
- מצא את התוכן שברצונך לשפר.
- לצד התוכן מופיע סמל המציג את ניקוד הנגישות.
- בחר את סמל הניקוד כדי ללמוד כיצד לשפר את ניקוד הנגישות.
- Ally נפתחת ומציגה את השלבים בנוגע לאופן העריכה של התוכן שלך עבור נגישות משופרת וממטבת אותו עבור תבניות חלופיות.
תלמידים אינם רואים את ניקוד הנגישות של התוכן. במקום זאת, תלמידים יכולים לבחור מבין התבניות החלופיות שיוצרת Ally עבור התוכן. באפשרותך לעזור ל-Ally ליצור תבניות חלופיות טובות יותר על-ידי ציות לשיטות העבודה המומלצות ליצירת תוכן נגיש.
הצגת תבניות חלופיות
לאחר שאתה מוסיף תוכן לקורס, Ally יוצרת תבניות חלופיות של התוכן בהתבסס על המסמך המקורי. לדוגמה, אם התוכן המקורי הוא PDF, Ally יוצרת תבניות שמע, ברייל אלקטרוני ופרסום אלקטרוני של אותו תוכן. תבניות אלה הופכות לזמינות עם הקובץ המקורי כך שהכל נמצא במיקום נוח אחד.
התבניות החלופיות שנוצרו תלויות בסוג התוכן המקורי. אם אינך רואה אפשרות להורדת תבניות חלופיות, Ally אינה מופעלת עבור קורס זה או שהתוכן אינו בעל סוג תוכן נתמך.
מצא תוכן בקורס שלך. בחר את התפריט לצדו ובחר תבניות חלופיות. בחר את הגרסה המתאימה ביותר לצרכים שלך! בחר הורד כדי לשמור את התבנית החלופית בהתקן שלך.