You can add files to your course in multiple ways, including when you create course content. When you add files to your course, they are stored in the course's file repository: Course Files or the Content Collection.
Three common ways to add files to your course
You can add all types of files to your content. In our examples, we add a document in three ways.
- To control where a file link appears in your text, use the editor to attach files as you create content.
- When you create content, attach a file in the Attachments section.
- Add your files to Course Files or the Content Collection BEFORE you create content.
To control where a file link appears, use the editor to attach files as you create content
When you use the Add Content function in the editor, you can choose where the file's link appears within your content.
Depending on the type of content, you can link to files already in Course Files or the Content Collection or browse for one on your computer. Any files you upload from your computer are saved in the repository in the top-level folder. You can't select the folder your files are uploaded to.
Advantage: You have creative control over how your content appears. If you add three files to your content item, you can split them up among the text as you want.
Example: You provide your students with three case studies to read. They must select one to further investigate. In the same content item, you can provide an introduction and a file link for each case study. You can use the file name or provide a link title for each.
Files appear: The links to the files appear exactly where you want. As you refine your content or need to update material, you can continue to add files, images, and multimedia. You have the flexibility to change the order and appearance when you want.
More on the functions in the editor
When you create content, attach a file in the Attachments section
As you create content, you can add a file from your computer or from the course's file repository: Course Files or the Content Collection.
Advantage: You can upload files while you build your course. You don't have to upload your materials first.
Example: Your students are struggling with a group project. You can deliver more instructions and ask them to download a file with specific examples. As you create the new content item, you can attach a file. If the file is on your computer, you can select the folder in Course Files or the Content Collection that you want to upload it to.
Select Browse Course or Browse Content Collection to locate the file on your computer and upload it. Alternatively, locate the file in one of the folders in your repository.
Add your files to Course Files or the Content Collection BEFORE you create content
Upload files and folders into Course Files or the Content Collection, either one at a time or in batches, with the drag-and-drop function or the browse function.
Advantage: In Course Files or the Content Collection, you can create folders to organize your content.
Example: You decide to deliver content to your students for each week. On the course menu, you add links for Week 1, Week 2, and Week 3. In Course Files or the Content Collection, you create folders with the same names and upload your files. When you create content, you can navigate to the appropriate folder to locate the file you need.
Frequently asked questions
Before I create content, do I have to upload all my files into the Content Collection?
No. You can add files directly to the Course Content page. You can upload one or more files to your course and the files are automatically saved to the Content Collection for easy access in the future.
Files are automatically stored in the Content Collection when you upload on the Course Content page or using the editor.
A new semester has started and I need to update my syllabus file. What is the best way to do this?
You can edit and overwrite individual files in the Content Collection while maintaining the course links to those files.
Example:
You upload your syllabus file to the Course Content page. Later, you need to make changes to the file. First, edit a copy of the file on your computer. Then, return to the Content Collection using the Tools menu in the base navigation. Locate the file within your course folder and access the item's menu. Upload the new version of the syllabus with the Overwrite File function. The link to the file in your course remains intact. When students access the syllabus in your course, they see the revised content.
More on adding files to the Content Collection
Can I add files to my course in places other than on the Course Content page?
Yes. You can attach files to other course content, such as documents, assignments, and tests. You can also insert files with the editor so students and other course members see the file alongside other content you add. Use the editor to insert files in discussions or messages.
How do I make my course content more accessible?
Ally in Learn Ultra Instructor Overview
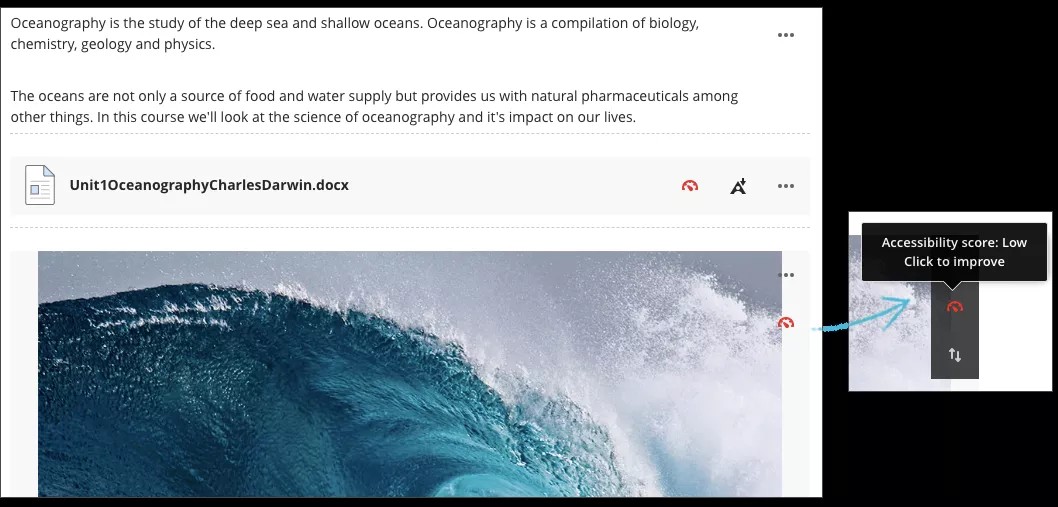
Your class is full of diverse students with unique learning abilities. Providing students with more accessible content means each individual can choose formats that work best for them. If your institution uses Blackboard Ally, you can use the tool to help ensure your course content is accessible to every student.
Accessibility score indicators and alternative formats appear next to course documents and tests.

