This information applies only to the Original Course View. Your institution controls which tools are available.
Your institution controls the availability of the adaptive release tool. If your institution disables adaptive release, all rules that you've created will disappear. If your institution enables the tool again, any adaptive release rules that you previously set reappear.
Two types of rules
Be sure Edit Mode is ON so you can access all of the instructor's functions.
Add a basic adaptive release rule
With basic adaptive release rules, you can add and edit one rule for a single piece of content. This single rule may have multiple criteria.
For example, a rule can require students to meet both date and review status criteria before they can open other content. You can use advanced adaptive release rules to add multiple rules to a single piece of content.
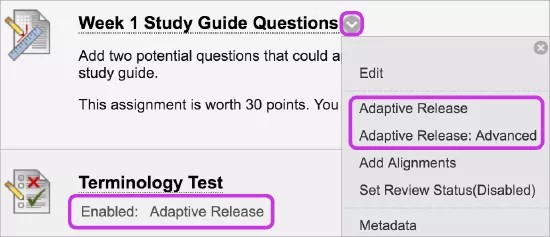
- Access an item's menu and select Adaptive Release.
- On the Adaptive Release page, complete one or more sections such as date and membership.
- Select Submit.
Add an advanced adaptive release rule
With advanced adaptive release, you can add multiple rules to a single content item. If you create multiple rules, the content is visible to a student if any of the rules are met. You can add multiple criteria to each rule.
For example, one rule allows Group A members with a score above an 85 on a test to view the content item. Another rule for the same item allows Group B members to view the same content item only after a specific date.
Rules that can't be satisfied by any student are noted because they won't provide any access to the specified content item.
- Access an item's menu and select Adaptive Release: Advanced.
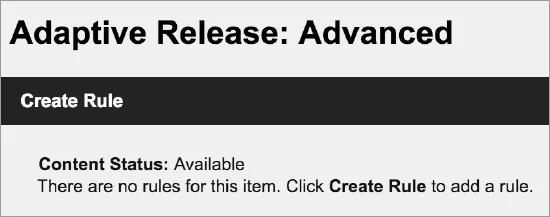
- On the Adaptive Release: Advanced page, select Create Rule.
- On the Add Rule page, type a name for the rule and select Submit.
- Select Create Criteria and select date, grade, or membership, and provide the criteria. Select Submit.
- Select Review Status to add it to the advanced adaptive release rule. Browse and select the item students must review before the content is released.
- Repeat Steps 6 and 7 to add multiple criteria to an item.
Edit or delete an adaptive release rule
To edit the criteria or delete a basic rule, access the item's menu and select Adaptive Release.
For example, you can change the date range for a date rule. If some students already submitted and you assigned grades, they see that grade on their My Grades pages. They may not see the item in the course any longer if your new date range is in the future.
For advanced rules, you manage the name and criteria of a rule separately:
- Access an item's menu and select Adaptive Release: Advanced.
- On the Adaptive Release: Advanced page, access a rule's menu:
Select Manage to edit the rule's name.
-OR-
Select Edit Criteria to add, edit, or delete criteria.
-OR-
Select Delete to delete both advanced and basic adaptive release rules.
Copy an adaptive release rule
You can copy an existing adaptive release rule rather than create a new one. After you copy the rule, you can change the name and edit the rule. You can copy rules only within a single item. You can't copy a rule from one item to another item.
- Access an item's menu and select Adaptive Release: Advanced.
- On the Adaptive Release: Advanced page, access a rule's menu and select Copy.
- An exact copy of the rule appears at the bottom of the list. The copy has the same name as the original rule and starts with "Copy of."
- In the copied rule's menu, select Edit Criteria to make changes to the name or criteria.
Visibility of items with adaptive release rules
If you create no adaptive release rules, the content appears to all students in your course. However, you can change an item's visibility or add date restrictions when you create or edit the item.
After you establish adaptive release rules for an item, the visibility of that item is restricted to those students who meet the criteria of those rules.
For example, you create a content item called "Introduction" in a content area. At this point, all students can see that item. Next, you create a rule that restricts the item to Group A members. Now, only members of Group A can see the item—all other students in your course don't see it.
Next, you add another criterion to this rule that restricts it to Group A members who have received at least 80 points on Test #1. All other students, including Group A members who scored less than an 80 on the test, won't see the item.
If you create an adaptive release rule but define no criteria for it, the content appears to all students—even if you associate no other rules with the item. One blank criterion will allow the content to appear to all students.
View item availability by student
When you create several adaptive release rules, you may find it difficult to remember which students may access each piece of content. You can see which items appear to specific students on the User Progress and Performance Dashboard pages.
You can check if your students can access your content.
If you made an item unavailable, the User Progress page indicates that the item isn't visible to students. The User Progress page also lists adaptive release rules that affect the visibility of an item. If you enable review status for an item, you can check which students have reviewed the item and when.
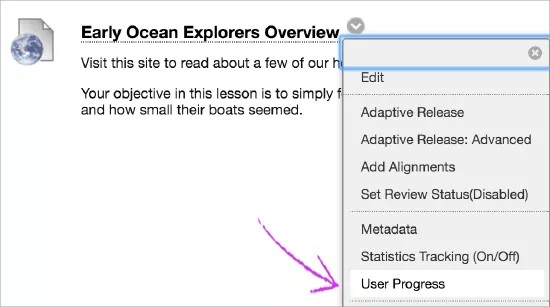
- Access an item's menu and select User Progress.
- On the User Progress page, select a column title to sort the contents.
- When you finish the review, use the breadcrumbs to navigate to a previous page.
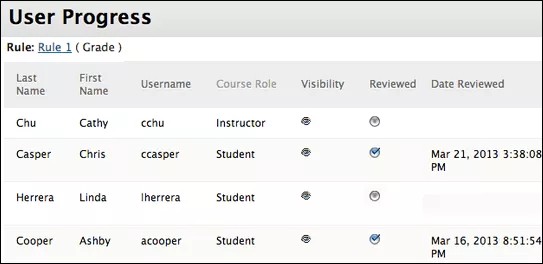
User Progress page
The icons in the Visibility column show if the item is visible to students. The Not Visible icon shows the item isn't visible to students because of an adaptive release rule or the item's availability settings.
A check mark in the Reviewed column shows the student has selected the item's Mark Reviewed link.
Check user progress from the Performance Dashboard
You can view the review status on the Performance Dashboard.
Control Panel > Evaluation > Performance Dashboard
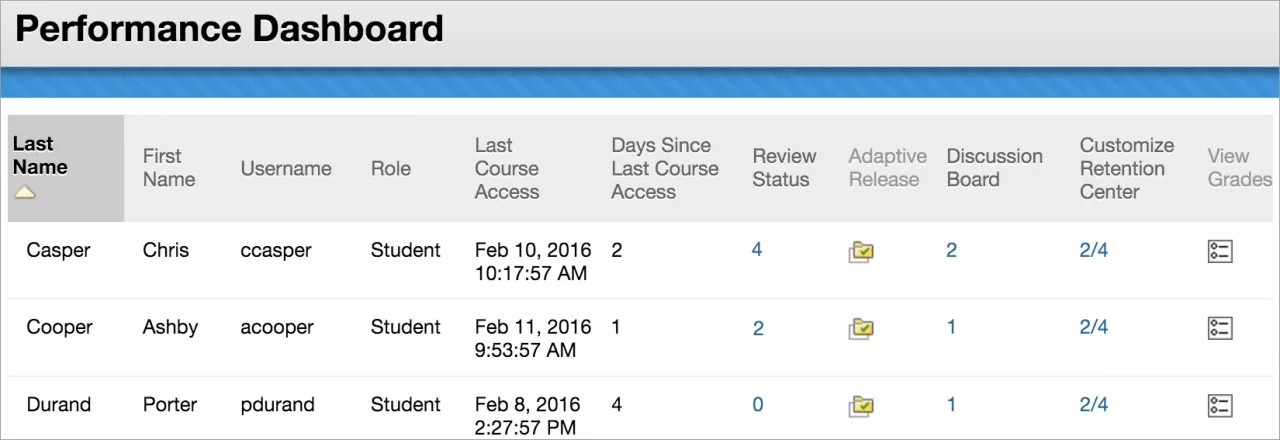
The numbers in the Review Status column show the number of items that a student has marked as Reviewed.
Alternatively, select the adaptive release icon for any student. In the pop-up window, icons show the visibility of items to that student. An icon also shows the review status of any items with a review requirement, if applicable.
More on the Performance Dashboard
Adaptive release rules and course copy, archive, and export
Adaptive release rules and user progress information are included with these operations:
- Full course copy that includes users
- Archive and restore operations
Rules and user progress information aren't included with these operations:
- Copy of course materials into a new course
- Copy of course materials into an existing course
- Export and import operations
What do students see?
With the student preview feature, you can view a course as a student does. The system creates a student account—the preview user account. You're logged in as that student and enrolled in the current course. With the preview user account, you can check your adaptive release rules. For example, you can mark an item as reviewed to see if you can open the unit test.