Organizations
Doesn't seem familiar? Jump to the "Ultra" help on organizations.
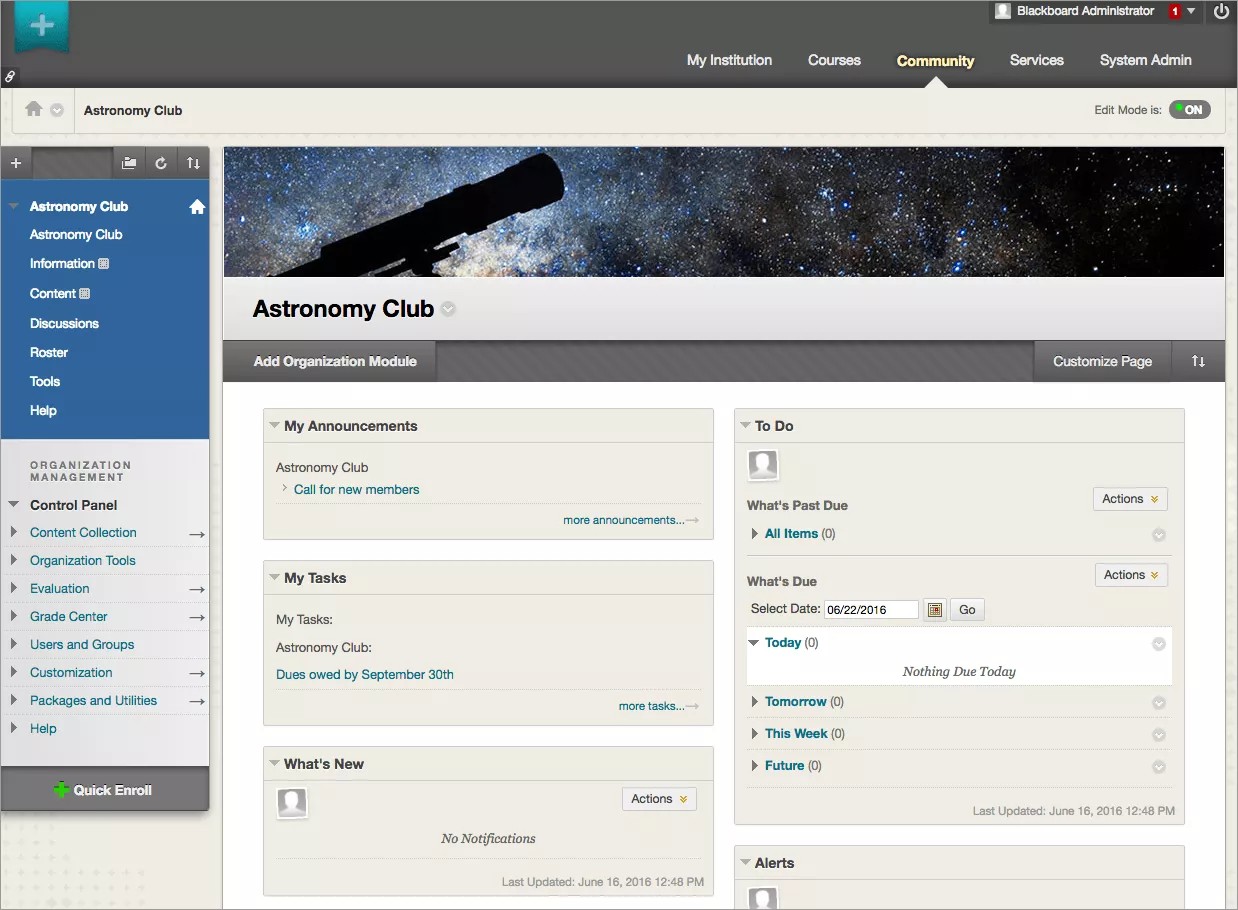
Organizations behave like courses and contain tools that enable group members to communicate efficiently. Users can post information, have discussions, and share documents. Groups that might use organizations include academic departments, study groups, and extra-curricular activities.
Create an organization
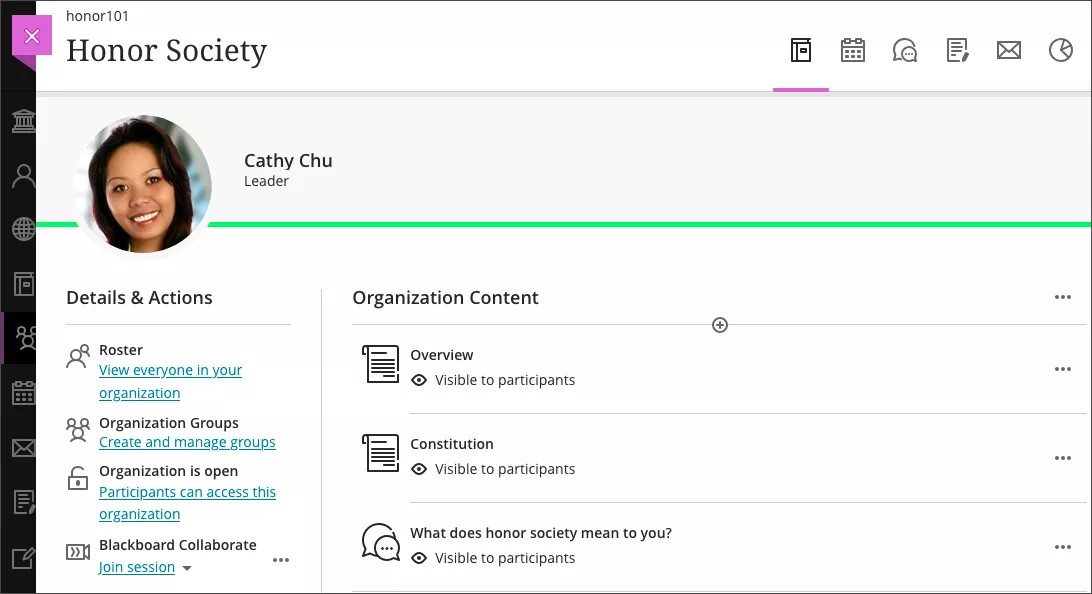
Organizations appear in the Original Organization View or Ultra Organization View. Organization settings remain the same as in the Original experience of Blackboard Learn.
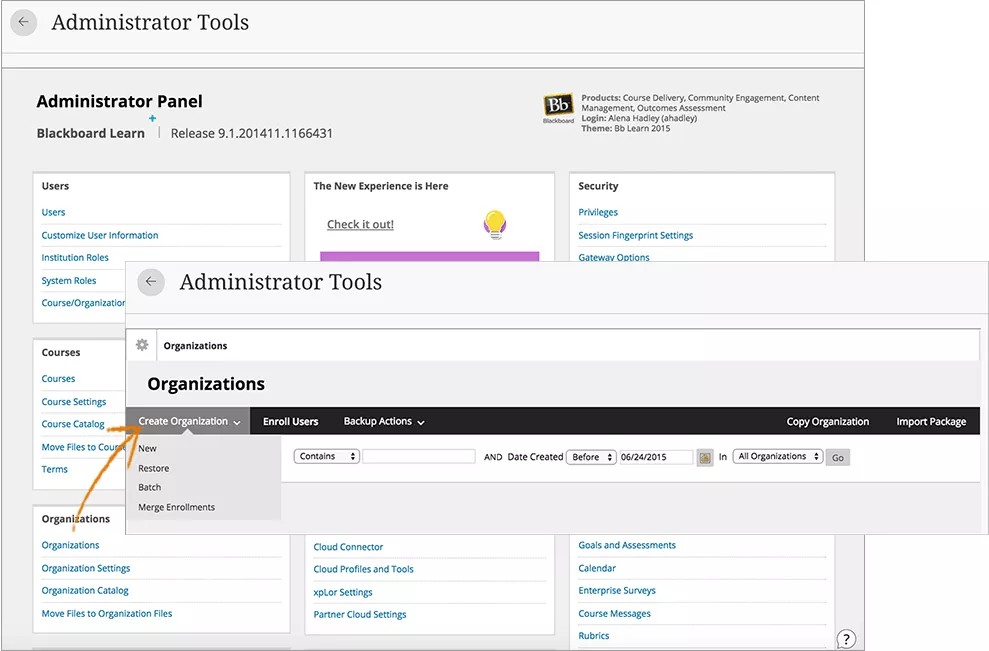
Create new organizations in the Admin Panel > Organizations > Create Organization > New.
Each new organization you create must have an Organization Name and an Organization ID. Further options are detailed in the following table.
Options
This table describes each optional field for creating new organizations. Some fields aren't supported in the Ultra experience.
| Field | Description |
|---|---|
| General Information | |
| Organization Name [required] | Organization names don't have to be unique. For example, you can have three organizations titled "Shakespeare Recitation." You can change organization names at any time. The maximum length is 255 characters. This field is searchable. |
| Organization ID [required] | Organization IDs must be unique. For example, if you have three "Student Government" organizations, create three different organization IDs, such as studgov01, studgov02, and studgov03. You can use numbers, letters, hyphens (-), underscores (_), and periods (.). All other characters, including spaces, are prohibited. You can't change organizations IDs after you create them. This field is searchable. |
| Description* | *Although your information is stored, the description isn't currently used in the Ultra experience. Descriptions appear in the organization catalog listing. Include an organization summary and enrollment instructions. |
| Subject Area and Discipline* | *Although your information is stored, the subject area and discipline aren't currently used in the Ultra experience. Subject areas and disciplines group related organizations together for easier searching and browsing in the organization catalog. |
| Term | Terms assign organization availability to specific periods of time, such as sessions and days from end of enrollment. You can manage terms, from the Administrator Panel > Courses > Terms. |
| Availability | |
| Available | When you make an organization unavailable, users can't see, access, or self-enroll. |
| Duration | This defines the time period the organization will remain available. Available organizations are open to participants to access or self-enroll in if an organization allows self-enrollment. Select Continuous to keep the organization constantly available with no date restrictions. You can Select Dates to limit organization availability to specific dates. The start and end times are set automatically. The organization will start at midnight and the end at 11:59:59. To limit organization availability to a specific number of days after a participant enrolls, select Days from the Date of Enrollment and provide the number of days. |
| Guest Access | |
| Guests Permitted | You can allow or prohibit unauthenticated users to enroll in organizations. Users can make settings inside an organization that can limit what content and tools are available to guests. |
| Categories | |
| Select Organization Catalog Category | The category determines where the organization description appears in the organization catalog. |
| Institutional Hierarchy Nodes | |
| Add Node | Institutional Hierarchy is available if your institution has access to the Community Engagement features. To make an organization available in more than one institution, select Find Node. Select whether to search for the node by Name, Description, or Identifier. Select a search condition from the drop-down list: Contains, Equal To, Starts With, or Not Blank. Provide the search term and select Go. In the search results, select the check box of each institution you want to add the organization to. Select Submit. Administrators create nodes on the Hierarchy page. |
| Banner | |
| Current Banner Image | Shows the current image that appears at the top of an organization's Announcements page. We recommend a banner image size of approximately 480 by 80 pixels and the JPEG, GIF, or PNG format. |
| New Banner Image | Select Browse to replace the image with another. The new image doesn't display until you select Submit to save the organization information. To delete the existing image without replacing it, select Remove. |
| Organization Cartridge | |
| Organization Cartridge Leader Download Key | Provide an access key to use an organization cartridge with the organization. The organization cartridge is available after you select Submit. |
| Enrollment Options | |
| Leader/System Administrator | You can require that a leader or administrator handles all enrollments for the organization. You can also allow participants to email enrollment requests to leaders for approval. |
| Self Enrollment | Allow users to enroll themselves in the organization. You can limit self-enrollment by time period or access code. If you select Require Access Code to Enroll, provide the text to use for the access code. Ultra Organization View: Self-enrollment isn't supported at this time. |
| Language Pack | |
| Language Pack | The language pack defines the text that appears on buttons, titles, and other navigation items. |
| Default Content View | |
| Content View | Your options are icon only, text only, or icon and text. |
Search for an organization
- On the Administrator Panel in the Organizations section, select Organizations.
- Select the type of information to search:
- Organization ID: Searches for text that appears in the organization's Organization ID.
- Organization Name: Searches for text that appears in the organization's Organization Name.
- Description: Searches for text that appears in the organization's Description.
- Leader: Searches for text in the leader's Username. Follow the username convention at your institution to improve search results. For example, if the leader's name is Joe Bell but the username is jbell, searching for "Joe Bell" won't produce successful results.
- Data Source Key: Searches for text that appears in the data source identifier in the Blackboard Learn database. Data source keys can contain letters, numbers, and underscores, but no spaces or other special characters.
- Select a search condition from the list: Contains, Equal To, Starts With, or Not Blank.
- Type a search term or phrase. The search isn't case-sensitive. For example, if you selected the Starts With search condition, typing either "Shakespeare Recitation" or "shakespeare recitation" into the search field will find organizations named "Shakespeare Recitation Club," "Shakespeare Recitation Competitors," and "Shakespeare Recitation Group."
- Select whether to search for organizations created Before or After a specified date.
- Provide a date in the Date Created field or select the calendar icon and select a date to select it.
- Select All Organizations or limit the search to a specific domain.
- Select Go.
ULTRA: Organizations
Doesn't seem familiar? Jump to the "Original" help on organizations.
Organizations behave like courses and contain tools that enable group members to communicate efficiently. Users can post information, have discussions, and share documents. Groups that might use organizations include academic departments, study groups, and extra-curricular activities.
Organization settings remain the same as in the Original experience of Blackboard Learn.
Global Organizations page
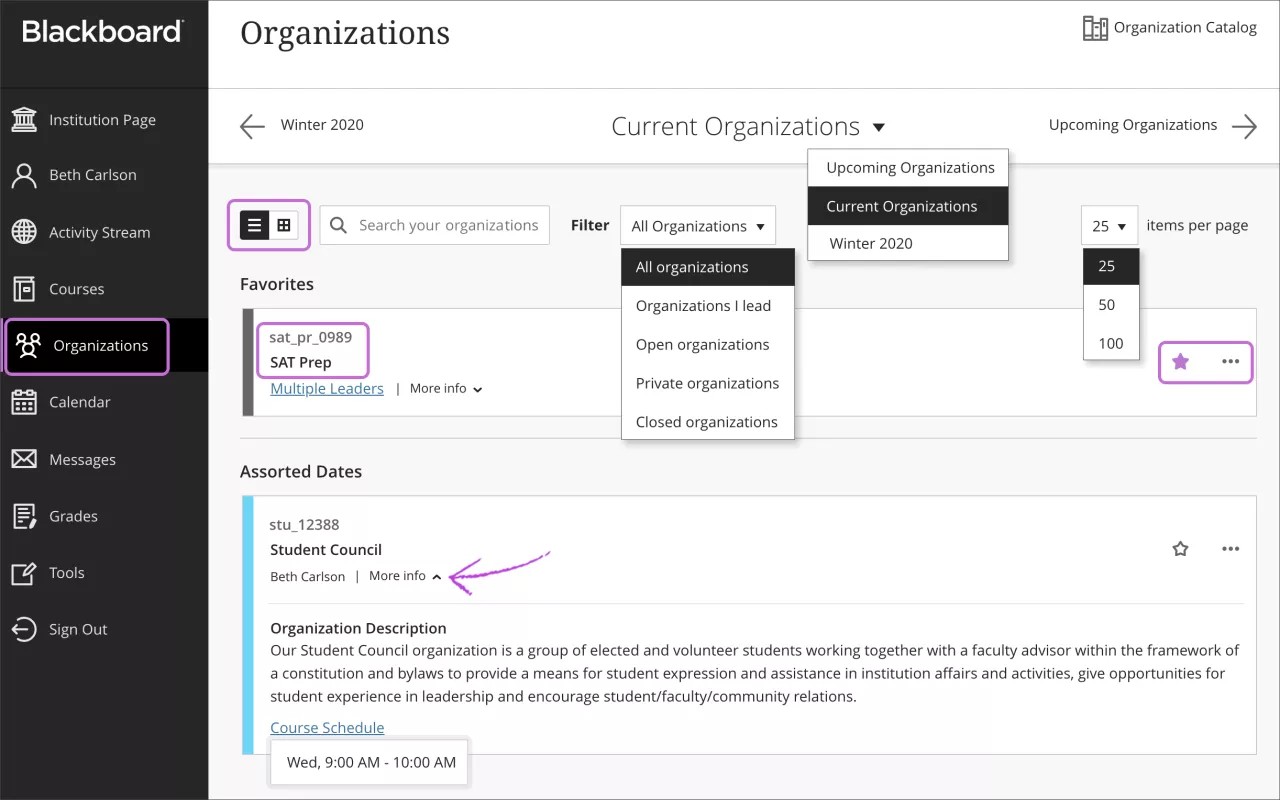
On the Organizations page, users can access all of their organizations, no matter which organization view they're delivered in. The Ultra Organization View and the Original Organization View appear seamlessly in the list. The Original Organization View now appears with a new design, and any previous themes or color selections are overridden.
Each organization card lists the organization ID, organization title, and leader. If an organization has multiple leaders, select Multiple Leaders for a list. Select More info to see the description and schedule, if added.
Your institution controls the page that appears after users log in.


