How it works and what is required
Role-Based Access is a feature in Anthology Illuminate Reporting that allows access to compartmentalized reports, ensuring each user accesses only appropriate data based on their role.
Currently, Anthology Illuminate Reporting is targeted towards high-level institutional leadership including Provosts, Heads of distance/online learning, Deans, Student Success Leaders, among others. However, to fully support and facilitate a data-informed decision-making culture, we want to expand support to additional users interested in report content but may only have access to some institution-wide data.
Having a broader deployment of Reporting across your Teaching and Learning management structure will empower each user to make confident decisions, facilitate delegation, feedback, and collaboration across roles, enabling data-informed conversations without the need to export and distribute reports’ data.
To successfully implement Role-Based Access, we recommend:
- Adopt Institutional Authentication for Anthology Illuminate. Find out how to set up Institutional Authentication
- Set up Institutional Hierarchy:
- On-Demand Webinar: Best Practices for Blackboard Learn Configuration
- Find out how to set up Institutional Hierarchy
Supported Reports
This table will be frequently updated to reflect the supported reports as we release them:
| Area | Report | Status |
|---|---|---|
| Learning | Student Engagement | Supported |
| Learning | Student Performance and Grades | Supported |
| Learning | Social and Collaborative Engagement | Supported |
| Learning | Student Summary | Supported |
| Teaching | Instructional Practices | Supported |
| Teaching | Assessment and Grading | Supported |
| Teaching | Course Summary | Supported |
| Leading | Learning Tools Adoption | Work in progress |
| Leading | Collaboration Session Activity | Work in progress |
| Leading | Learning Platform Adoption | Work in progress |
| Leading | Course Administration | Supported |
Setting up Role-Based Access with Blackboard Learn as identity provider
1) Ensure the report is already set to support restricted viewers (Check the table above).
2) Get Role-Based Access feature provision:
You can get access to the Role-Based Access feature by submitting a case in Behind the Blackboard:
- Log in to Behind the Blackboard.
- Select Create a case under the Support section.
- Fill in the required information on the form.
- Once provided, follow the next steps in the guide.
3) Add the BbDataRestrictedViewer role to an existing user:
To grant the BbDataRestrictedViewer role to a user in Blackboard Learn, follow these steps:
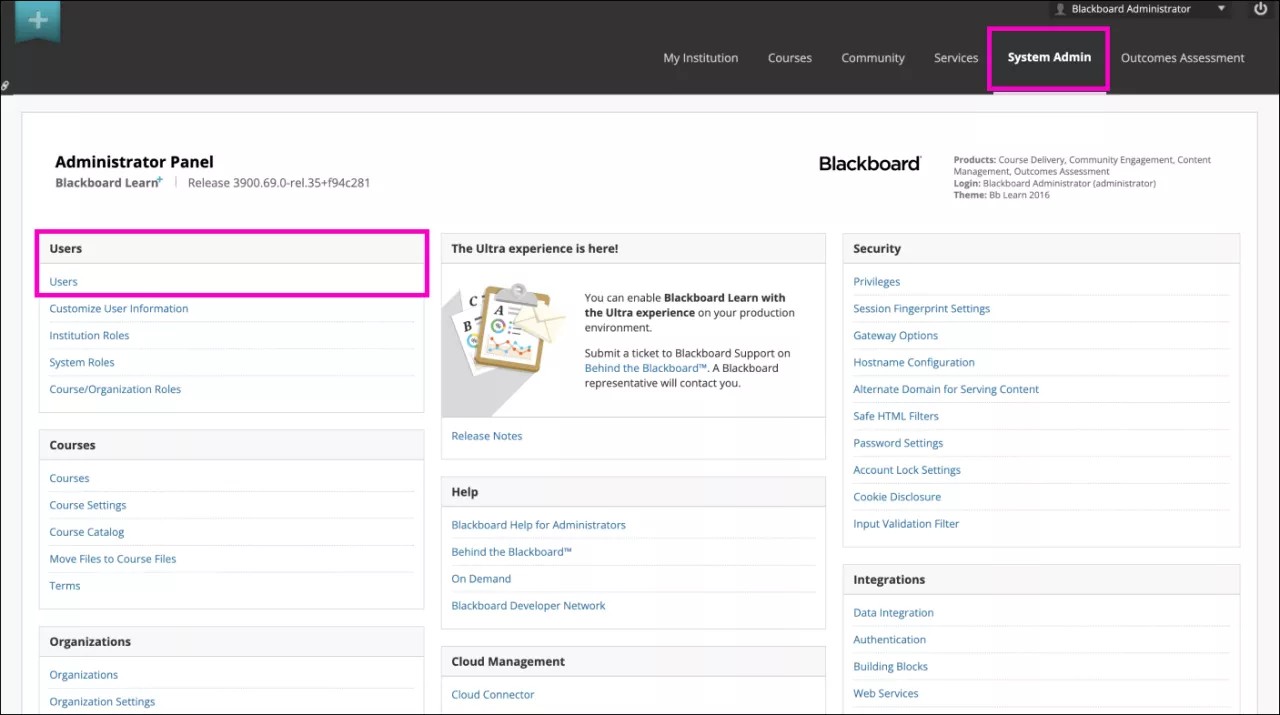
- Log into Blackboard Learn using your administrative credentials.
Go to the System Administrator panel.
At this point, we recommend having the Institutional Hierarchy (IH) and courses already configured. See how to set IH.
- Go to the Users section and select Users.
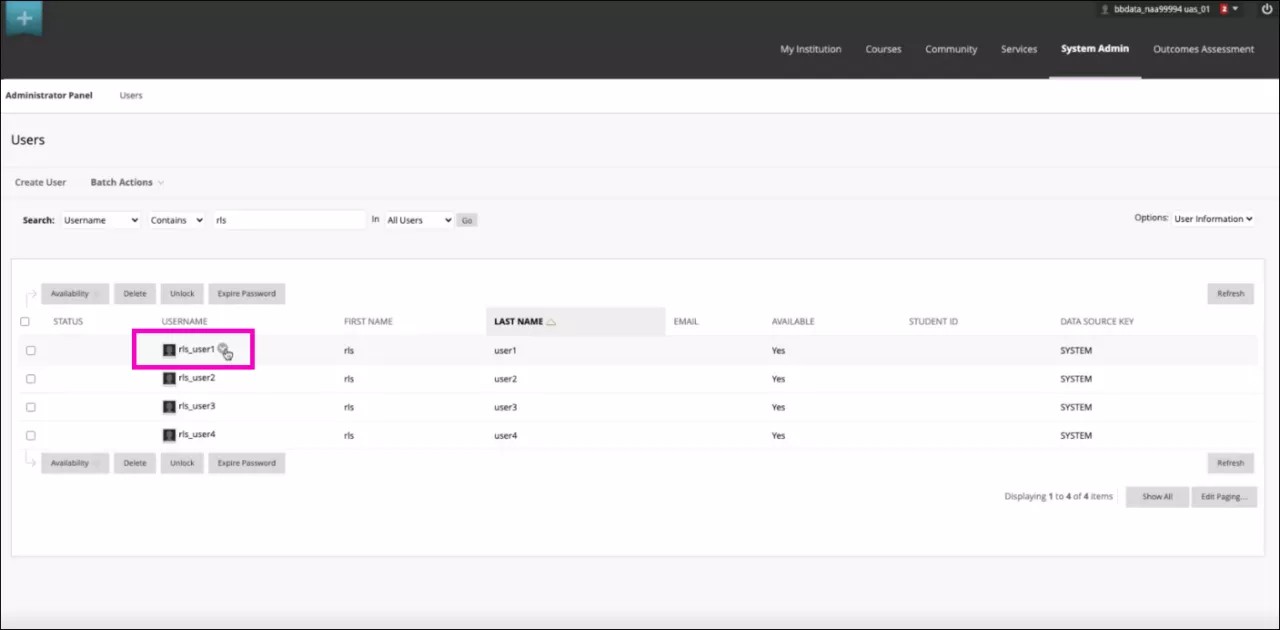
- In the Users section, search for the user you want to modify roles for.
- Drop down the menu next to the username and select Edit.
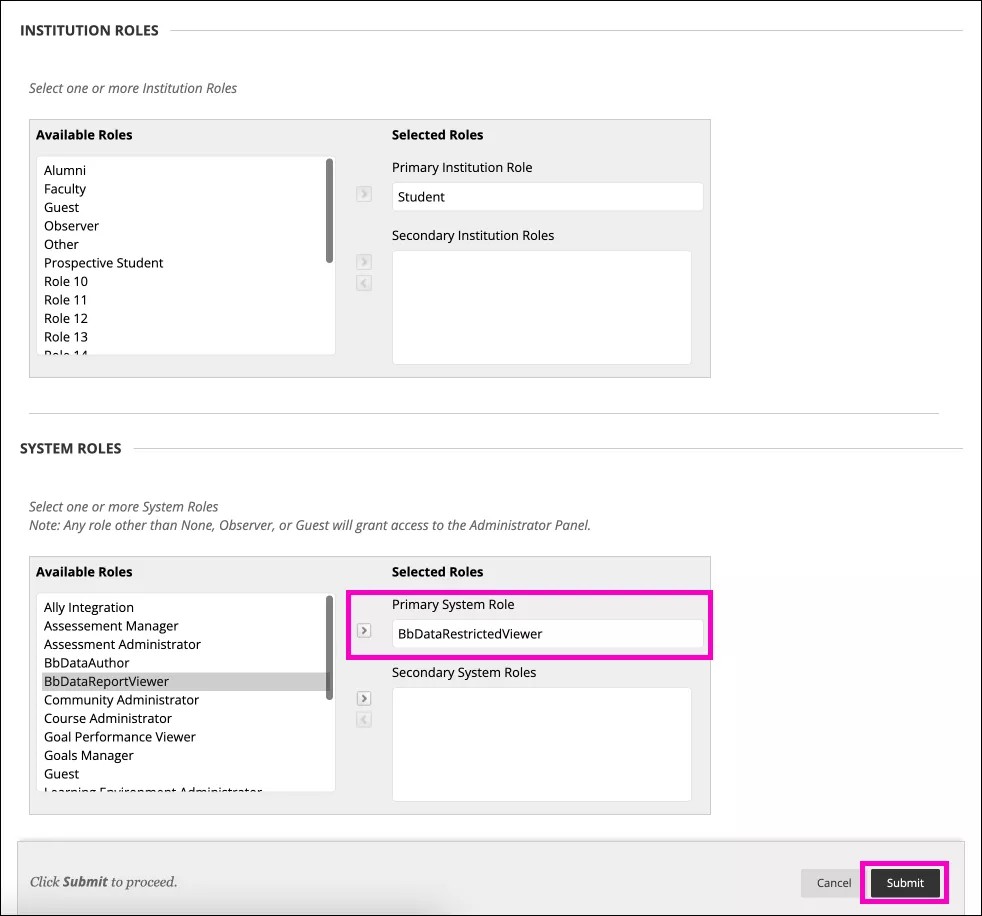
- Go to the System Roles section at the bottom of the page.
- Locate the BbDataRestrictedViewer role from the list and add it to the user: this role is specifically designed for restricted data viewing purposes.
- Select Submit to apply the changes to the user.
The changes may take time to be effective. Please allow a few hours for the updates to apply.
4) Set the user access levels:
To configure the levels of access for a user within the Institutional Hierarchy, follow these steps:
- Go to the System Administrator panel.
- Go to the Communities section and select Institutional Hierarchy: this allows you to manage and configure the hierarchy levels.
- Navigate through your Institutional Hierarchy and choose the nodes and child nodes you would like to grant access to the user, e.g., College A > Department 1.
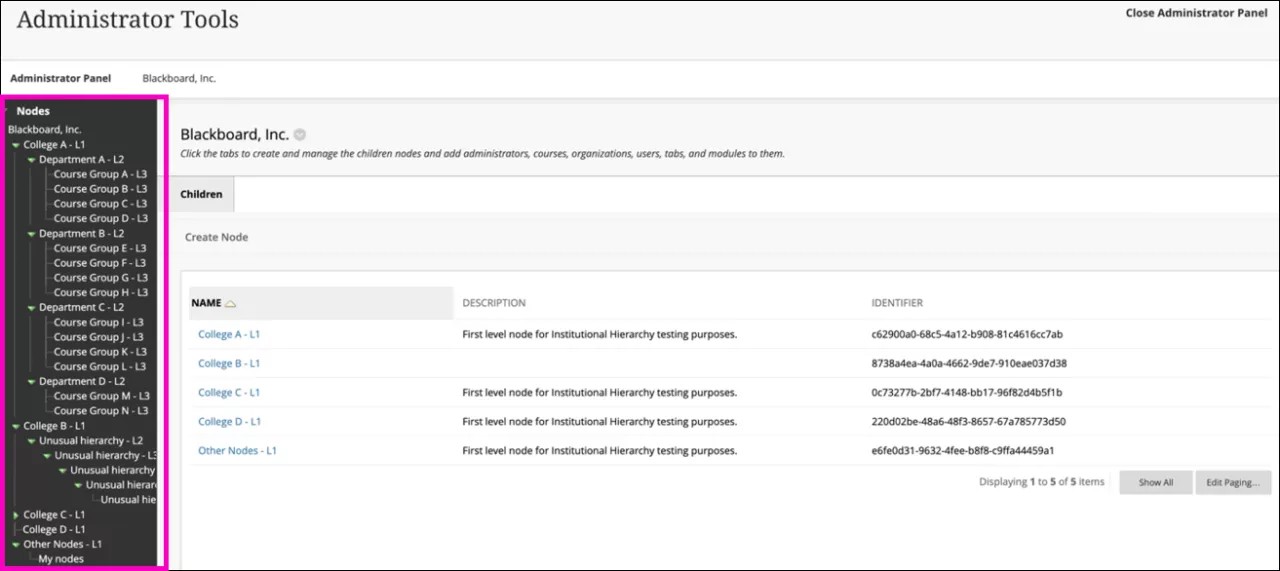
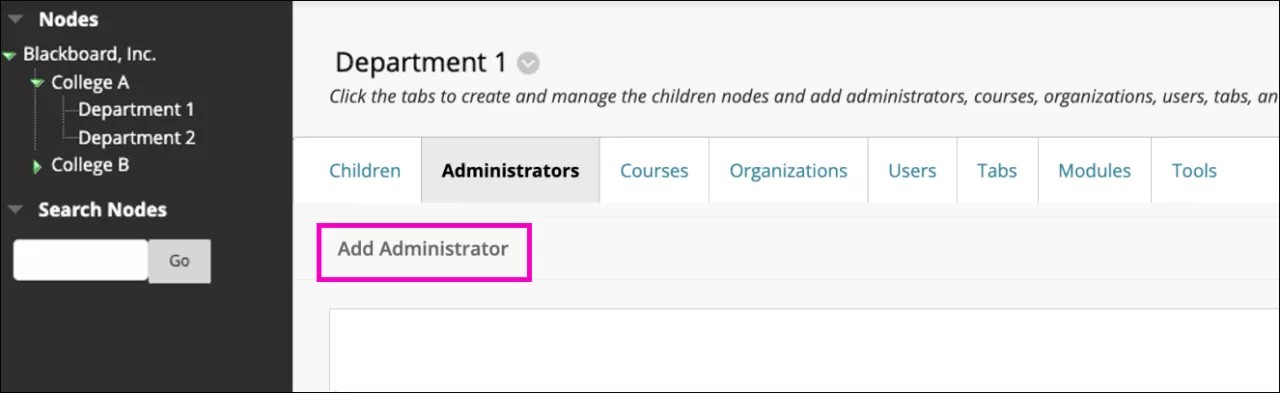
- Once you have selected the desired node, go to the Administrators tab.
- You should see a list of all current Administrators for the node. If the list is empty, select Add Administrator.
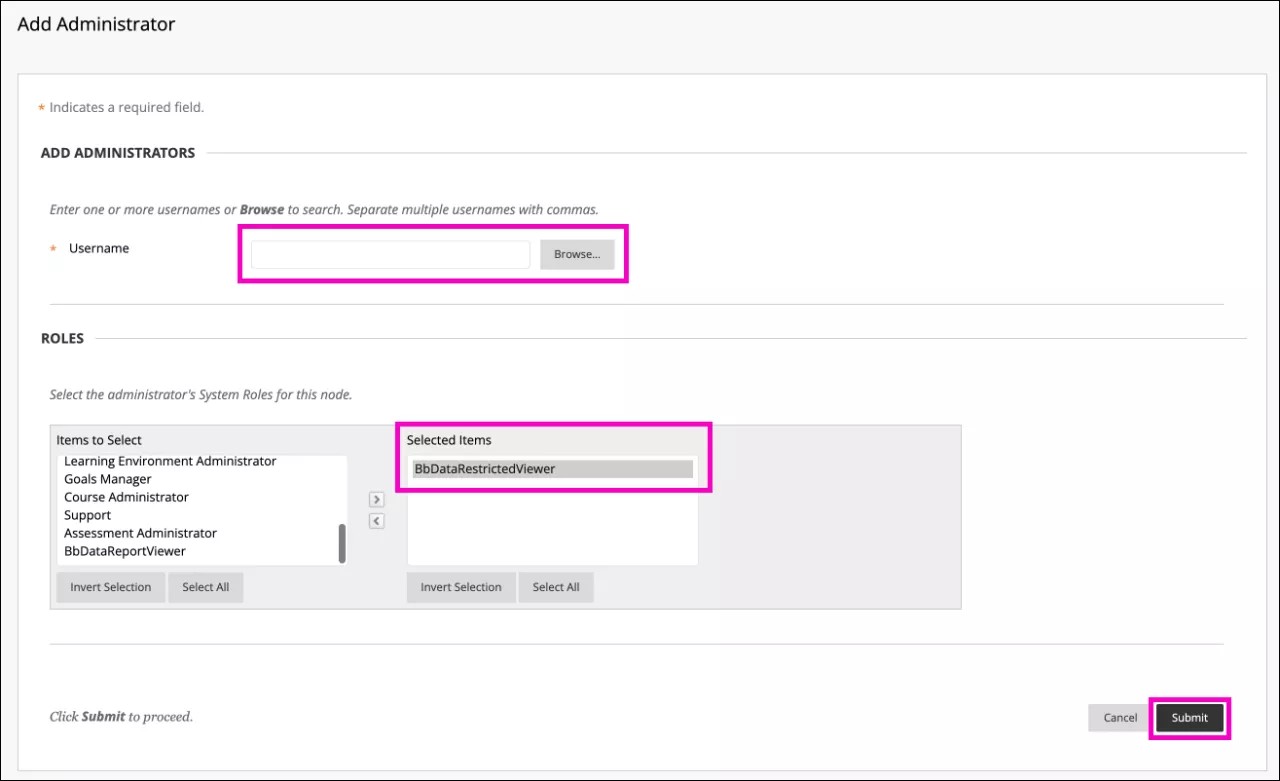
From the Add Administrators dialog box:
- If you know the Username you want to add as an Administrator, type it in the username field.
- If not, select the Browse button and search by fields including Name, Email address, or System role. Select all relevant results and then Submit.
Simplify the process by assigning the system role of BbDataRestrictedViewer to all users who require compartmentalized access. This way, you can easily find these users without knowing their usernames.
After selecting the relevant users, assign them the Administrator's System Roles for use in the node.
When setting up access, it's important to carefully choose the level you assign to each user. Keep in mind that users can view information from their assigned level and any levels below it, but not from levels on the same tier or above.
Consider this example:
- Institution Level 1 - A
- Institution Level 2 - B
- Institution Level 3 - C
- Institution Level 4 - D
- Institution Level 4 - E
- Institution Level 3 - C
- Institution Level 2 - B
Given this structure, if you grant User1 access to Institution Level 3 - C, the user will also have access to data from both Institution Level 4 - D and Institution Level 4 - E. This is because Levels 4 - D and 4 - E are nested under Level 3 - C, and access privileges extend down to lower levels.
However, if you grant User2 access only to Institution Level 4 - D, the user won’t be able to access data from Institution Level 4 - E. Access at Level 4 - D is limited to that level only and doesn’t include other nodes at the same level or any higher levels.
- Institution Level 1 - A
The specific role is not relevant to compartmentalized reporting in Anthology Illuminate but will impact the user's permissions within the node in Blackboard Learn. We recommend using one of the roles dedicated to Anthology Illuminate, such as BbDataRestrictedViewer, as it won't grant any additional permissions in Learn.
Select Submit.
After the nightly refresh, this user will have compartmentalized access to reports and will only be able to see the nodes for which they have an administrator association, given that they also have the BbDataRestrictedViewer role in Institutional Authentication.
You can modify the association at any time by changing the node administrator associations or entirely revoke access by removing the user's Institutional Authentication role/group or disabling their SSO account.
Granting access to the desired node ensures that the user can view and interact with the data specific to that level. This allows for fine-grained control over user access based on their role and responsibilities within the institution or organization.
Setting up Role-Based Access with SAML as identity provider
Access via SAML is currently not supported, however, it is part of our planned future developments.
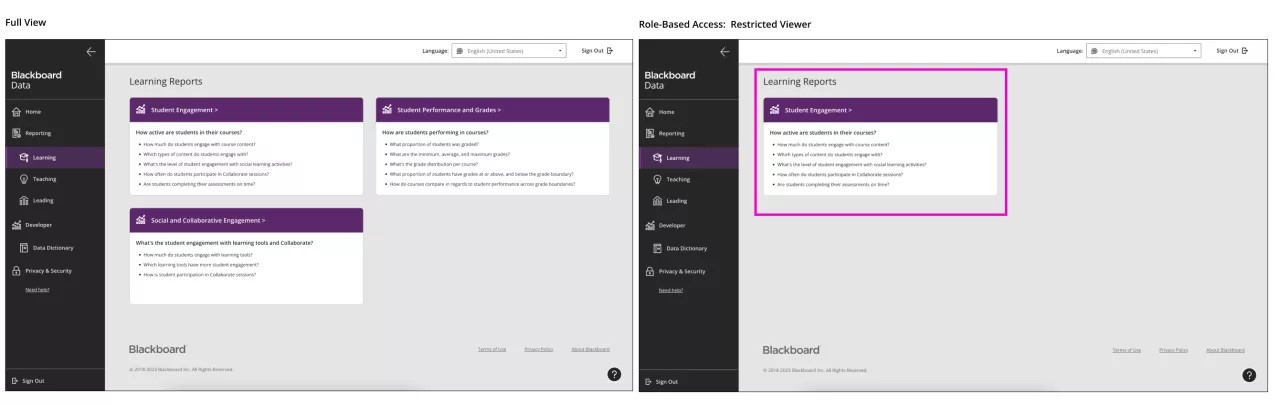
Role-Based Access experience within Anthology Illuminate
Once we release the first phase, users with Role-Based Access (RBA) will only be able to see the reports supported and the data from the nodes they are assigned to. (Check the table of supported reports above)
View of a user who has compartmentalized access to the Learning reporting area: