Register each Ally tool
The following steps guide you through the LTI configuration for:
- Client configuration tool
- Institution report
- Course Accessibility report
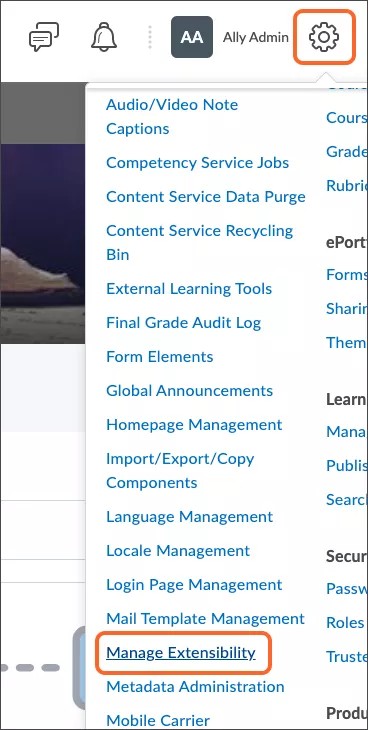
- From your D2L environment, open the Admin Tools and select Manage Extensibility.
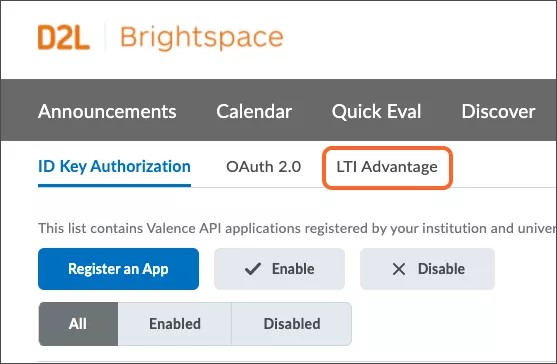
- Select LTI Advantage.
- Select Register Tool.
- Select the Dynamic option.
- Copy and paste the link for the tool you want to register into the Tool initiation registration endpoint field. Replace [AllyEnvironment] with the environment information your institution is hosted in.
- Institution report: https://[AllyEnvironment]/api/v2/auth/lti/1.3/register/institution
- Client configuration: https://[AllyEnvironment]/api/v2/auth/lti/1.3/register/config
- Course accessibility report: https://[AllyEnvironment]/api/v2/auth/lti/1.3/register/course
- Check the Configure Deployment check box.

- Select Register.
Ally environment for your region
Use the information for the Ally environment your institution is hosted in.
- US data center: prod.ally.ac
- Canadian data center: prod-ca-central-1.ally.ac
- European data center: prod-eu-central-1.ally.ac
- Singapore data center: prod-ap-southeast-1.ally.ac
- Australian data center: prod-ap-southeast-2.ally.ac
Configure tool deployment
D2L Brightspace registers the LTIs as Disabled by default. The LTIs need to be enabled after they're registered.
- From your D2L environment open the Admin Tools and select Manage Extensibility.
- Select LTI Advantage.
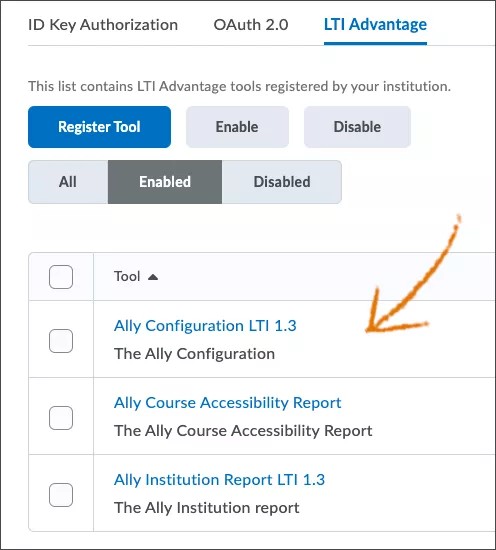
- Select the tool.
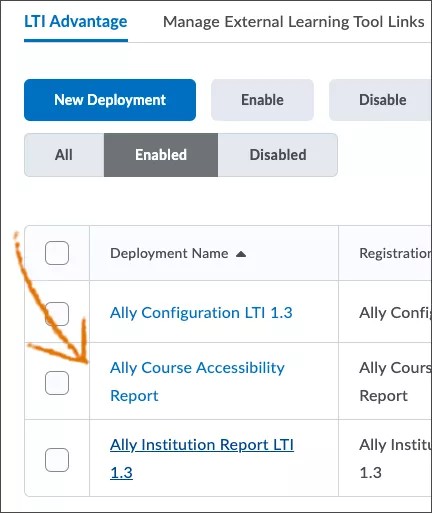
- Select View deployments at the bottom of the page.
- Select the deployment corresponding to the application. For example, if you selected the Institution report tool earlier, select the Institution deployment now.
- Under Security Settings, check these check boxes:
- Org Unit Information
- User Information
- Link Information
- Open as External Resource
- Select Add Org Units and make the tool available to the appropriate organizational unit
- Use the same Name and Description
- Copy and paste the appropriate link into the URL field. Replace [AllyEnvironment] with the environment information your institution is hosted in.
- Institution report: https://institution.[AllyEnvironment]/api/v2/auth/lti/1.3/target
- Client Configuration: https://config.[AllyEnvironment]/api/v2/auth/lti/1.3/target
- Course Accessibility report: https://course.[AllyEnvironment]/api/v2/auth/lti/1.3/target
- Save the deployment.
Check out how to add the Course Accessibility Report to a course.