Once a course has been created, new offerings can be created from the course. The course acts as a container for the different instances it is offered to learners in. Each of these instances can be delivered as an offering.
Create a TDM offering
- Sign in to TDM.
- Select Administration.
- Select the Offering Management tab.
Add Offering
Fill out the information for the offering you want to create. Fields marked with an asterisk (*) are required.
- Select Select Course.
- Select the plus icon (+) next to the Course you want to select. When the Course has been chosen, the plus sign will turn into a green checkmark icon.
- If necessary, type a unique ID. (This may be autogenerated depending on how TDM settings have been configured).
- Choose the language the offering information will be displayed in.
- Type the offering name.
- Write a short summary of the offering, which will show in the catalog view, and a full description of the offering, which will show on the peek panel when you click the offering in the catalog.
- Write an additional description if you need to add more details, which will also show on the peek panel when the offering is selected in the catalog.
- Choose relevant tags and requirements from the appropriate menus.
- Type the maximum number of enrollments.
- Choose the availability from the menu.
- Choose the visibility of the offering from the menu—the visibility determines whether the offering is visible to everyone or is restricted to specific groups of learners—and choose the roles allowed for enrollment from the menu that appears if the visibility is set to “Restricted.”
Offering Media Settings
Offering media settings allow you to add visual elements to offering tiles. These elements make offerings easier for learners to identify. You can add an image that will show up on an offering tile; otherwise, the default catalog image is displayed. You can also add a video URL to enable a video playback icon on the image when the offering is clicked in the catalog.
- Select Change media settings if you want to add an image or video playback icon to your offering tile.
- Drag a file to the drop zone at the top of the peek panel or select Upload to navigate to the file to add an image.
The image must be at least 310 pixels wide, 126 pixels tall, and no more than 2 MB. It must be a JPG, PNG, or GIF file.
- Select the Enable Video toggle if you want to add video playback to your offering tile, then add the URL for the video you want to use.
You must use the “Sharable” URL provided for the video.
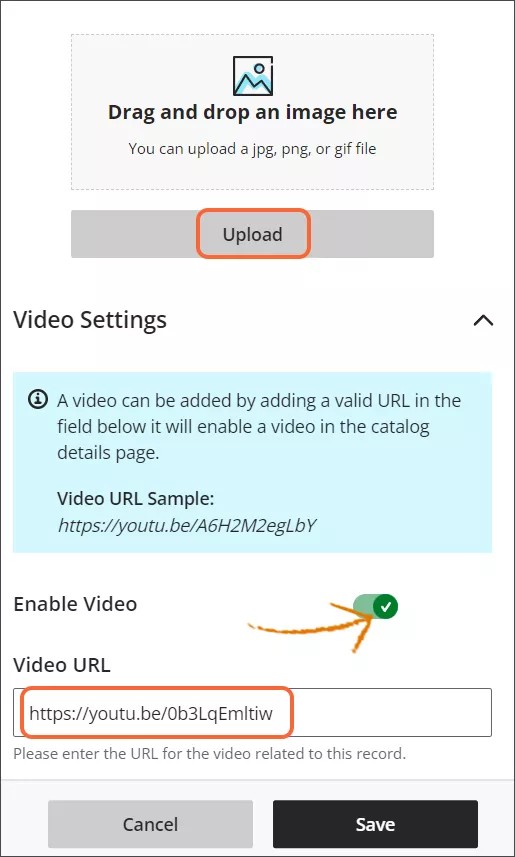
- Select Save.
Language Configurations
Courses can be configured in multiple languages that appear in the catalog when the user selects the alternate language for the TDM catalog.
- Select the purple + icon.
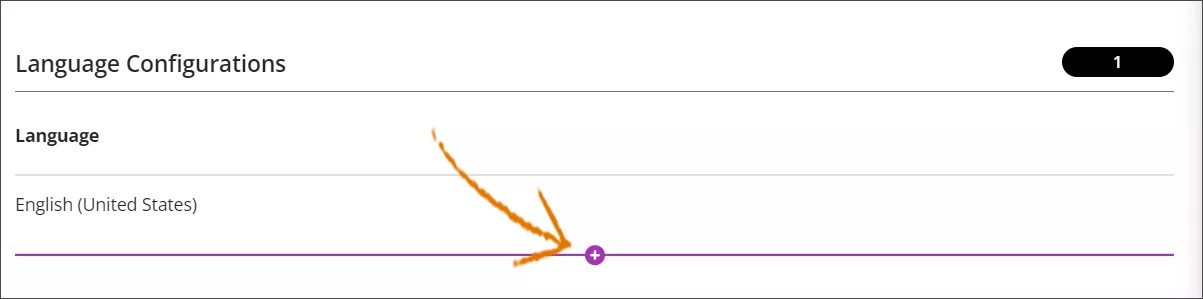
- Choose the new language at the top of the screen.
- Type the name, summary, and description in the new language.
Offering Information
- Optionally, if Institutional Hierarchy has been enabled, select Find Node. Select the desired institutional hierarchy node for the offering and select Submit.
- Choose the language in which the offering will be delivered.
- Choose the course template being used for the offering.
- Select the modality in which the offering is being delivered.
- Choose categories and associate assigned instructors by typing search terms or choosing from the appropriate menu.
- Select the Cost toggle if there is a cost for the offering, then type the cost.
Offering Dates
On the right side of the screen, you can configure Offering dates, recurrences, enrollment dates, and more, depending on the modality you choose. Fill out the options as appropriate.
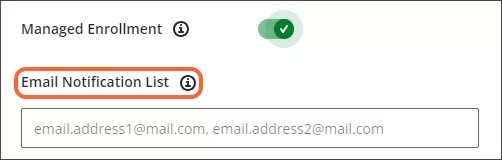
Managed enrollment
Select the Managed enrollment toggle to allow learners to enroll in the course but not grant them access until an instructor or administrator manually approves them.
Type in the email addresses of instructors and administrators who should be notified when someone enrolls in the managed enrollment offering, separated by commas. You will configure those emails on the Notifications Settings screen.
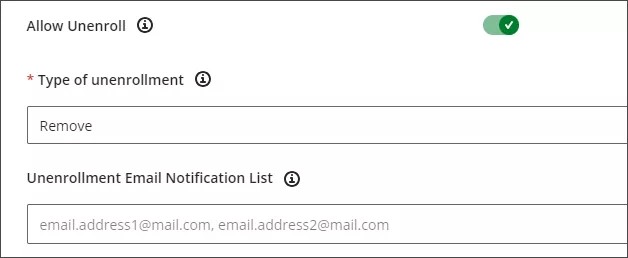
Unenroll
Select the Allow Unenroll toggle to allow students to unenroll from an offering. They will be able to unenroll from the dashboard.
The Type of unenrollment should be set to Remove. This means that the learner is no longer enrolled in the offering and their space becomes available for others to register in the offering.
You can optionally enter a comma-separated list of email addresses that will receive a notification each time a learner unenrolls from the offering in the Unenrollment Email Notification box.
Unenroll is not available for paid offerings.
Allow Access Codes
Select the Allow Access Codes toggle to require learners to enter an access code created by an administrator to be able to enroll in the offering. This is only available for free courses.
If you want to add a certificate or assign progress to your offering, click Next. If you are finished adding information, click Save & Close.
Add a certificate to an offering
- Select Assign Achievements.
- Select the name of the certificate you want to assign on the Assignment peek panel.
- Select the Assign Certificate Template for this course toggle and choose the appropriate tag from the menu.
- Create the rule that will determine whether the certificate is awarded.
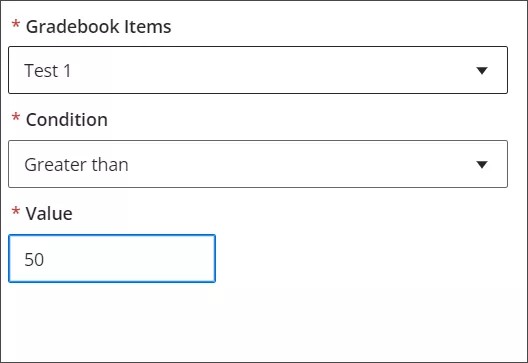
- Choose the gradebook item from the menu that the rule is based on.
(For example, Test 1 or Test 2.) - Choose the condition that must be met from the menu.
(For example, “greater than” or “less than.”) - Choose the value to serve as the threshold for the condition.
(For example, 50 [50 points].) - Select Save.
- Assign as many certificates as desired to the course, then close the Certificate Assignment peek panel.
- Select Save & Close to save your offering.
- Select Assign Progress.
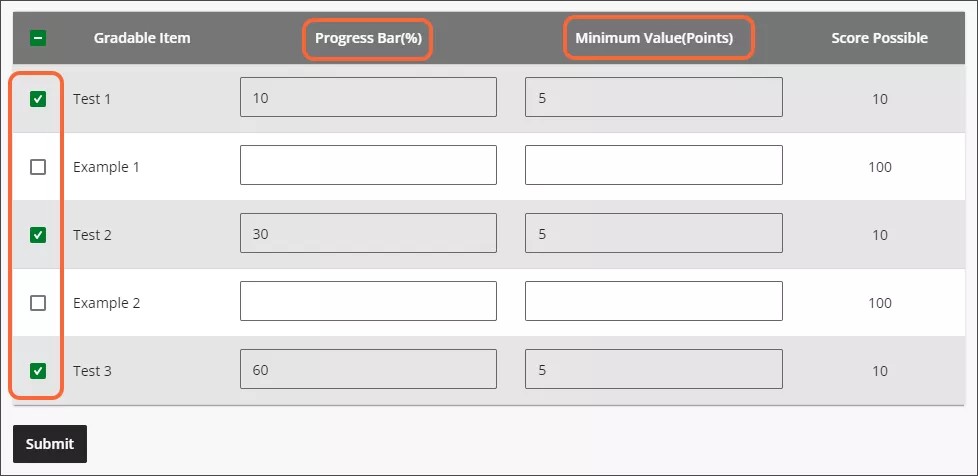
- Select each Gradable Item that you want to be considered in course progress.
- Type the percentage of the total progress that you want each gradable item to account for in the Progress Bar column (the numbers in this column must total 100).
- Type the minimum number of points the learner must earn for each gradable item to achieve the progress for that item in the Minimum Value column (this will be a number out of the listed Score Possible).
For example:
Progress in the course below is determined by Tests 1, 2, and 3. Test 1 accounts for 10%, Test 2 for 30%, and Test 3 for the remaining 60%. In order to obtain the percent progress tied to each test, the student must earn at least 5 points on that test. So, when the student earns 5 points on Test 1, they will see 10% progress; when they also earn 5 points on Test 2, they will see 40% progress; and they will finally see 100% progress when they also score at least 5 points on Test 3.
- Select Submit.
- Close the peek panel.
- Select Save & Close to save your offering.