Oppilaitoksesi määrittää, mitkä työkalut ovat käytettävissä alkuperäisessä kurssinäkymässä. Otsikot ovat aina kouluttajien käytettävissä Ultra-kurssinäkymässä.
Grade with a rubric
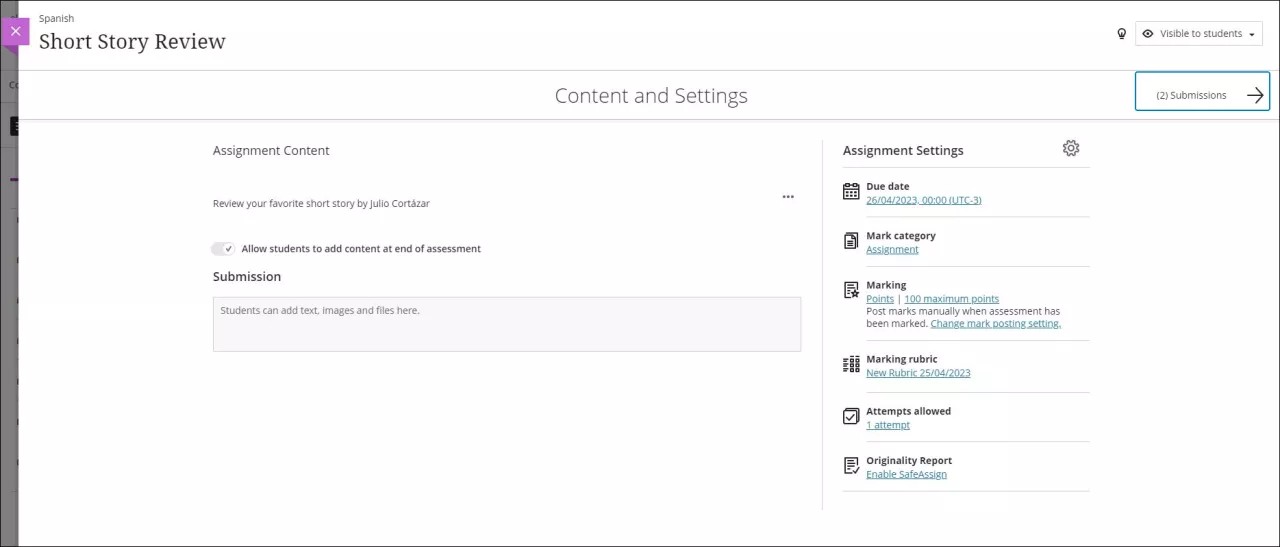
You can create a rubric, associate it with an assessment, journal, or discussion, and use it for grading. The rubric will appear on the graded item's page. Please note that you can currently only associate one rubric to each item. You can’t associate a rubric to an assignment with questions at this point.
If you associate a rubric with a graded item, you should grade using the the rubric. If you enter a grade as an override, the submission will continue to display as Needs Grading.
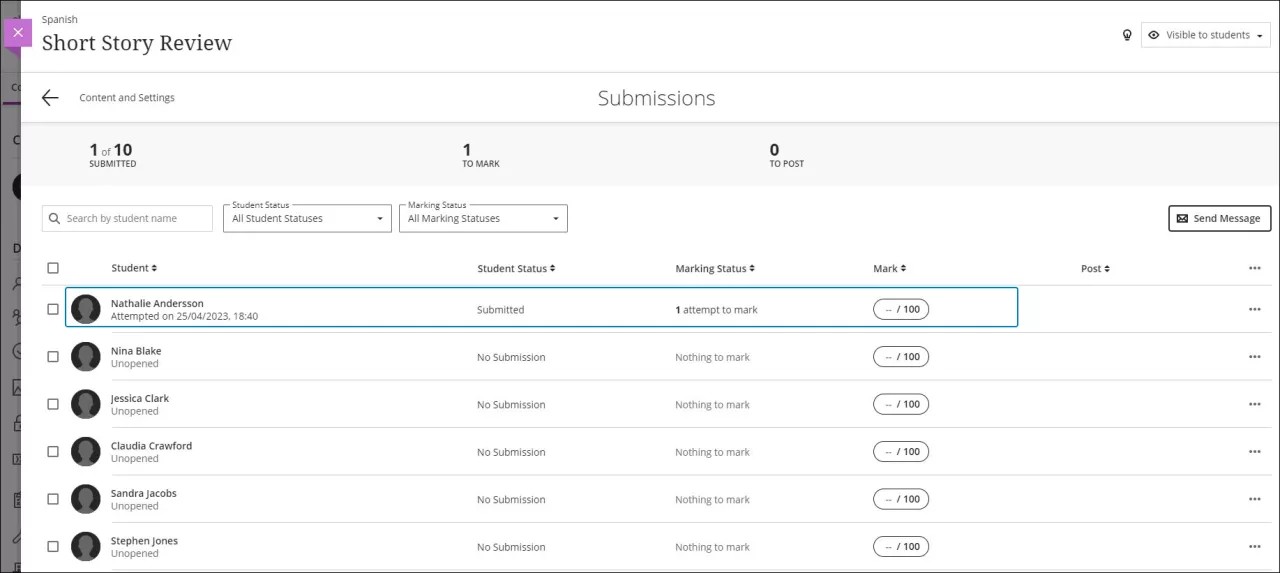
To begin grading an assessment, go into the Gradebook and select the assessment to grade. Select the Submissions link. On the Submissions page, select student names to access their individual submissions and the rubric.
If you've enabled parallel grading, you and students aren't able to view graders' rubrics and annotations in student files. Students only see the rubrics and annotations that the final grader—known as the reconciler—provides.
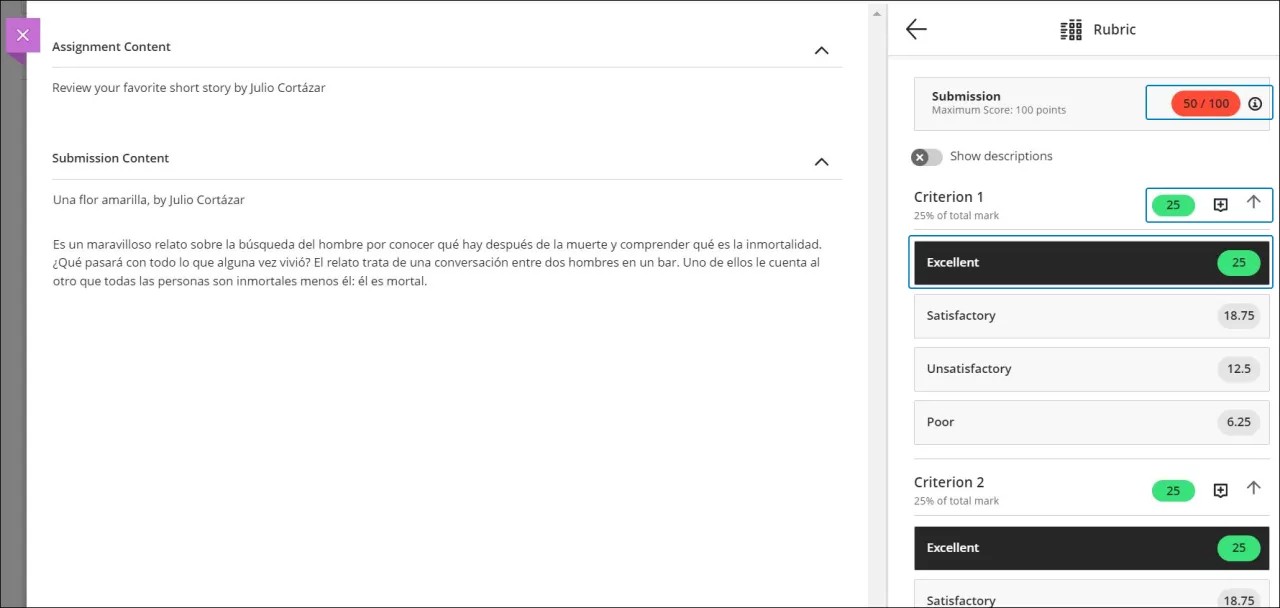
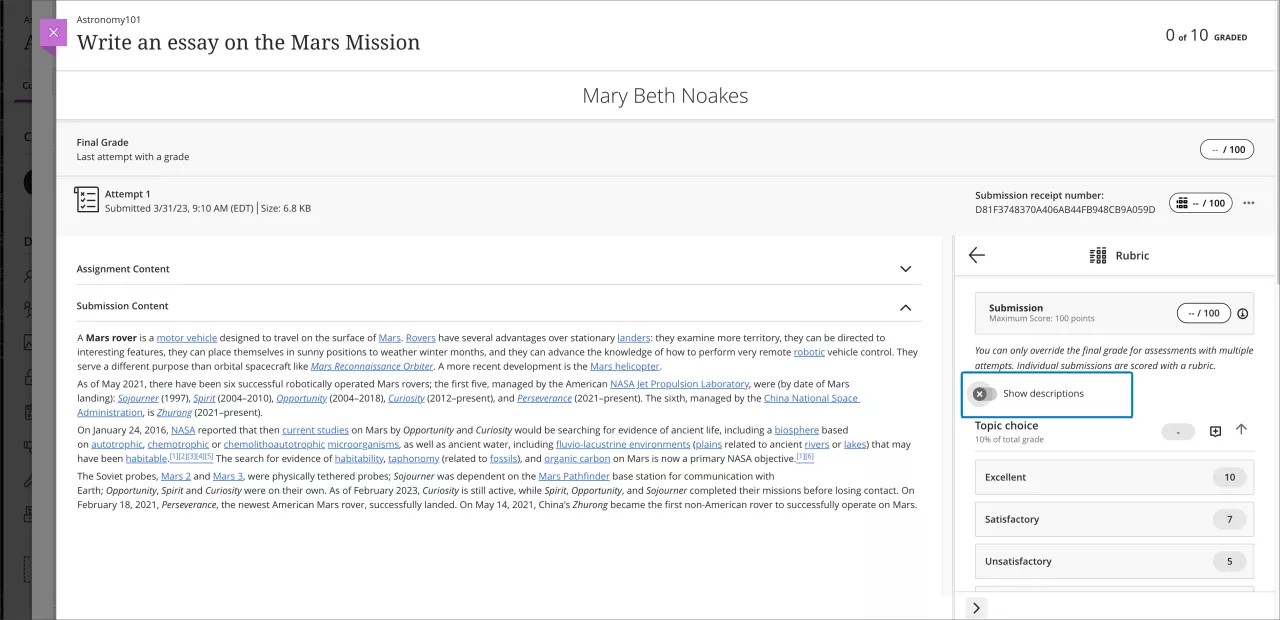
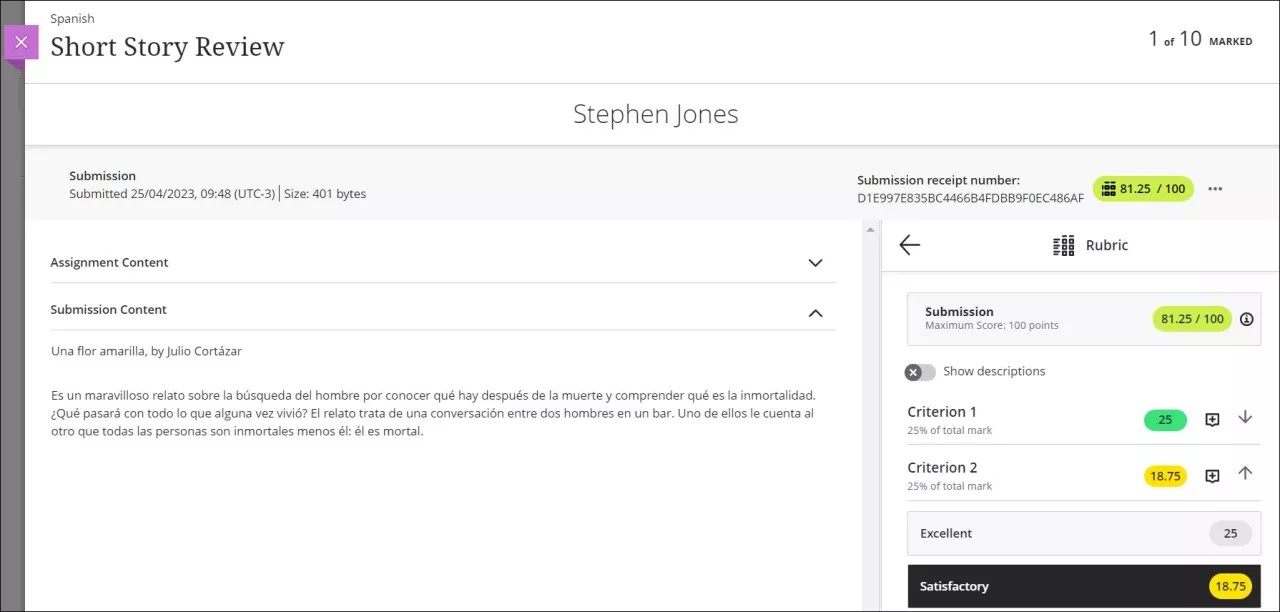
On the student's submission page, the grade pill displays a rubric icon. Select the grade pill to open the rubric in a panel next to the student's work.
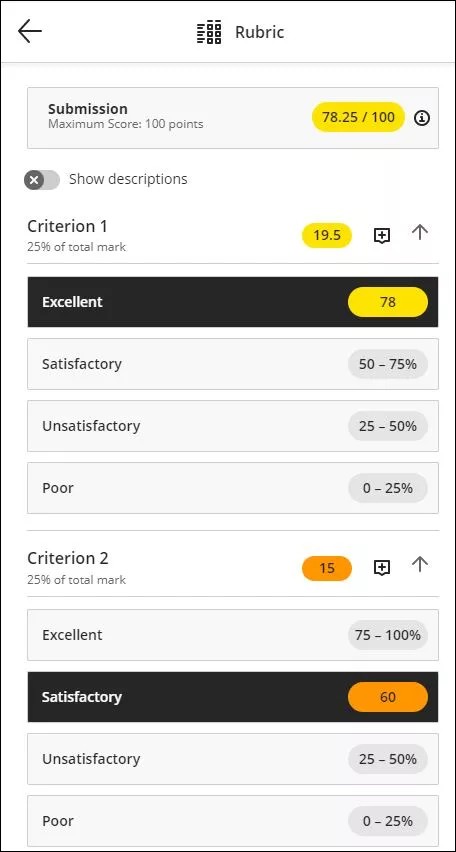
You can assign a performance level to each criterion by selecting the desired score pill. As you select a performance level, the rubric's grade pill updates. You can deselect a performance level and choose another if you change your mind while grading.
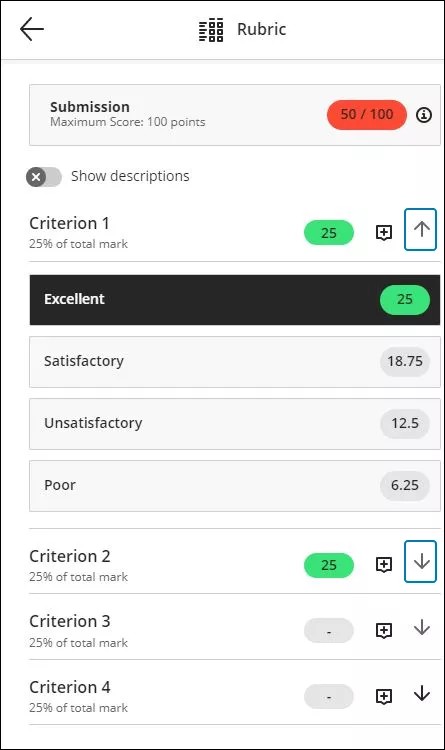
Use the arrow icons to collapse or expand any criterion. You can do this even if the criterion has already been scored.
Performance level descriptions are hidden by default. To view them, use the Show descriptions toggle switch. Once turned on, the descriptions appear for each submission in the assessment.
You can navigate between rubric criteria using your keyboard's tab and select a performance level using the up and down arrows.
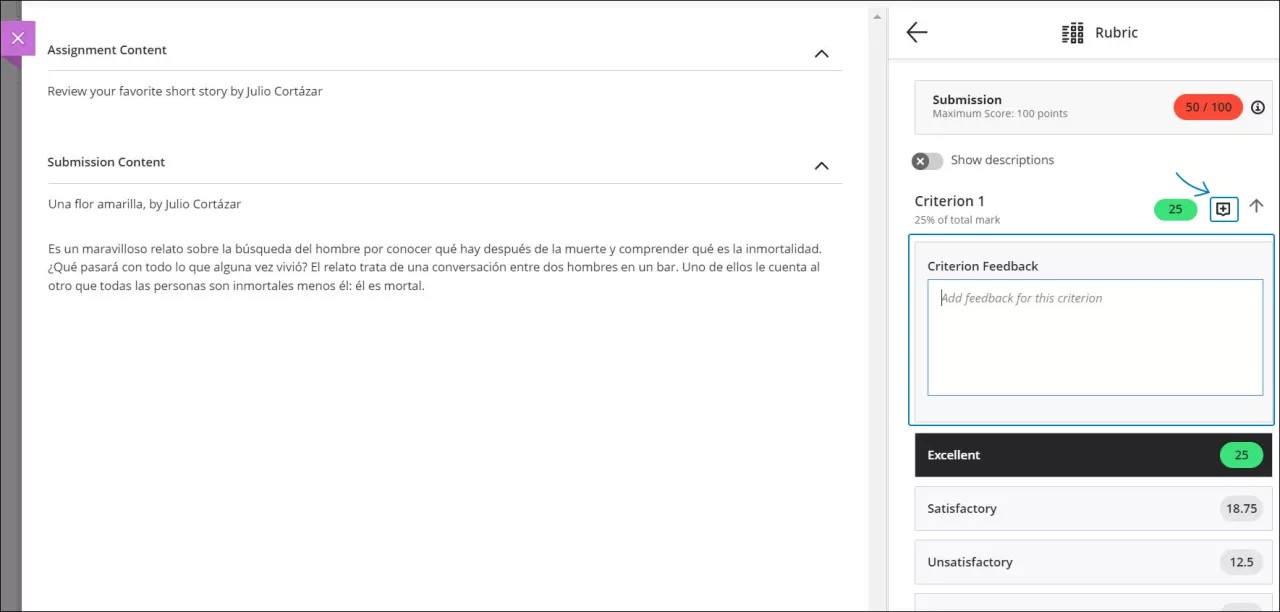
To provide individual criterion feedback, use the text box in each criterion. There's no character limit on written feedback. The editor is a plain-text editor
The rubric score and feedback save automatically as you make selections. Select the X to close the rubric panel. The grade you assign with the rubric appears on the student's submission page and in the gradebook.
For percentage-range rubrics, each performance level has a range of values. When you grade, you select the appropriate percentage level for each performance level. The system calculates the points earned by multiplying the weight, achievement percentage, and item points.
Provide feedback on the overall attempt
On the student's submission page, select the feedback icon to open the Feedback panel. Type notes and feedback for the student and save them. There's no character limit on feedback. The editor is a plain-text editor.
When you're ready for the student to view the grade, open the menu and select Post. If you want to give the student another attempt, select Delete, and the submission will be permanently deleted.
You can return to the item at any time to change the grade, even after you've posted it.
After you use a rubric for grading, you can't edit it, but you can make a copy that you can edit and rename.
Reuse Rubrics
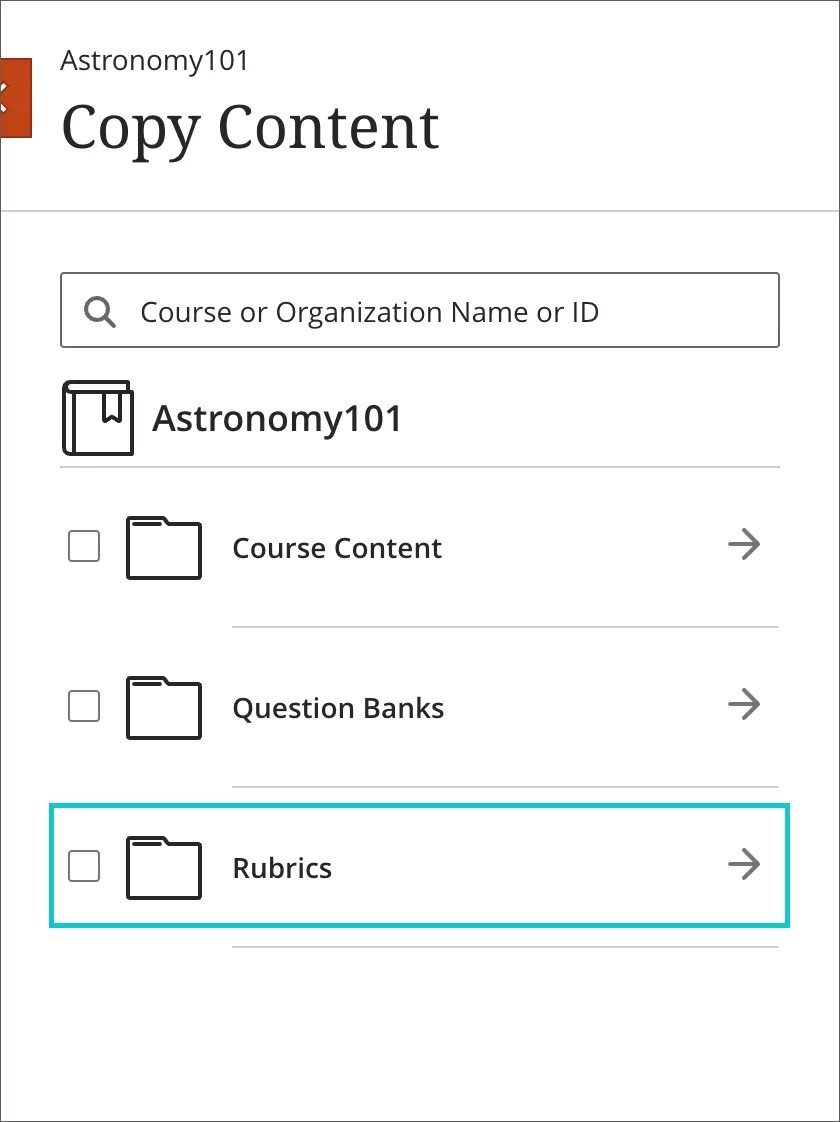
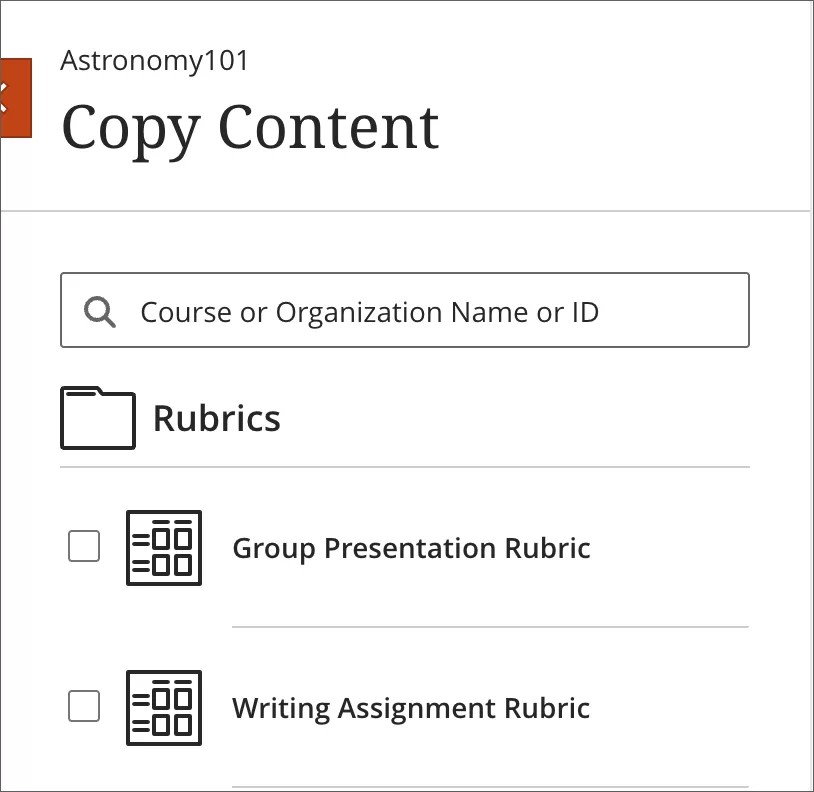
You can reuse rubrics to save time by copying them into a course. Select the Rubrics folder from the Copy Content menu in your course and check the boxes for the rubrics you would like to copy.
Copied Rubrics appear in the Gradebook Settings area. Select Gradebook, select the gear icon in the top right-hand corner, and review all the rubrics in the Course Rubrics section.
Student view of rubrics
After you grade items and post the results, students can view their scores on their grades pages or in the activity stream. They can also access a graded item on the Course Content page to review their submissions, the rubric, your feedback, and their grades.
More on assignments and the activity stream
When students view their graded submissions, they can select the grade pill to open the rubric next to their work. Students can expand an individual criterion to review their performance levels. The awarded scores are highlighted.
Override rubric grades
Override grades are grades you assign manually. An example is if you type in the grade pill in the Gradebook. An override label appears next to the grade. You can also override each individual rubric criterion.
In the grade pill, you can type a numeric value of no more than five digits. You can include two additional digits after the decimal point.
On the student's Submissions page, you can select Undo Override next to the grade pill and the override label is removed. The previous grade appears, or you can use the rubric to grade.
Posted grades
If you choose to post grades and then override those grades, students will see the changed grades. However, if you entirely remove a grade that you posted, students no longer see a grade for the item. The item returns to "ungraded." After you assign new grades, you'll need to post those grades again.
Associate a rubric after grading begins
Associating a rubric to and assessment after grades have been assigned will result in override grades. In the Gradebook, an override label will be displayed next to the grade. In the Rubric Details panel, you can choose to regrade any graded submissions with the newly associated rubric. When you select Regrade with the rubric, the rubric becomes active, and you can use it to provide grades. The new grades appear in the Gradebook, and the override label is removed.
Watch a video about grading using a rubric
The following narrated video provides a visual and auditory representation of some of the information included on this page. For a detailed description of what is portrayed in the video, open the video on YouTube, navigate to More actions, and select Open transcript.
Video: Grade using a rubric shows how to grade an assessment using an associated rubric.
