Provide valuable resources that help drive student success with Blackboard Assist!
Blackboard Assist is a free Learn SaaS central hub for both online and on-campus resources meant to drive student success. You can add services easily and set featured services in the hub for easy access to students. Through Blackboard Assist, students can subscribe to and pay for the services they want to use. Alternatively, these services can be licensed by your institution for student use. Contact [email protected] to learn more.
Assist is available for SaaS deployments only
Watch a video about Blackboard Assist
The following narrated video provides a visual and auditory representation of some of the information included on this page. For a detailed description of what is portrayed in the video, open the video on YouTube, navigate to More actions, and select Open transcript.
Video: Introduction to Blackboard Assist provides the student overview to Blackboard Assist.
The Assist service itself is hosted in AWS East in the United States. A system-generated, universally unique 128-bit identifier not based on any person information (UUID) is used to coordinate information exchange between the Blackboard Learn instance and Assist - no personal information is shared with the Assist service. The following information is stored in AWS East:
- The institutional service profiles that are created by administrators, including the service description, image, and URL.
- Metadata about user preferences for a service such as favorites and subscription state are associated only with the anonymized identifier.
There is no processing of utilization data or persona information associated with any functionality of Assist. Personal information is not used to target content or service recommendations.
Get started
Any Higher Education, business, or government client on SaaS will have access (Both the Ultra Base Navigation and Original Navigation). Ready to get started? Use the guide below to add services to Blackboard Assist.
Enable Assist
To enable the Assist service, go to Admin Panel > Cloud Management > Platform Extensions and then set Blackboard Assist to On.
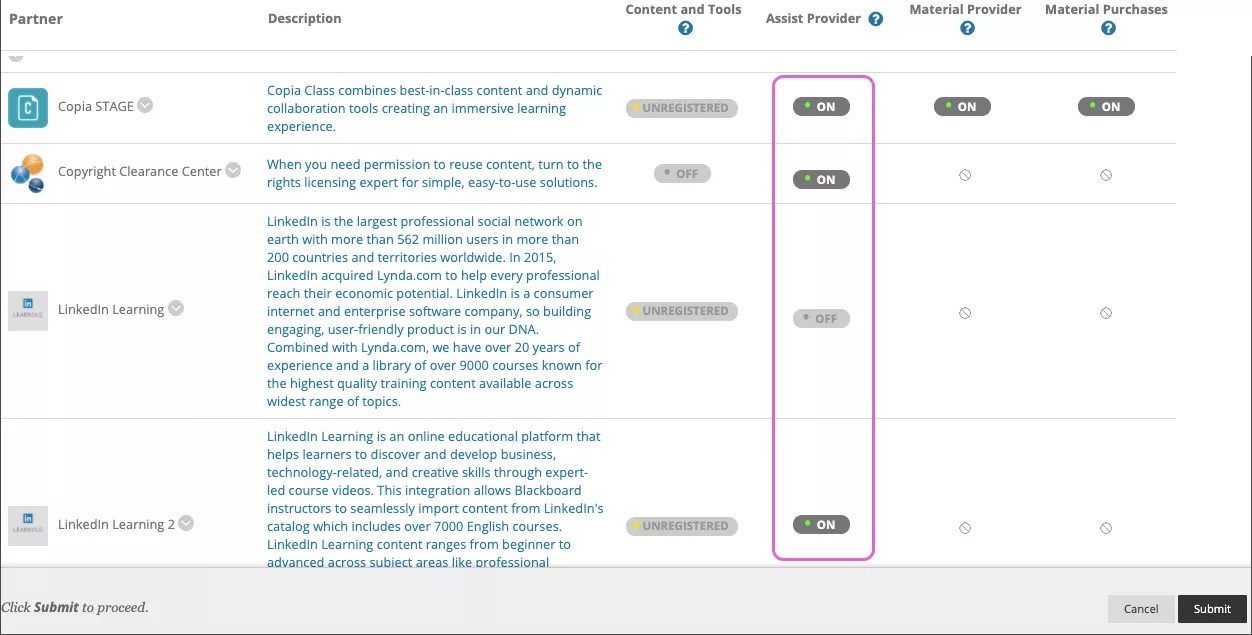
When you activate Blackboard Assist, it enables all your existing Partner Cloud Assist providers by default.
If you add a new partner cloud service, an administrator must turn it on in Admin Panel > Cloud Management > Partner Cloud Settings for it to appear in Blackboard Assist.
More on our Partner Cloud integrations
Create Assist module
Available for Learn Original experience only
In the Learn Original experience, you can create a module that renders the Assist service. You can place this into either an existing or new tab. Let's create a new Top Frame Tab just for Assist:
Create a module to contain the Assist interface:
- Go to Admin Panel > Communities > Tabs and Modules > Modules.
- Select Create Module.
- Under General Proprieties, enter a title for the module. We recommend "Assist." Optionally, you can select Hide Title on Module if you use an internal name you don't want users to see.
- For Module Type, select "LTI Launch."
- Select a module category and enter a reference name and description.
- For System Availability, select Yes.
- Select Submit.
- From the Edit page, under LTI Launch, select "BbAssist LTI Link."
- Select Submit.
Create a tab for the Assist module:
- Go to Admin Panel > Communities > Tabs and Modules > Tabs.
- Select Create Tab, Create Module Tab.
- Name the tab. We recommend "Assist."
- Select No to Allow Users to Personalize the Tab.
- For the number of columns, select "1."
- Select Submit.
- From the Tabs page, select Create Top Frame Tab.
- Enter a title for the top frame tab that will appear to users. We recommend "Assist."
- For System Availability, select Yes.
- Under Membership, select the Module Tab you created and move it to Selected Items.
- Select Submit.
To reorder tabs, drag them up and down in the list.
Add services
Doesn't seem familiar? Jump to "Ultra" help for Blackboard Assist.
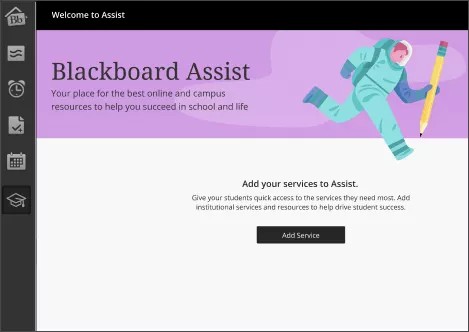
Services are easy to add in Blackboard Assist. From the navigation menu, select Assist and select Add Service.
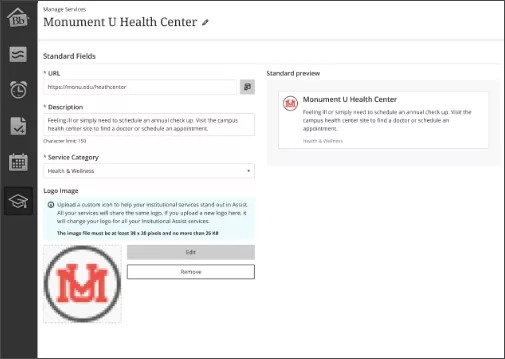
Enter or copy and paste the service URL, enter a description of the service, and choose the service category. A preview of the service appears in the Standard preview section. Upload your institution's logo image if this service is offered by your institution. A logo can help distinguish your institutional services from third-party services. Select Save.
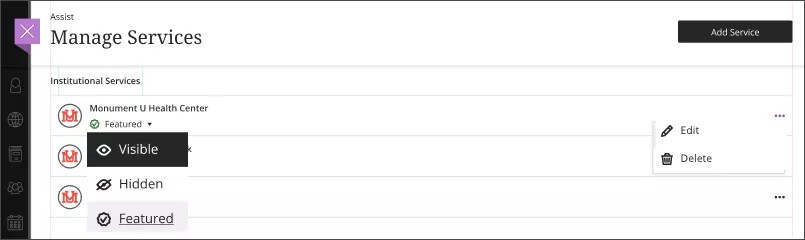
Manage services
Doesn't seem familiar? Jump to "Ultra" help for Blackboard Assist.
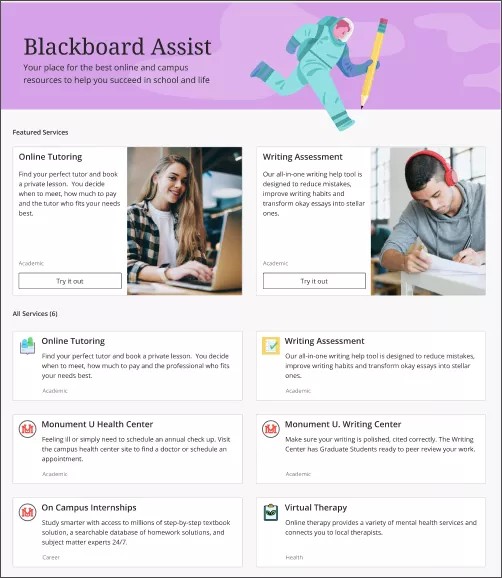
From Manage Services, you can edit and delete services, show or hide services, and promote services as featured services in Blackboard Assist.
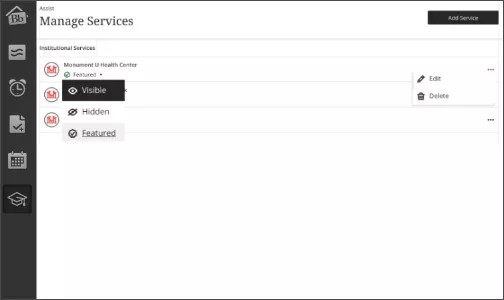
From the navigation menu, select Assist. Open the menu next to the service you want to edit and select Edit. Select Delete to delete the service.
Open the menu under the service to show or hide the service or promote it to a featured service. You can promote two services as featured services.
A featured service requires a supporting image.
Featured services
Doesn't seem familiar? Jump to "Ultra" help for Blackboard Assist.
Highlight two services for your students with Feature Services in Blackboard Assist. You can feature two services at a time. Featured services require a display image.
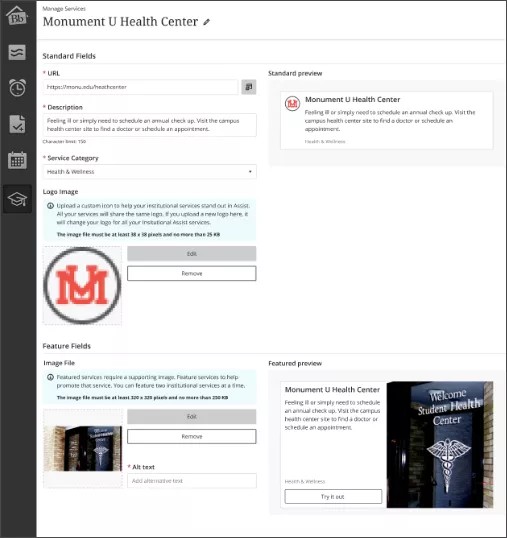
You can feature a service in two ways:
- From Manage Services, upload an Image File and enter alt text for the image. Provide a description for the service and select Save.
- From the list of services, select Featured from the menu.
ULTRA: Featured services
Doesn't seem familiar? Jump to "Original" help for Blackboard Assist.
Highlight two services for your students with Feature Services in Blackboard Assist. You can feature two services at a time. Featured services require a display image.
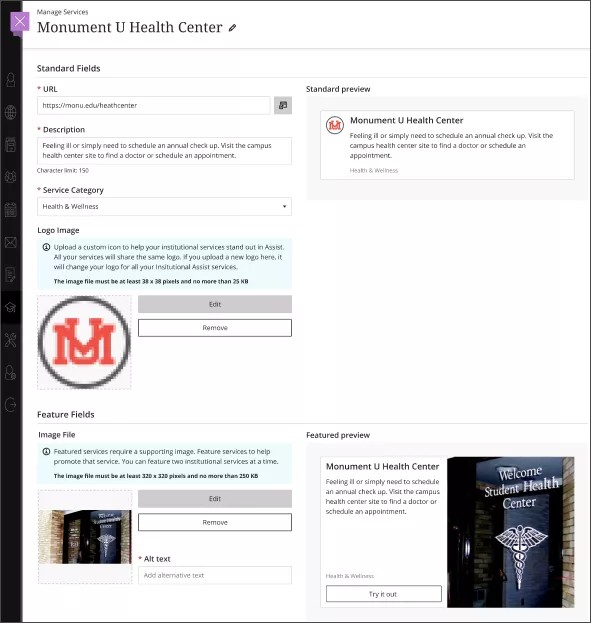
You can feature a service in two ways:
- From Manage Services, upload an Image File and type an Alt Text for the service. Type a description for the service and select Save.
- From the list of services, select Featured from the menu.
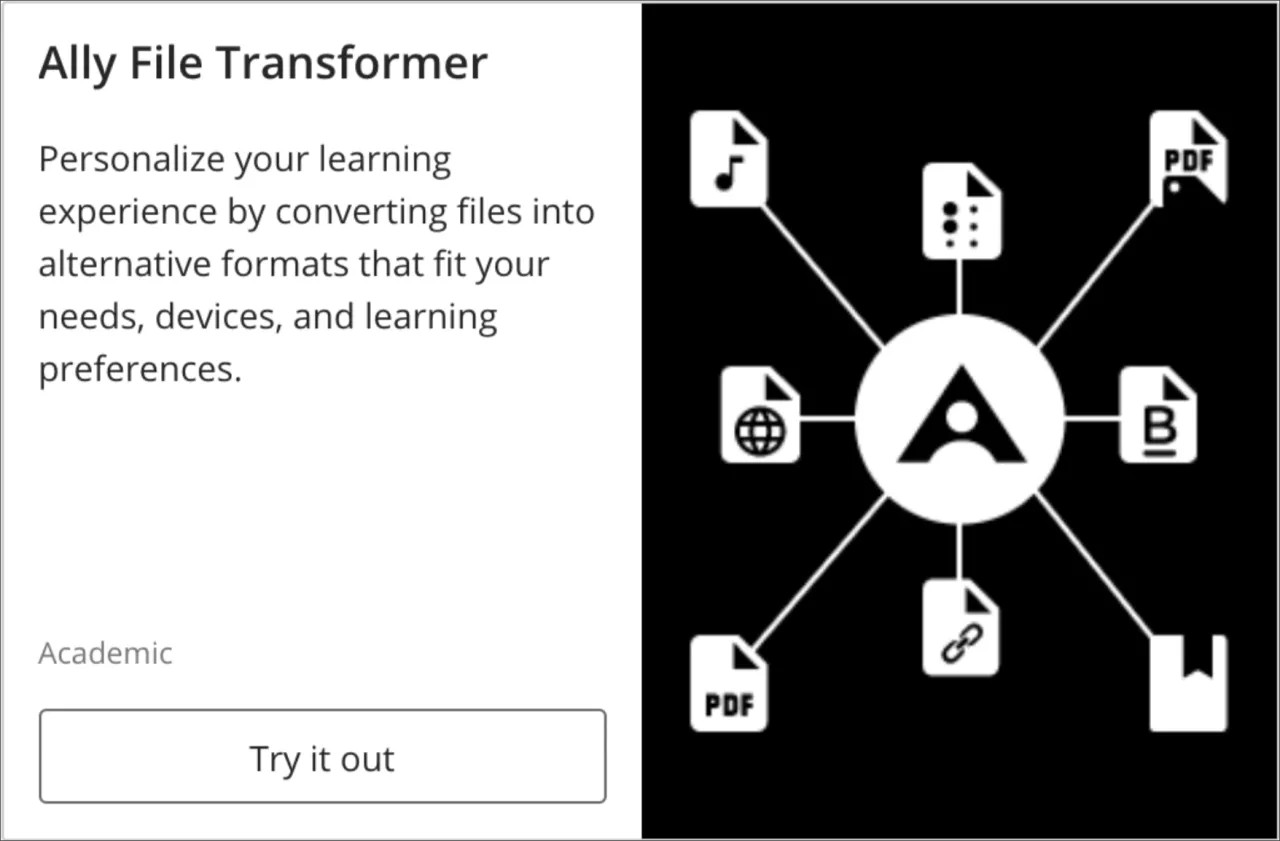
Ally File Transformer in Blackboard Assist (North America availability)
Ally File Transformer helps students personalize their learning experience. It converts files into alternative formats to better fit their needs, devices, and learning preferences.
- Ally File Transformer converts digital files to alternative, more accessible formats, including HTML, ePub, electronic braille, audio, BeeLine reader, as well as to a PDF that underwent optical character recognition (OCR).
- Ally File Transformer allows students to convert course files, their own files, and files they found via research or project work.
- Ally File Transformer is available through Blackboard Assist. Blackboard Assist must be enabled to access Ally File Transformer.
- Ally File Transformer does not require an Ally license.
- Ally File Transformer comes automatically with Blackboard Assist. You can manage this service by going to the Administrator Panel > Partner Cloud Settings.