From the USERS & GROUPS settings you can do these things.
- Set email address auto-generated user management information is sent from
- Unlock user accounts automatically after a set time period has passed
- Add Lightweight Directory Access Protocol (LDAP) domains and test sign in
- Configure access for Bb Communications parent and student user roles
Set Users and Groups from Email Addresses
Set address for user management from emails
Site Manager sends emails to users when something has changed with their account. For example, when a user forgets their password or gets a new account.
Set the email address you want these emails sent from. If a user responds to the auto-generated email, this is the address they respond to.
This is not the same as the site From email. If you haven't already, you still need to set your site From email address in Site settings.
- From Site Manager select USERS & GROUPS.
- Select Settings.
- Type the email address.
- Optionally, select Automatically Unlock User Account. User accounts are locked by multiple incorrect sign in attempts. If you select this, accounts automatically unlock after the amount of time you set.
- Select Save.
Automatically unlock user accounts
User accounts are locked by multiple incorrect sign in attempts. You can set accounts to automatically unlock after the amount of time you set.
- From Site Manager select USERS & GROUPS.
- Select Settings.
- Select Automatically Unlock User Account.
- Select Save.
Create and Test LDAP Domains
Add LDAP domains
If you see the LDAP tab, you can create domains. You can add more than one.
Web Community Manager only supports secure LDAP connection protocol.
- From Site Manager select USERS & GROUPS.
- Select Settings.
- Select LDAP.
- Select Add Domain.
- Type a fully qualified domain name.
- Select Continue.
Blackboard Community Engagement Solution
Integrate your website with your mobile communications
When used together Blackboard's Web Community Manager (WCM), Mobile Communications App (MCA), Mass Notifications System, and Social Media Management (SMM) tools take your communications to the next level. This is the Community Engagement Solution.
Universal navigation bar
Simplify the process of managing multiple systems. After you connect your WCM account with your Community Engagement account you can move between your Site Manager and your communication management center without needing to login in again. Write a blog post, monitor your social media networks, update your apps, and send out important information all in just minutes. Without needing to remember multiple urls and logins.
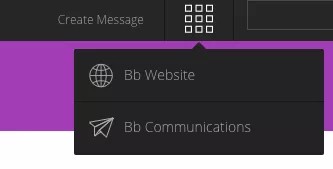
Select the checkerboard menu to move between Site Manager and the communications management center.
Enable the universal navigation bar and set permissions
Ask your Blackboard representative to help you integrate your website with your communication programs and enable your universal navigation bar.
In order for District Administrators, School Administrators, and/or Principals to use single sign-on capabilities, accounts must be given permission in both admin systems. For example, allowing principals to send messages to users at their schools and to edit the homepage of the website.
- Review the roles that exist in your Bb Communications interface. Your Blackboard representative can assist with providing the universal navigation bar permission to a specific role or roles that you indicate.
- Review your user Passports in Site Manager. Users need the extended privilege View Universal Navigation Bar to use the bar.
- Review the site directors and homepage editors for each of your sites. Only users with permissions in both systems and editorial access to at least one site can post news messages from the universal navigation bar. Site Directors at the district level have the ability to create a news message and post it to any subsite homepage in addition to posting to the On-Screen Alerts pop-up window.
Create and send messages
Depending on the features your district or school subscribes to, you can create the message once, and publish everywhere, including text, phone, email, social media, and your website.
- Access the Messages page.
- In Site Manager select Create Message from the Universal Navigation bar.
- From the Blackboard Communications HQ interface, select Messages and select Send.
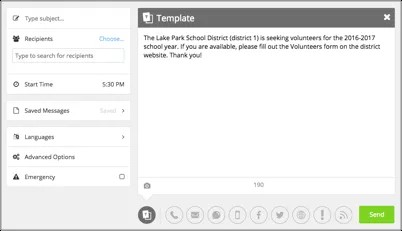
- Add your message to the template.
- Select the delivery option.
What your district and school subscribes to determines the delivery options available in your Send Message interface. If you subscribe to all the products available in the Community Engagement solution — Blackboard Mass Notifications, Blackboard Mobile Communications app, Blackboard Social Media Manager, and Blackboard Web Community Manager — you can access any of the features. To learn more see Create Once, Publish Everywhere (COPE).
- Select Send.
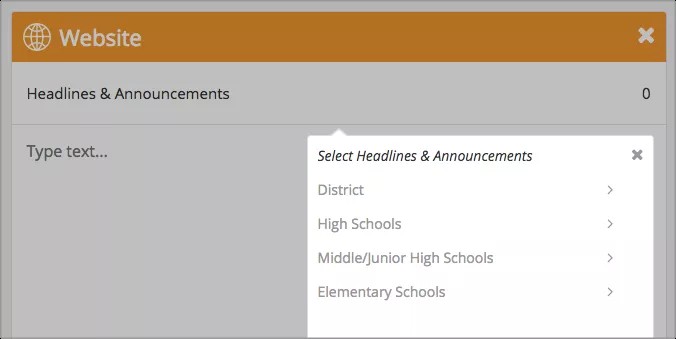
Website delivery option
If you select the website delivery option, select Headlines & Announcements. Select the district and/or school websites that will show the message. If posting to the Headlines app, select the camera icon to attach an image. This displays as the accent image on the website headline. Posting to the Announcements app appears as text only.
If you don't see any sites listed, contact your administrator.
On-screen alert delivery option
An alert appears on every screen of your website. The alert expires midnight the day you posted the alert. From Bb Communications select Reports and Message Tracking to cancel the alert sooner. From Site Manager select SITES & CHANNELS, Tools, and On-Screen Alerts to edit or extend the display time of the alert.
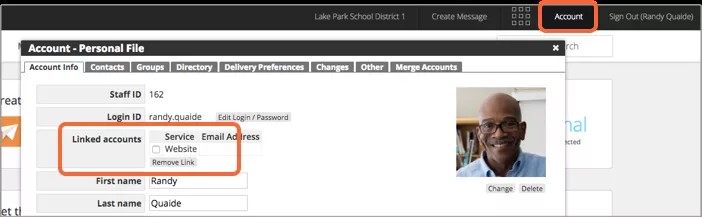
Unlink your accounts
Remove the link between your user accounts in the communications management center.
- From Bb Communications select Account.
- Select the linked account.
- Select Remove Link.
Integrated dashboard
Bb Communications
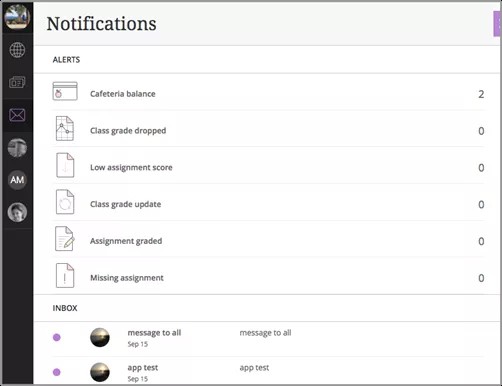
If you are integrated with the Community Engagement solution, your parent and student accounts can see their alerts and messages in the site dashboard Notifications. If your district licenses Student Data integration, parents or guardians also see their children’s student profiles, which include assignments, attendance, grades and cafeteria balance information.
- All school messages — emails, text messages, phone messages, and app messages — are in the Inbox.
- All alerts — low assignment score, cafeteria balance, class grade update, assignment graded, and missing assignment — are in Alerts.
If you want parents and students to take advantage of the integration with your Community Engagement solution, you need to activate them.
- From Site Manager select USERS & GROUPS.
- Select Settings.
- Select Bb Communications.
- Select Inactive to activate the parent and student user roles.