You can create groups to have a pre-selected set of people to send a message quickly. The groups will be available under the My Groups when you or other users are selecting recipients for messages.
Great for sports - Coaches, create a group for your team and their parents for when you need send them messages.
Use for clubs - Send out meeting reminders or special interest newsletters.
Want to contact only the parents of a specific class? - Select only the parents of one of your classes.
From the Blackboard Communications HQ interface menu, select Messages > Group.
Administrators can create private groups and public groups. Private groups will only be available to you for messages, whereas a public group will be available to all users that have permission to send messages.
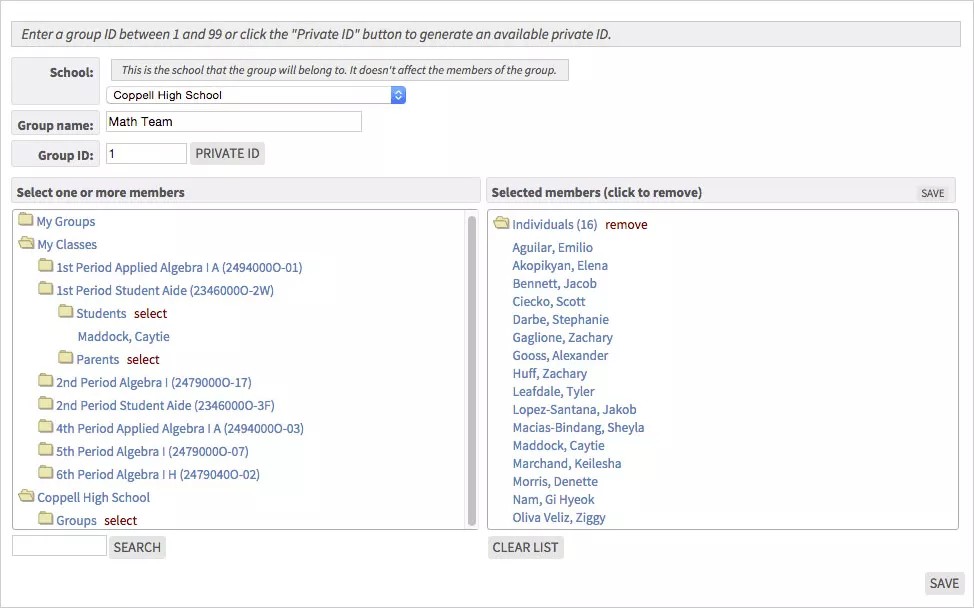
Add a new private group
Private groups are only available to you for your messages. All staff members can create private groups.
- From the Blackboard Communications HQ interface menu, select Messages > Group.
- Select Add to create a new group.
- Select the School for the group.
- Type a Group Name.
- Select Private ID for the Group ID to be assigned.
- Select the members for your group.
- Clicking on the folder icon will expand the folders, showing students and parents from your classes or other groups.
- Add entire folder of names by selecting Select next to the folder. To add individuals, expand the folder and select the individual's name.
Current members selected will display in the Selected Members list. To remove them, select the name from this list.
- Select Save when finished.
Add a new public group
Public groups will be available to all users that have permission to send messages.
- From the Blackboard Communications HQ interface menu, select Messages > Group.
- Select Add to create a new group.
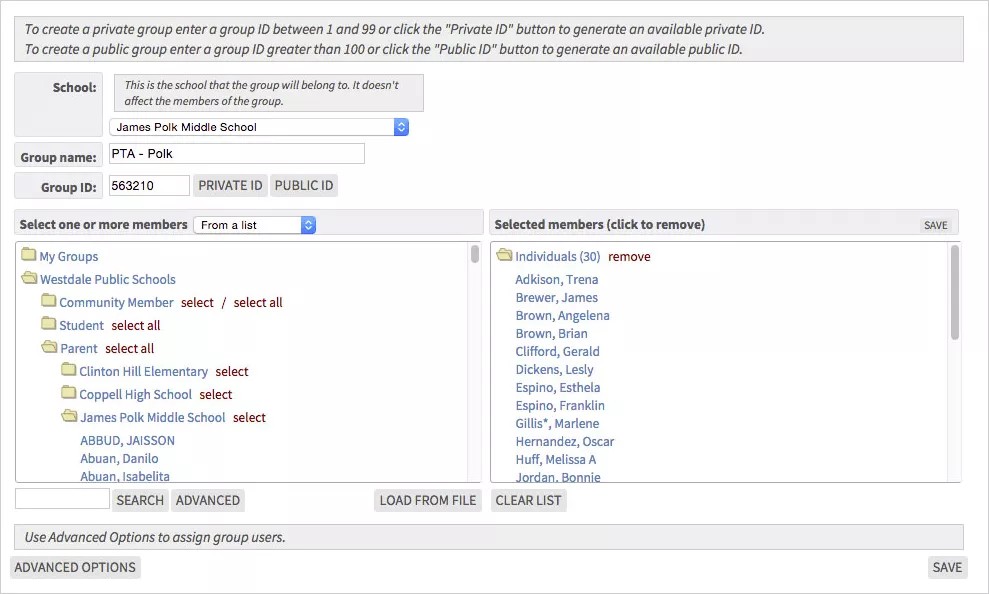
- Select the School for the group.
- Type a Group Name.
- Select Public ID for the Group ID to be assigned.
- Select the members for your group. There are several ways you can create a new group:
Static Groups - Standard group where you select members from a list of available users.
Query Groups - A group where you search for a group of users based on query criteria.
File Groups - A group you create from uploading a file of users.
- Select Save when finished.
Add a new static group
You create a static group by selecting members from a list of available users.
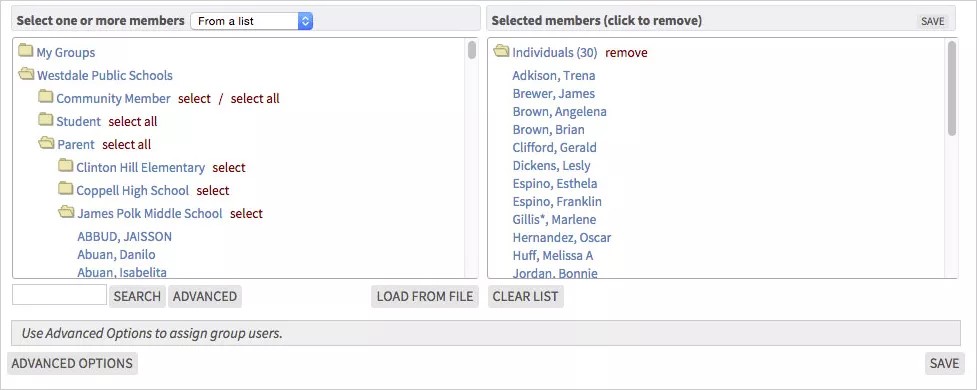
- Select From a list in the Select one or more members box.
- Select the members for your group.
- Selecting the folder icon will expand the folders, showing students and parents from your classes or other groups.
- Add entire folder of names by clicking Select next to the folder. To add individuals, expand the folder and click on the individual's name.
- You can type a name and select Search to find a specific user.
Current members selected will display in the Selected Members list. To remove them, select the name from this list.
Select Advanced Options to select users that can view members of and contact members of this group.
- Select Save when finished.
Add a new query group
You create a group by searching for users that meet a specific criteria. For example, you might send messages to parents with students that are receiving a below average grade, or to teachers who have students with too many absences.
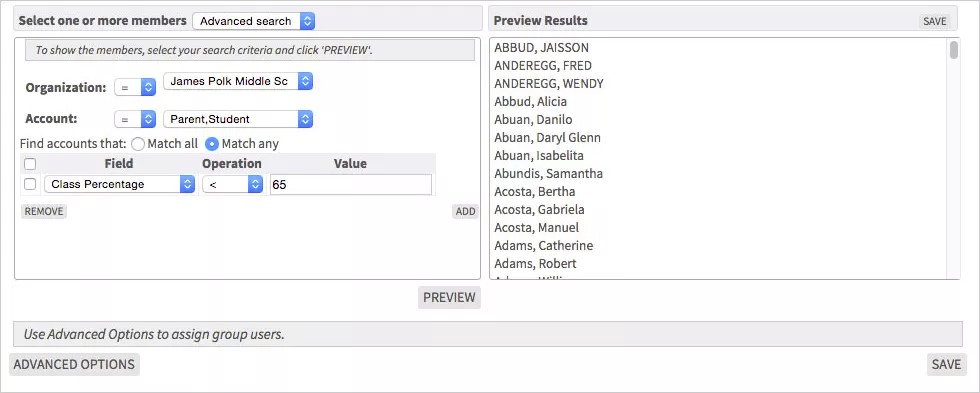
- Select Advanced search in the Select one or more members box.
- Select the query settings.
- Select the Organization(s) and Account type(s) for your search.
= means, equals the selected field, and != means, does not equal the select field.
- Select Match All or Match Any to select only users that match all the criteria or any of the criteria.
- Select the Field, Operation, and Value for the search criteria. You can add as many criteria as needed.
- Select Preview to view a list of users that currently match the criteria.
Current members selected will display in the Selected Members list. To remove them, click on the name from this list.
- Select the Organization(s) and Account type(s) for your search.
- Select Advanced Options to select users that can view members of and contact members of this group.
- Select Save when finished.
Add a new group with a file
You create a group by uploading a file of user IDs with one ID per line.

- Select From a file in the Select one or more members box.
- Select the file settings.
- Select the Member Type you are uploading.
- Select the file location from the Transfer Type.
- Select Choose File to select the file to upload and click Load.
- After loading the file, select Load to move the recipients to the Selected members box.
Current members selected will display in the Selected Members list. To remove them, click on the name from this list.
- Select Advanced Options to select users that can view members of and contact members of this group.
- Select Save when finished.
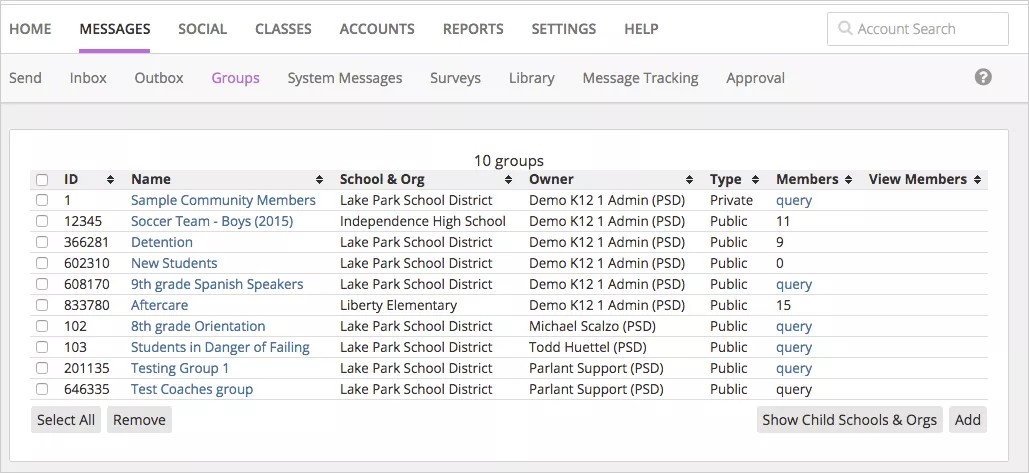
View child schools and groups
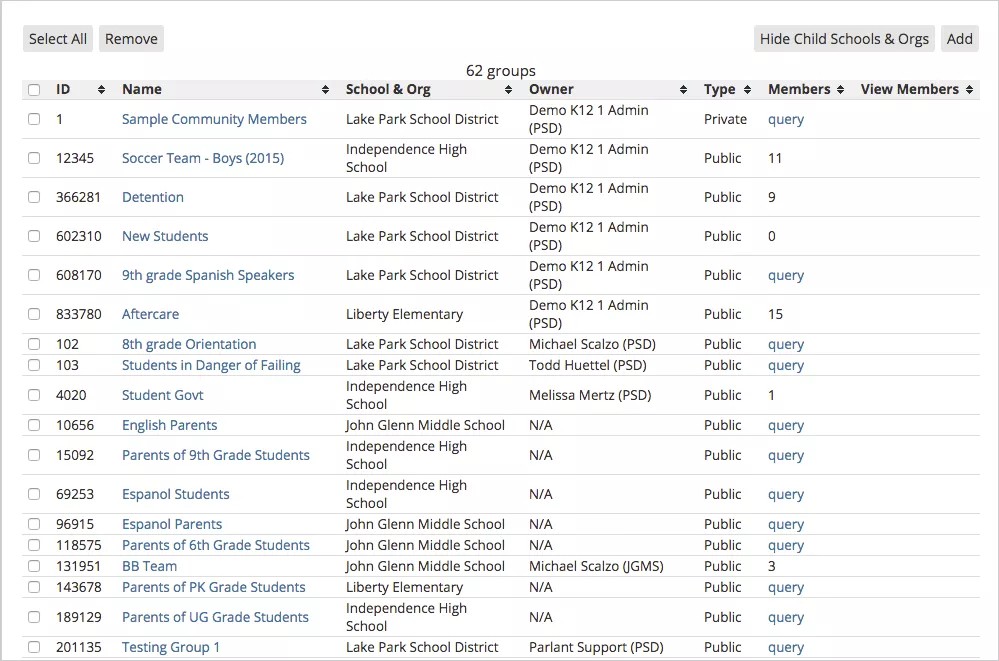
Administrators will be able to view the different groups available at the schools under the specific district.
- From the Blackboard Communications HQ interface menu, select Messages > Groups.
- Select Show Child Schools.
The page will load all the groups in schools that you are able to view.
Remove a group
You can remove any group that you can view from your district or school.
- From the Blackboard Communications HQ interface menu, select Messages > Groups.
- Select the group to delete.
- Select Remove.
- Confirm on the warning message by selecting Remove again.