Send a message via the Blackboard Communications HQ App!
With the Blackboard Communications HQ app you have access to the same message creating capabilities and features that currently exist on the web interface.
Create a message and send it via Phone, Email, Text, Push Notification, as well as posts to Facebook, Twitter, and RSS feeds.
You can also cancel the message from the Blackboard Communications HQ app, sent as an emergency message, start and end delivery times selected, or translated into different languages.
Create a message
You can send messages via different delivery methods, including phone, email, text, push notification for your mobile app, Facebook posts, Tweet, and website feed.
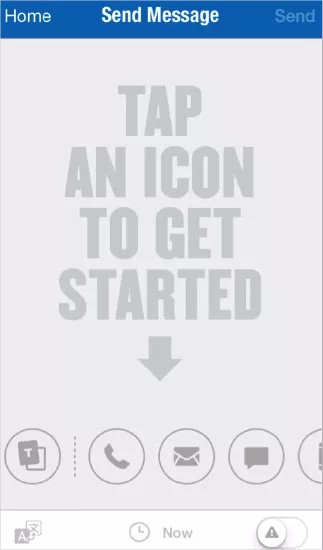
- From the Blackboard Communications HQ app, select New Message.
- Select one of the delivery methods from the Send Message tab:
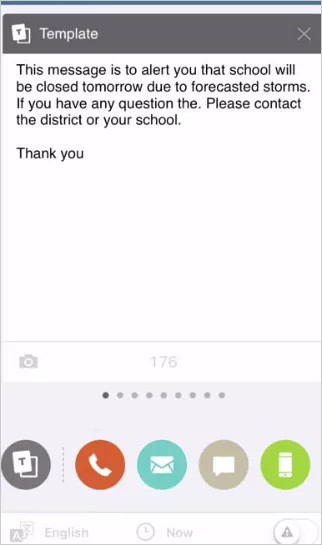
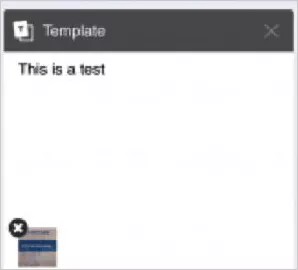
- Template option - Create a template message to be used on all of the delivery types and modified later in each one to customize them. Type the body of the message here. You can also add images for the template option. Not all messages types will post images.
You must fill out the template before selecting delivery methods. The text will not transfer automatically if the delivery methods are chosen before the template is finished.
- Phone messages - If you created a template message, the content will be added here for phone calls. You can update the text and select how to make the recording - Call me to record (voice recording), Call in to record (voice recording), Upload audio file, or Text to speech. To remove the phone call option, close out the tab from the upper right hand corner.
- Emails - If you created a template message, the content will be added here for emails. You can update the text and add any images. To remove the email option, close out the tab from the upper right hand corner.
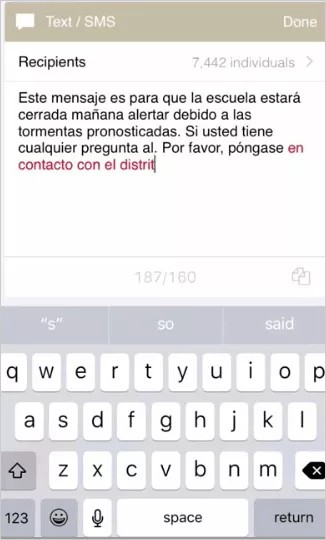
- Text/SMS - If you created a template message, the content will be added here for text/SMS messages, but you may need to edit the content to be less than 160 characters. To remove the text/SMS option, close out the tab from the upper right hand corner.
- Push Notifications - If you created a template message, the content will be added here for the app notifications. You can update the text and add any images. You can also mark the notification to appear only to known recipients and not to the general public of your mobile app. To remove the app notification option, close out the tab from the upper right hand corner.
- Facebook - If you created a template message, the content will be added here for Facebook messages, but you may need to edit the content to be less than 160 characters. You can update the text and add any images. To remove the Facebook option, close out the tab from the upper right hand corner.
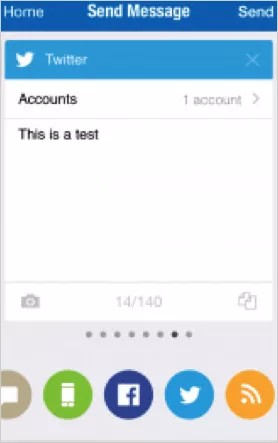
- Twitter - If you created a template message, the content will be added here for text/SMS messages, but you may need to edit the content to be less than 140 characters. You can update the text and add an image. To remove the Twitter option, close out the tab from the upper right hand corner.
- District/School Websites - If you created a template message, the content will be added here for your district or school websites. You can update the text and add any images. To remove the website option, close out the tab from the upper right hand corner.
- Template option - Create a template message to be used on all of the delivery types and modified later in each one to customize them. Type the body of the message here. You can also add images for the template option. Not all messages types will post images.
- Select the message recipients:
- Select the Recipients bar.
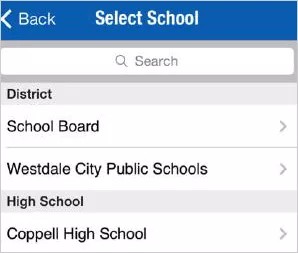
- Select the school or district.
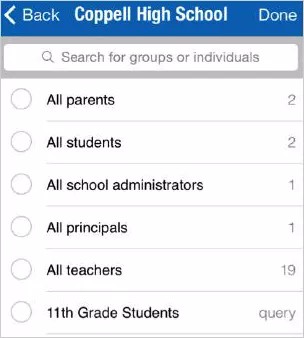
- Select the recipient group.
You can add as many groups as you would like. Select Back to add groups from different schools.
The lists only show the groups themselves. To find individuals, use the search bar at the top, and then filter by the options.
- Select Done when finished.
- Select the Recipients bar.
- Fill out the appropriate information for the message, such as the message title and the message content.
- Select Send when ready to send your message, or use the advanced options.
Advanced options
Before selecting Send, you can translate the message to different languages, customize the date and time a message begins delivering, and set it to go out as an emergency message.
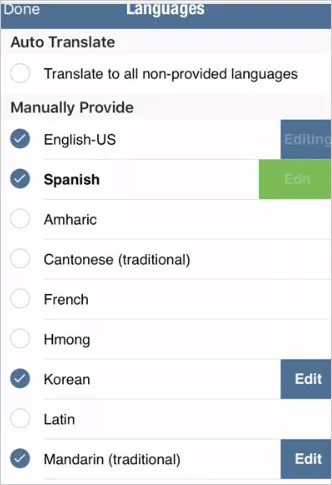
- To translate your message, select the Translate icon.
Amheric language will not include translation or text-to-speech capabilities. Some Android devices and iOS do NOT support Amheric, and the message may not look correct on those devices. However, it is expected that those users requiring Amheric language will use phones that support the display.
- Select the languages for the translation, or select Translate to all languages.
- To update the content in a specific language, select Edit.
- Update the specific message types as required by any character restrictions.
- Select Done when finished.
- To adjust the delivery for the message, select the Date and Time icon.
- Select the date and time for when to Start the message delivery.
- Select the date and time for when to End the message delivery.
- Select Done when finished with the delivery time.
- For an emergency message, select the Emergency icon.
Emergency messages will appear as warnings to recipients and all black-out delivery times configured will be ignored. Use ONLY in emergency situations.
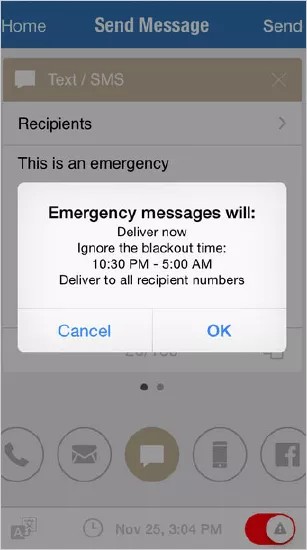
- Select OK when finished to send immediately.
You can send an already existing message from the Saved Messages feature. Use these standard messages for content that needs to be sent out on a time-to-time or frequent basis.
Send a saved message
- From the Blackboard Communications HQ app, select Saved Messages.
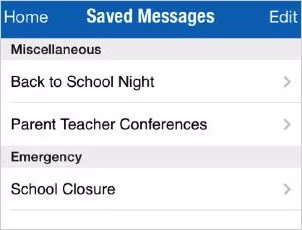
- Select the message to send.
- Change any of the following for the message:
- Edit the text, edit the subject, or add new delivery method types.
- Choose the recipients.
- Translate to different languages.
- Select delivery time.
- Select emergency status.
- Delete delivery method types.
- Select Send when ready.
To delete a saved message, select Edit, select the message to delete, and then select Delete.
Add a photo
You can add pictures to several delivery methods in the Blackboard Communications HQ mobile app, including email, to the app, Facebook, Twitter, and to the website feed.
- Select the Camera icon available for the delivery method.
- Either take a photo or select an existing photo:
- Select Take Photo to take a picture.
- Select Choose Photo to select from the Photos or Gallery.
- Select Use Photo to add the picture to the message or template.
Users can easily remove the photo by selecting the Delete (x) icon. You can also select the image and move it to where you need it in the message.
Cancel a message
The Blackboard Communications HQ app allows the user to cancel a message that was sent from the Blackboard Communications HQ app. You cannot cancel a message if it is currently being delivered, but you can cancel the message up to 5 minutes before the delivery.
Once a message starts being built and sent, the cancel feature does not guarantee to stop cancelation immediately.
- In the Blackboard Communications HQ app, select Message Tracking.
- Select the message to cancel.
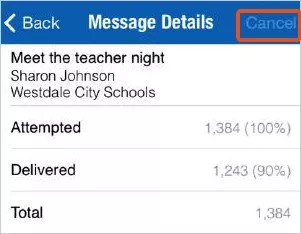
- Select the Cancel option.
Track messages
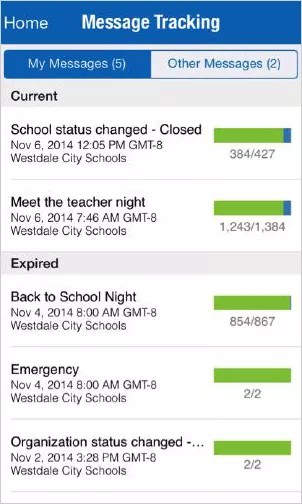
The Blackboard Communications HQ app allows you to see the delivery status of messages and the priority levels.
- In the Blackboard Communications HQ app, select Message Tracking.
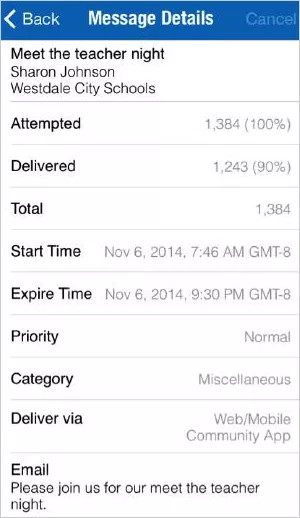
You can view the message summary including who sent the message, the percentage of delivery attempts and successes, the detailed date and time, the priority level, the category for the message, and the delivery methods chosen.