Active Directory Federation Services (ADFS) is a software component developed by Microsoft®. It can be installed on Windows Server operating systems so that users have single sign on access to systems and applications.
Supported ADFS:
- Microsoft Active Directory Federated Services (ADFS) 2.0
- Microsoft Active Directory Federated Services (ADFS) 3.0
- Microsoft Active Directory Federated Services (ADFS) 4.0
- Microsoft Active Directory Federated Services (ADFS) 5.0
ADFS is a standards-based service that provides for the secure sharing of identity information between trusted partners (a federation) across an extranet (an intranet that can be accessed by authorized outside users). When users access a Web application from a federation partner, their organization has the responsibility of authenticating them. It provides identity information in the form of claims to the partner that hosts the Web application. The hosting partner uses its trust policy to map the incoming claims to claims that are understood by its Web application, which then uses the claims to authorize the user.
You must configure ADFS before SAML. Work with your Blackboard project manager to set up ADFS and SAML.
Configure ADFS
You must configure ADFS before you can set up SAML.
- Launch ADFS Management on the ADFS server.
- Under Trust Relationships, select and add Relying Party Trusts.
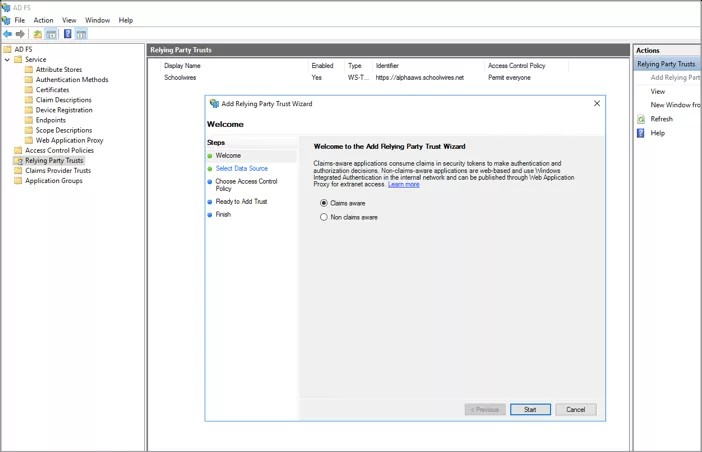
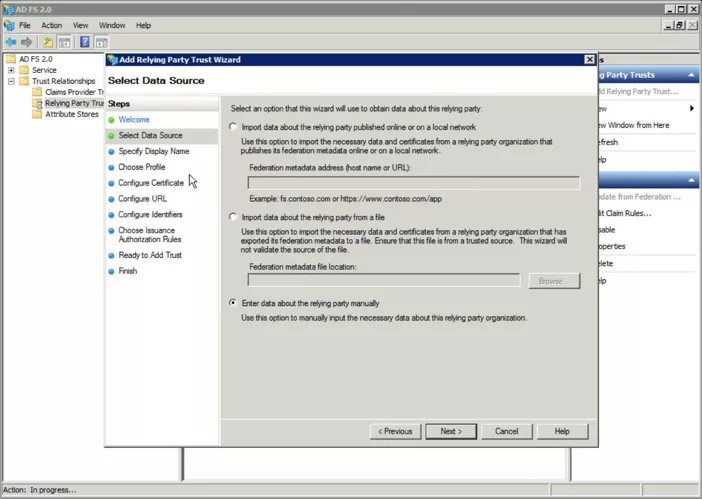
- Under Select Data Source, select Enter data about relying party manually and complete the wizard.
- Choose a Display Name that meets your naming convention.
- Under Choose Profile, select your version of ADFS (2.0-5.0).
- Under Configure URL, check Enable support for the SAML 2.0
- Type https://<WCMDomain>/site/handlers/samlhandler.ashx/ProcessRequest as the Relying party SAML 2.0 SSO service URL.
Replace <WCMDomain> with your website. For example, https://schoolwires.com/site/handlers/samlhandler.ashx/ProcessRequest.
- Under Choose Issuance Authorization Rules, check Permit all users to access this relying party. If you intend to restrict user access, apply the appropriate restrictions at this time per ADFS documentation.
- Under the newly-created Relying Party Trust's Properties, enter the following settings.
- In the Relying Party Properties > Endpoints tab, ensure that the binding is POST.
- Set the relying part trust identifier to https://<WCMDomain>.
- On the Advanced tab, set Secure Hash Algorithm to SHA-256.
- On the Signature tab, add the Signature Certificate (.cer) which was provided in your initial communication regarding SAML integration. If you need a new copy of this certificate, please reach out to WCM support.
Add claim rule
- Right click on the Relying Party Trust you created.
- Select edit claim rule or add rule.
- Select Send LDAP Attributes as Claims.
- Claim Rule Name: Enter an identifiable name consistent with your naming conventions.
- Attribute Store: Select Active Directory.
- Map SAM-Account-Name to Outgoing Name ID.
- Map E-Mail-Addresses to Outgoing E-Mail Address.
- Map Given-Name to Outgoing Given Name.
- Map Surname to Outgoing Surname.
Metadata URL
Our deployment of SAML for your WCM does not use metadata, however, the instructions we provide for you above contain all the relevant information that would be conveyed via metadata.
You've set up trust between your Identity Provider and WCM, and you've encrypted those communications. Now you need to tell ADFS what to send. In ADFS, this is called a claim rule. Use the steps above to set a claim rule instructing ADFS to send user attributes found in your Active Directory Server commonly used in LDAP.
Prepare WCM to accept SAML Assertions
Navigate to Site Manager > Configure > System Settings > Integration
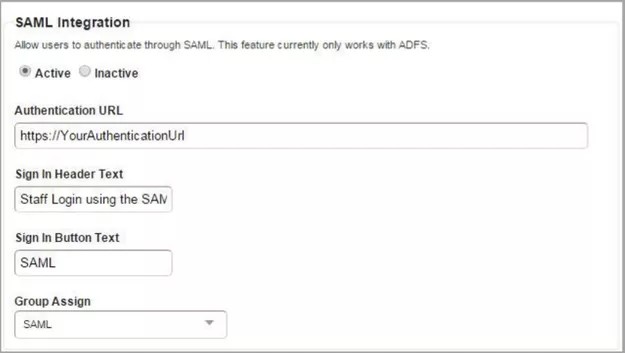
- Enter your Authentication URL. This is the URL of the ADFS service you want to direct users to.
- Enter the Sign In Header Text. This is the message that appears on the sign-in page above and inside the SAML sign-in link.
- Enter the Sign In Button Text. This is the text that appears on the SAML sign-in button.
- Select Group Assign. Assign all SAML-authenticated users automatically to one WCM group.
- Toggle availability. You can toggle the availability of SAML integration with the Active and Inactive radio buttons.
Additional settings
Navigate to Users and Groups > Settings > User Settings
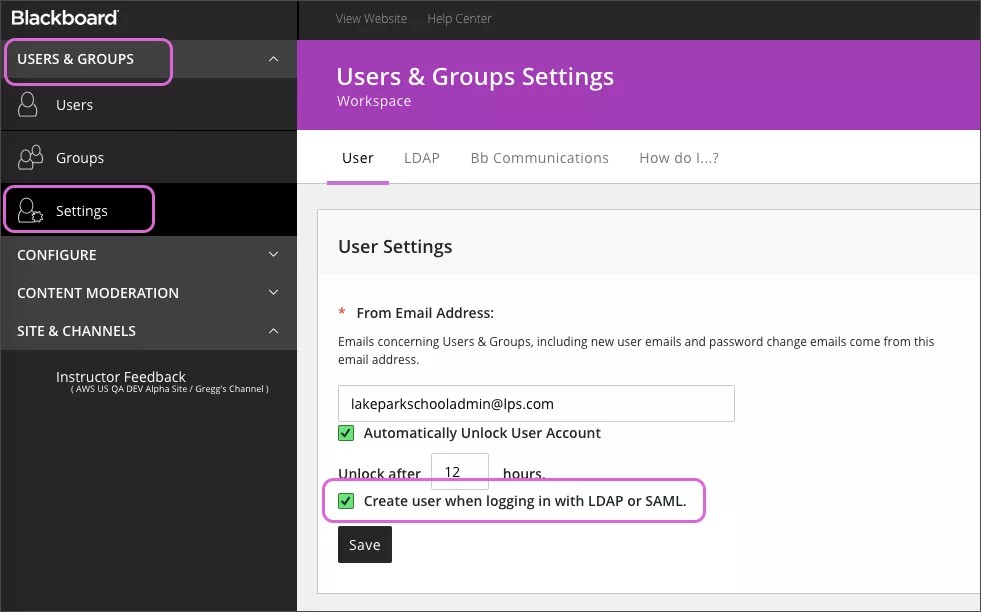
You have the option to tell WCM to auto-create users when a SAML assertion doesn't match an existing user in WCM. This feature may require careful consideration as it may conflict with other automation practices in use.