Follow these steps to add the course accessibility report to your Original and Ultra courses.
This configuration uses your current Ally Key, Secret and Client ID. If you don't know it, go to your Building Block settings and record it, or ask your Blackboard Technical Consultant for it.
Create an Ally LTI provider
Check to see if an Ally provider already exists. If an Ally provider exists, you just need to add placements to the provider. If not, create one.
Learn more about creating LTI tool providers
- From the Administrator panel select LTI Tool Providers.
- Check the list for these Ally providers:
- prod.ally.ac
- prod-ca-central-1.ally.ac
- prod-eu-central-1.ally.ac
- prod-ap-southeast-1.ally.ac
- prod-ap-southeast-2.ally.ac
- If there is an Ally provider already, skip to Create Ally placements.
- If there is no Ally provider already, select Register Provider Domain.
- Enter the Provider Domain of your host data center. If you aren't sure, look at the information from your building block settings.
- US data center: prod.ally.ac
- Canadian data center: prod-ca-central-1.ally.ac
- European data center: prod-eu-central-1.ally.ac
- Singapore data center: prod-ap-southeast-1.ally.ac
- Australian data center: prod-ap-southeast-2.ally.ac
- Select Approved for the Provider Domain Status.
- Select Set separately for each link beside Default Configuration.
- Select Send user data only over SSL for the Send User Data setting.
- Select only the Role in Course option for User Fields to Send. All options are selected by default, uncheck the other options.
- Select Yes for Allow Membership Service Access.
- Select Submit.
Create Ally placements
After you have added a new LTI provider, it appears on the LTI providers list. From here, you can place the tool in Learn.
More on managing placements in Blackboard Learn
- From the LTI Tool Providers list, look for these Ally providers:
- prod.ally.ac
- prod-ca-central-1.ally.ac
- prod-eu-central-1.ally.ac
- prod-ap-southeast-1.ally.ac
- prod-ap-southeast-2.ally.ac
- Open the options menu for the Ally provider.
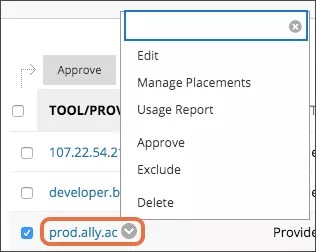
- Select Manage Placements.
- Select Create Placement and enter this information:
- Label: Accessibility Report
- Description: Anthology Ally Course Accessibility Report
- Handle: ally-instructor-report
- Select Yes for Availability.
- Beside Type select Course tool and select Non-student.
- To add an Icon, select Browse and the Ally icon.
You can save and use this Ally icon.

- Use one of these URLs for the Tool Provider URL. Replace "[ClientID]" with the Client ID in your Building Block settings.
- Institutions hosted in the US data centre: https://prod.ally.ac/api/v1/[ClientId]/lti/instructor
- Institutions hosted in the Canadian data centre: https://prod-ca-central-1.ally.ac/api/v1/[ClientId]/lti/instructor
- Institutions hosted in the European data centre: https://prod-eu-central-1.ally.ac/api/v1/[ClientId]/lti/instructor
- Institutions hosted in the Singapore data centre: https://prod-ap-southeast-1.ally.ac/api/v1/[ClientId]/lti/instructor
- Institutions hosted in the Australian data centre: https://prod-ap-southeast-2.ally.ac/api/v1/[ClientId]/lti/instructor
- Enter the Tool Provider Key from your Building Block settings.
- Enter the Tool Provider Secret from your Building Block settings.
- Select Submit.
Accessibility Report appears as an option in a course under the Course Tools in Original courses and Books & Course Tools in Ultra courses. If you encounter any issues configuring the report, please Submit a case on Behind the Blackboard.
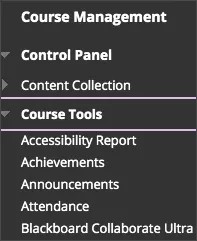
Course Tools in Original Course View
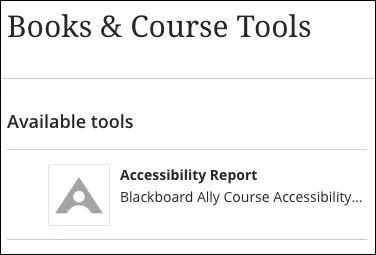
Books & Course Tools in Ultra Course View
Blackboard Learn Record Key, Secret, and Client ID
Record Key, Secret, and Client ID
You need the Tool Provider/Consumer Key, Tool Provider/Shared Secret, and Client ID to configure the course accessibility report.
Follow these steps to record the information. If these steps aren't available in your environment, ask your Blackboard technical consultant for it.
- From the Administrator panel, select Building Blocks.
- Select Installed Tools.
- Find Ally integration and select the options menu.
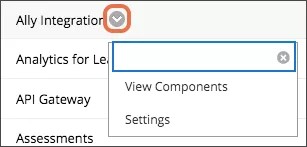
- Select Settings.
- Record the information in these fields to use later.
- Tool Provider Key
- Tool Provider Secret
- Client ID
- URL for Ally report
- Select Cancel and return to the Administrator panel.