Microsoft O365 Admin
To successfully integrate your Blackboard Learn instance with Microsoft Teams classes, make sure the Blackboard application is approved for access within your Microsoft Azure tenant. This is a process that your institution’s M365 Global Admin needs to complete.
This process can be done either before or after you have configured the LTI applications in your Blackboard Learn Instance.
Before configuring LTI applications
If you choose to approve the Blackboard Teams classes Azure app before configuring the LTI integrations, you'll need to redirect to the Microsoft Identity Platform Admin Consent Endpoint. The URL is shown below:
https://login.microsoftonline.com/{tenant}/adminconsent?client_id=2d94989f-457a-47c1-a637-e75acdb11568
You’ll replace {Tenant} with your specific institutional Microsoft Azure tenant ID. You will need to know your Microsoft Tenant ID to enable this integration in Blackboard Learn.
Learn more on How to find your tenant
As a Learn Admin you will need to register 2 LTI 1.3 integration apps within your test environment:
- The Blackboard Learn Class Teams integration to support the roster sync.
- The Microsoft Class Teams LTI tool.
- Make a note of the following LTI Client ID’s for both Apps:
- Blackboard - f1561daa-1b21-4693-ba90-6c55f1a0eb41
- Microsoft - 027328b7-c2e3-4c9e-aaa1-07802dae6c89
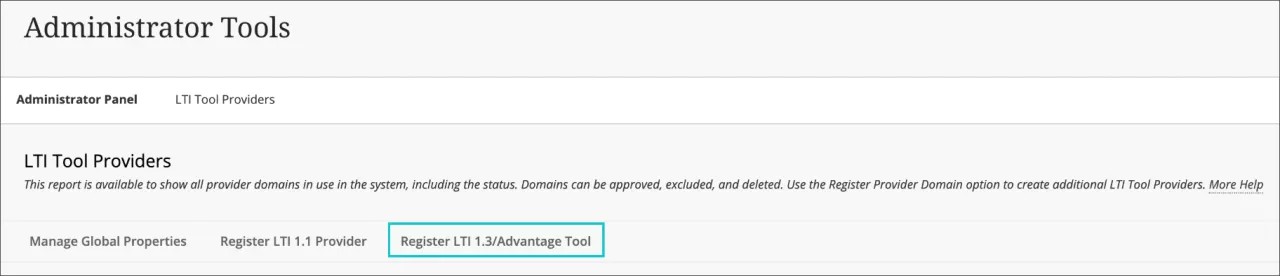
- Access the Admin Panel and under Integrations locate LTI Tool Providers.
- Select Register LTI1.3/Advantage Tool
- Enter in the first of the Client ID’s provided (either Blackboard or Microsoft) and select Submit.
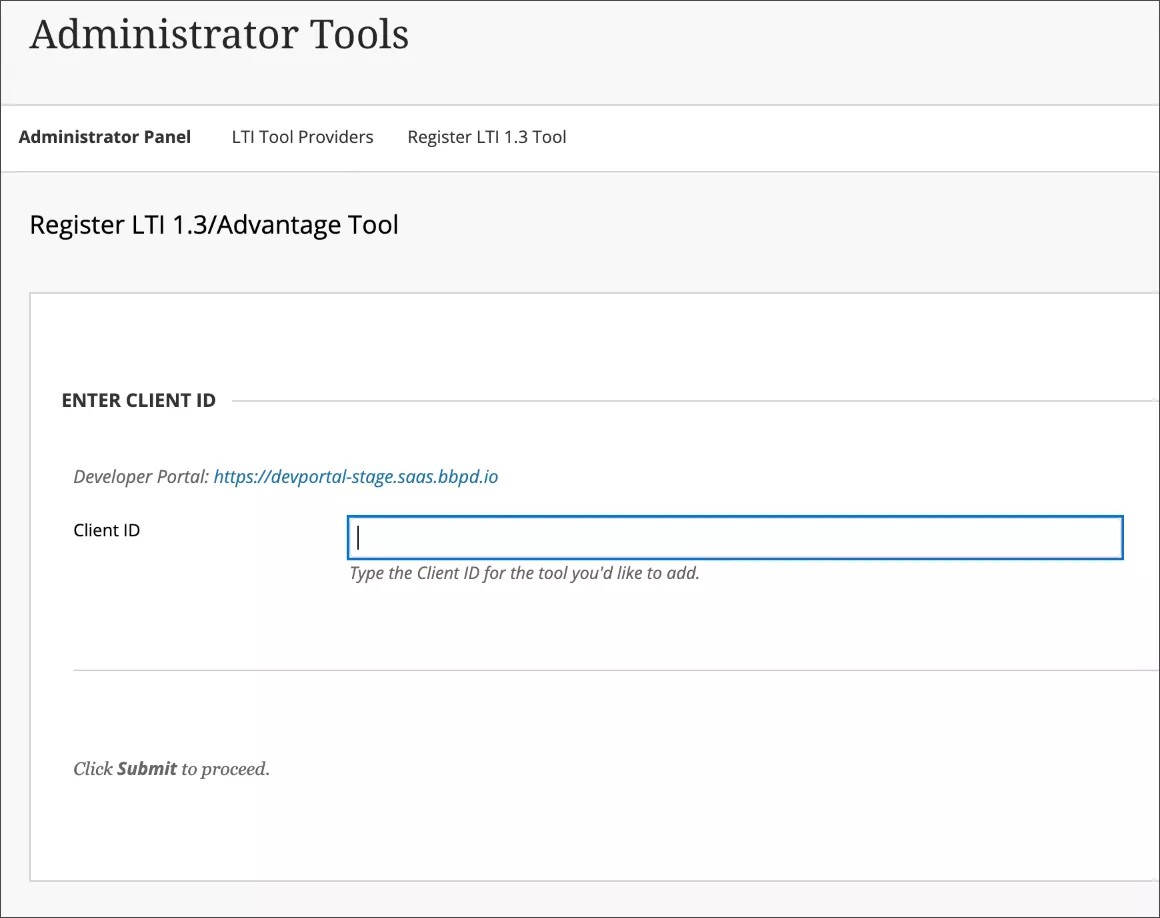
- All relevant fields will be pre-populated for you. Go through and review these settings. Make sure the tool status is marked as Approved.
- Make sure all institution policies are selected including role in course, name, and email address. Also, Select allow grade service access and Allow membership service access.
- Scroll down and select Submit at the bottom of the page.
- Repeat steps 4 and 5 to register the second of the LTI apps within your environment.
After configuring LTI applications
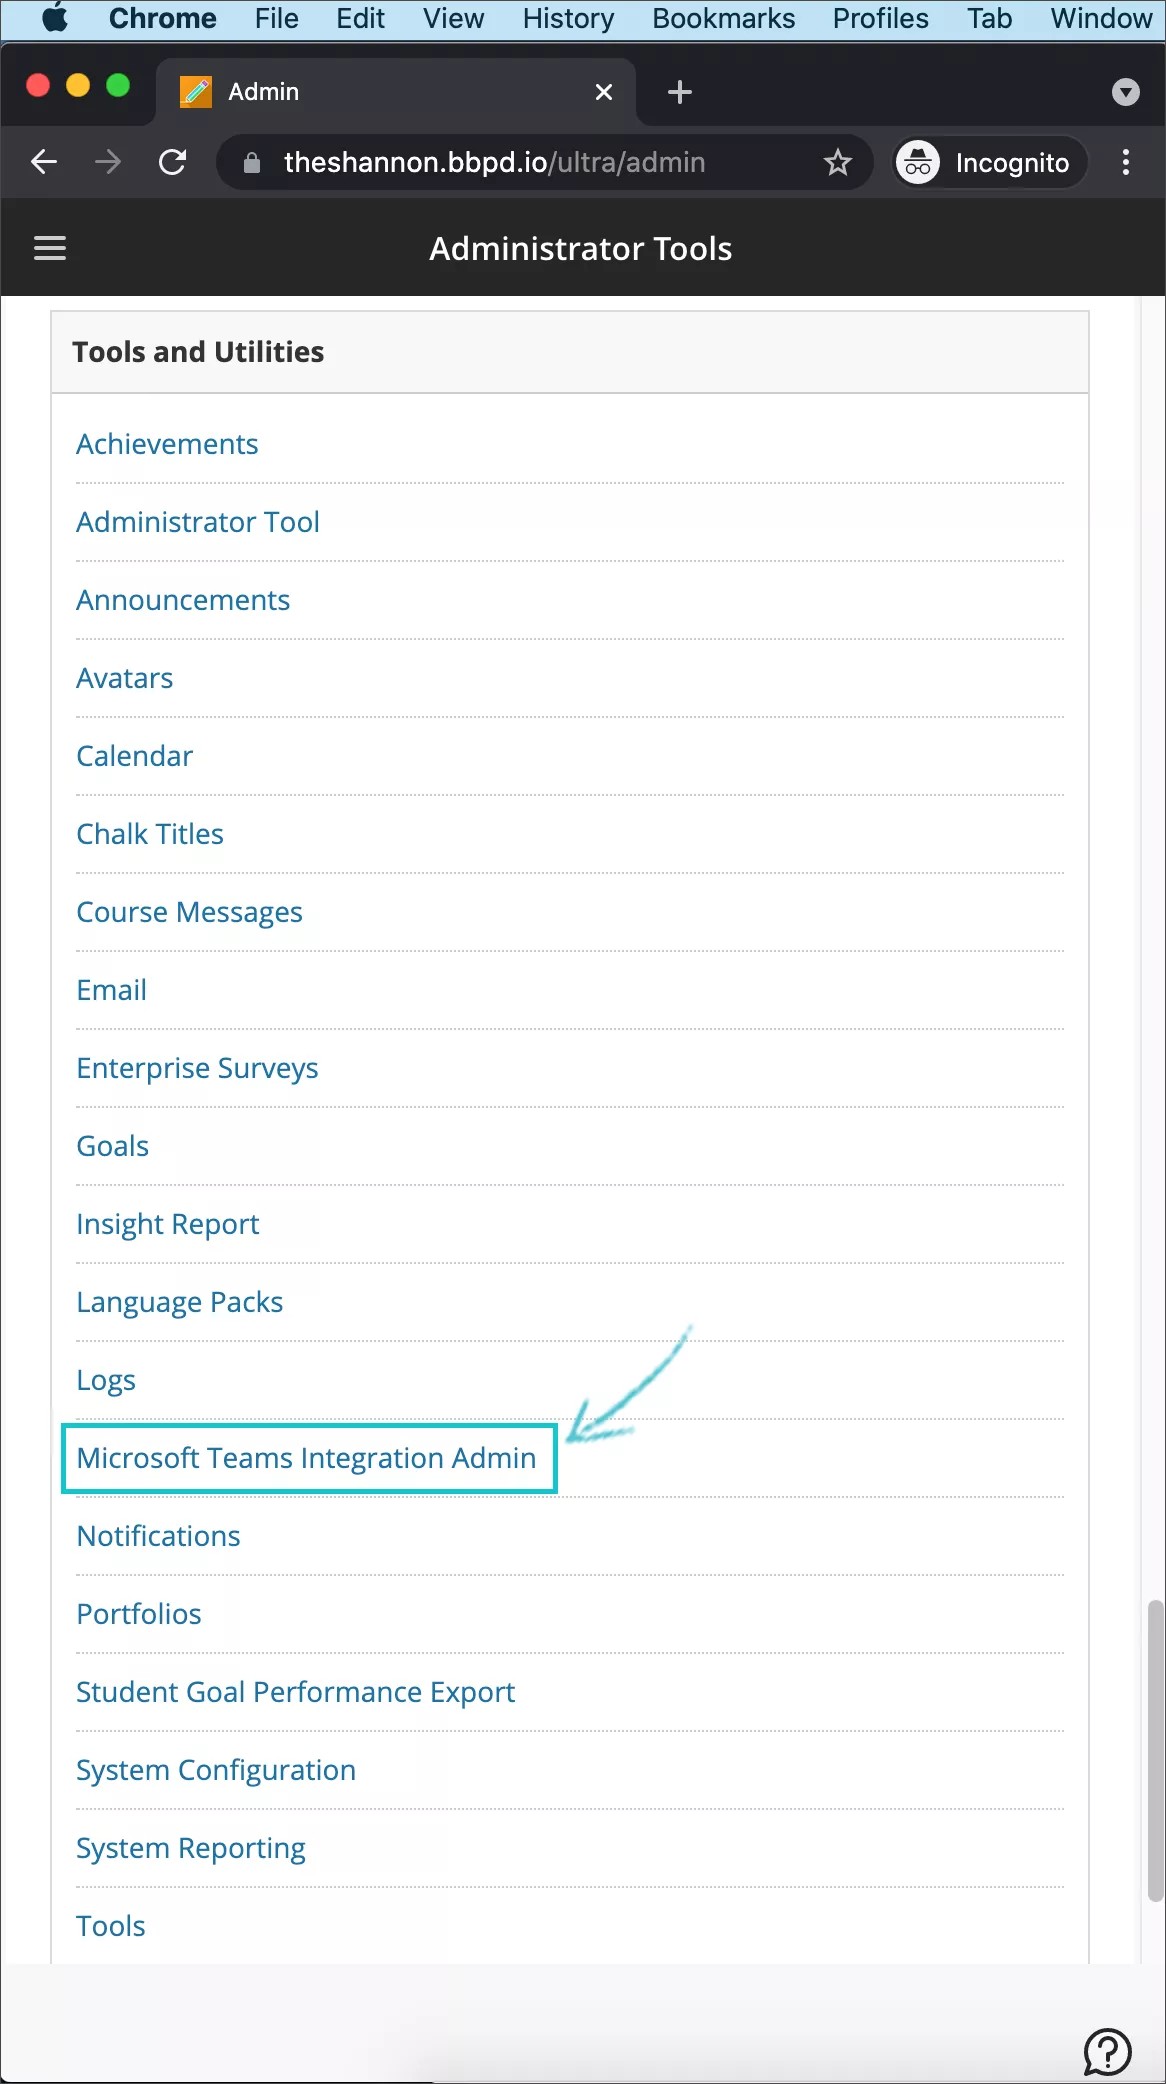
- From the Administrator Panel, navigate to Tools and Utilities and select Microsoft Teams Integration Admin.
- Select Enable Microsoft Teams.
- Add your Microsoft Tenant ID into the available text field.
- If the app has pre-consent, it will show a small checkmark. If the checkmark appears select Submit.
- If consent hasn’t been approved, follow the steps described to Generate the URL for consent and send it to the M365 Global Admin for approval.
- Once you have confirmation of approval, select the Retry button to confirm.
- Once confirmed, select Submit.
Requirements
The Microsoft Teams classes integration is available for Ultra Course View courses only. Your institution needs to complete these requirements to use it:
- Have Blackboard Learn SaaS with Ultra Base Navigation enabled
- Enable LTI for use in courses: Go to the Administrator Panel > LTI Tool Providers > Manage Global Properties. Then, select LTI Enabled in Courses, and optionally, select Enabled in Organizations. Select Submit.
- Must have LTI configured
- Add Blackboard Learn Teams Classes LTI Integration
- Add Microsoft Teams classes LTI 1.3 Tool
- Add the REST API Tool and Cross-Origin Resource Sharing
- Configure and approve Microsoft Teams classes Integration
Setting up the REST application and Cross Origin Resource Sharing
Alongside setting up the LTI integrations, the Learn admin will also need to configure the REST Application and also the Cross Origin Resource Sharing configuration.
Add the REST API tool
- On the Administrator Panel, navigate to Integrations and select Rest API Integrations.
- Select Create Integration.
- In the Application ID field, type or copy and paste this ID: f1561daa-1b21-4693-ba90-6c55f1a0eb41
- Type a user for this integration. This user will be the one with home API access from which the application is associated.
- Select Submit.
Add the Cross-Origin Resource Sharing
- From the Administrator Panel, navigate to Integrations and select Cross-origin Resource Sharing.
- Select Create Configuration.
- In the Origin field, type of copy and paste this URL: https://bb-ms-teams-ultra-ext.api.blackboard.com
- In the Allowed Headers field, type Authorization.
- Set Available to Yes.
- Select Submit.
Enabling class Teams in Blackboard Learn
Once you have enabled the LTI tools, your next step will be to set up the Microsoft Class Teams integration from your own Microsoft Office 365 tenant. You can do this by following these steps:
Learn Admin
- On the Learn Admin screen, under Tools and Utilities select Microsoft Teams Integration Admin.
- Select the checkbox on Enable Microsoft Teams and insert your tenant ID as referenced in the precious explained Microsoft O365 Admin section.
Please note that you won’t be able to save the settings until the application has been approved by the O365 admin. Refer to the previous Microsoft O365 Admin section.
- Select Submit and save the settings to enable Teams globally for all your Learn Ultra courses, once the global O365 admin has approved the Blackboard Teams application in your Microsoft tenant.
Institutional Email and why it is useful
A separate Help section on changing or using the institutional email, which defaults to the person email for most SIS formats, shows you how you can change it to your own fields as necessary.
The Microsoft Teams integration relies on the institutional email to map to the AAD UPN. Thus, it requires to be set for every user to synchronize. If it isn't set, then the user may not appear in the corresponding team and errors can occur.