Set the defaults for your organization's delivery needs.
With the Delivery Options feature, you can set the default delivery methods for your district or school for messages. You can also set the RSS feeds to post messages to third-party websites, and determine when messages will start being sent. You will also be able to set the caller ID for phone messages sent by your district or school, and determine when teacher messages will be sent.
Set organization delivery options for messages
- From the Blackboard Communications HQ interface menu, select Settings > Organization Config.
- Select the district or school to update from the Organization Name.
- Select Delivery Options from the Settings area.
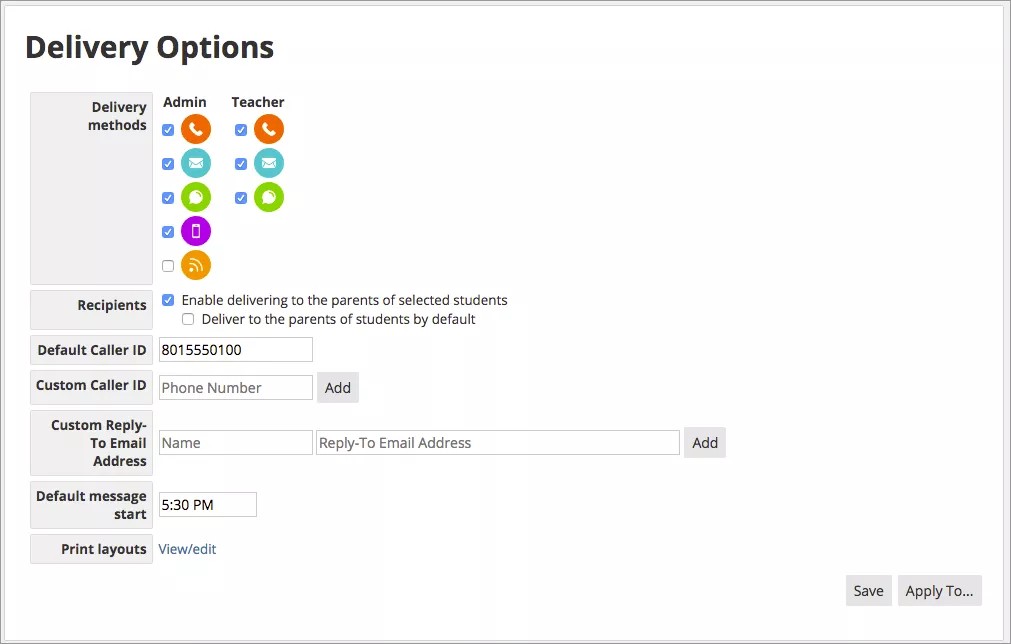
- Enable your organization's delivery methods for messages - Phone, Email, SMS/Text, Blackboard Mobile Communications App, or an RSS feed.
- Enable the delivery methods available to teachers in the Teacher Communications tool - Phone, Email, and/or SMS/Text.
- For an RSS feed, set the widget information:
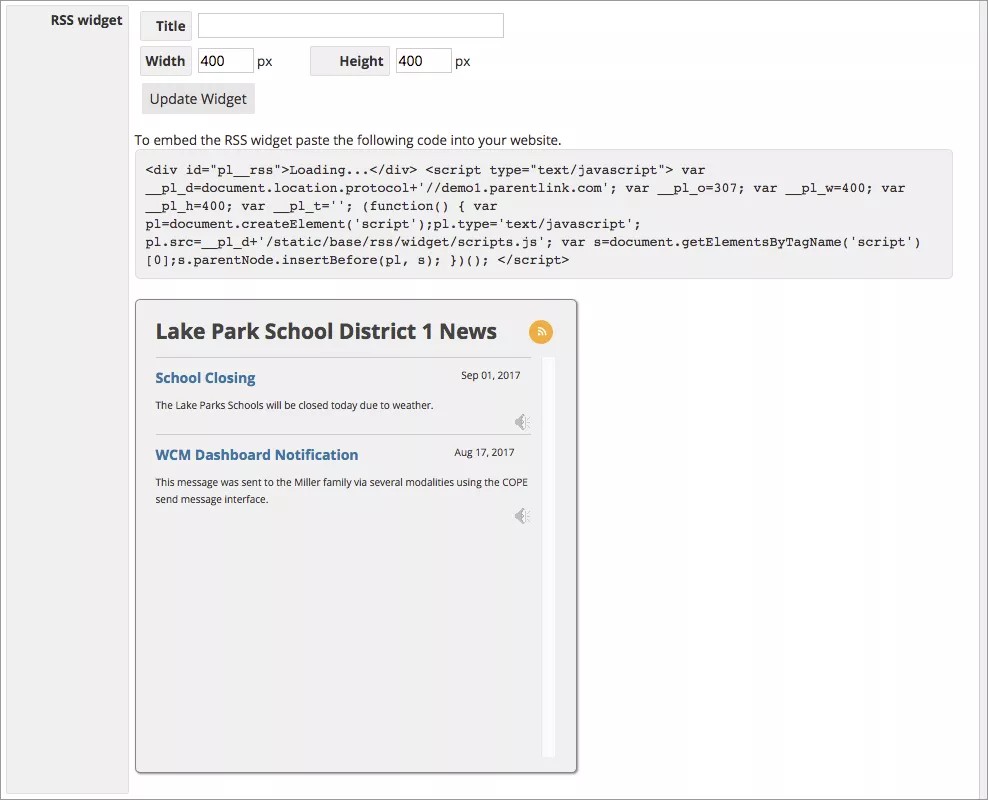
- Type the Title for the widget as it is to appear on your organization's website.
- Set the Width and the Height of the widget as it is to appear on your organization's website.
- Select Update widget.
- Copy the code to paste into your website.
- Enable the preferences for parent Recipients.
- Select Enable delivering to the parents of selected students to decide whether or not to include parents for a specific message.
- Select Deliver to the parents of students by default to include parents on all students message by default.
- Set the default and custom phone numbers and emails for sent messages:
- Type the Default Caller ID to appear on phone or text messages sent.
- Set any Custom Caller ID phone number or Custom Reply-To Email Address you need. You can setup and use several custom caller IDs for phone messages, and several reply-to-email addresses and sender names for email messages. When your district or school wants certain message replies to be sent to a specific group of staff members, you can setup and use the response phone numbers or email addresses.
Check it out!
- Set the optimal message start time in the Default Message Schedule box. Non-emergency messages will be sent at this time.
- If sending paper-based messages, set the paper's Print Layouts.
- Select Save when finished.
Update print layouts for hard copy messages
You can set the size and layout for printed messages.
- From the Delivery Options page, select View/Edit from the Print Layouts section.
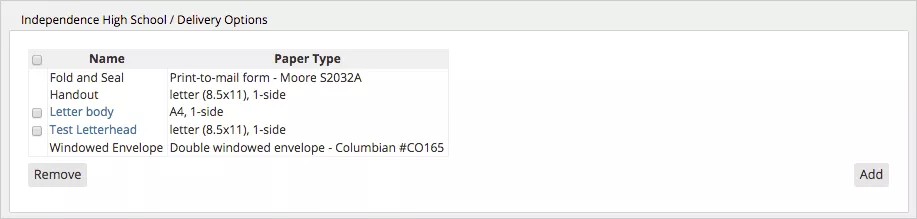
- To create a new layout, select Add.
- Each layout requires a name and a layout type for the paper. The preview appears for each of the layout types available.
- Select Save when finished.