Time to shine!
You've finished the initial configuration fo your app, now what? You may want to add some additional district-specific information and content. Through the Blackboard app management system, you can add additional content with ease. While you can do a little or a lot with your customization, we've shared five easy tricks to give your app your own look and feel.
Review starter content
We recommend that you verify the starter level content we pulled in is all correct. The starter level content that we've populated for you includes publicly visible sources, like social media, RSS feeds, sports pages, and online calendars. Review the numbers on the Mobile App Configuration page to ensure our team has found all your publicly visible sources, called Feeds. If you see we've missed some items, feel free to add them in. Think we've missed too many? Contact your implementations project manager and they'll have the app configuration team recheck your data.
The Mobile App Configuration page shows you the list of your schools and orgs and which content we have connected for each school. Access your page in Settings > App Configuration
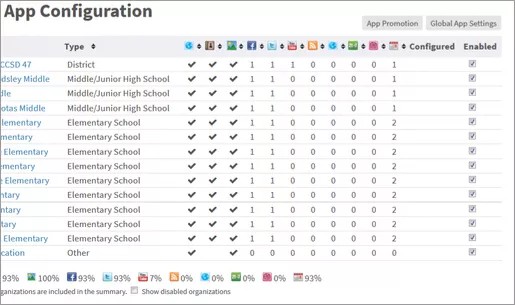
Make sure all your schools have some feeds associated with their settings. Since the app allows parents and community members to follow certain schools, all schools should have feed.
If your district uses Blackboard Web Community Manager (WCM), make sure your WCM Apps are connected to the app so the data is shared between the two products.
Add custom icons to your app
The Blackboard app comes with built-in modules that display the feeds and calendar information. In addition, you can add icons that link to websites.
Settings > App Configuration > Global App Settings > Icon Order
Rearrange your icons
Rearrange the icons into a different order by selecting the icon you want to move and dragging it to the new location. To hide icons from view in the app, select the icon you want hidden and drag it to Drag unwanted icons here.
Rename an icon and change the image
Select the icon you wish to edit. Type the icon name and select a new image to use for the icon.
Add a custom link to the app
You can display information from a webpage inside the app, like a policy page or information on transportation, by adding an additional icon in the app that links to the page. Navigate to Settings > App Configuration > Global App Settings > Icon Order > New Link Icon. Type a title for the link and the URL address, choose an icon, and select Save. You can choose if you want to require a login to access the link and you can also test the link directly from this wizard.
Please note that with great power comes great responsibility; adding too many custom icons to your app can cause your app to look cluttered and overloaded with unnecessary icons. We recommend adding no more than 10 custom links. Some popular suggestions for custom icons include
- Summer programs
- Back to school information
- Supply lists
- Transportation information
- Food service information
- Special announcements, like holidays or upcoming events
Add resource items
The Blackboard app allows you to add web links and PDFs in an organized folder structure. These resources are added at the individual organization level.
Settings > App Configuration > (select the school you want to configure) > Resources
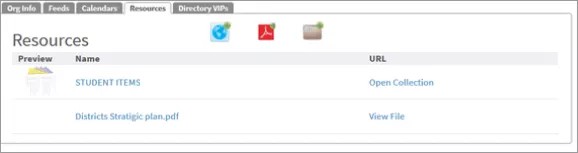
You can add a webpage, a PDF document, or a folder, called collections, where you can organize your web links and pdfs. For example, creating a collection named Parents allows you to add links to webpages and documents that are specific to parents. You'll need to repeat this process at each school.
More general information should be added at the district level. We recommend adding in the following resources
- Bell schedules
- Forms, like permission slips, athletic waivers, health documents
- Student handbook
- Google docs
- Safety policies
- Employment information
- Community information
Add additional directory contact information
An important feature of the Blackboard app is the directory, which displays a list of your schools and their contact information. By default, the Blackboard mobile app configuration team adds the School Name, Logo, Phone, Address, and Website, as long as this information is available on your website. You can add additional information to the directory for each school by navigating to Settings > App Configuration > (select the school you want to configure) > Org Info. Select an icon to add additional information.
When adding additional directory information, don't try and recreate your entire school directory. Focus on important phone numbers that your parents and community members need fast access to.
Change icon image
The icon images in the Blackboard app are customizable. You can select an image from our library or upload your own. Uploading your own image adds an additional layer of customization to your app and helps incorporate your brand.
Settings > App Configuration > Global App Settings
Select any icon to edit the image. Select the current icon to choose an icon from our icon library or select Custom Icon to upload your own image.
The icon is made of two layers. The first layer is 130 x 130 pixels and is transparent. The second layer is the actual image and is 106 x 106 pixels. Since it's two layers, save it as a PNG file. When uploading or creating your own image for an icon, make sure to use these dimensions.
Send a welcome message
The main purpose of the Mobile Communications App is that it is a communications tool. The notification button is empty when parents and community members download the app. We recommend sending a welcome or thank-you message to the app prior to going live so the notifications button contains content. You can welcome users to your app or thank them for downloading the app. You can also provide information on how best to use the app.
Messages > Create message
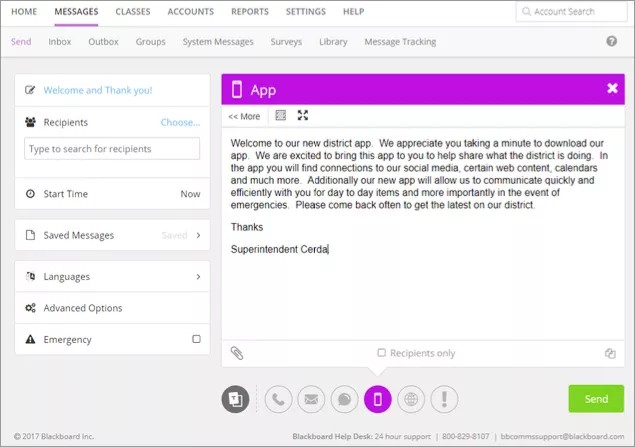
Select the app icon as the delivery method to send the welcome message to the app.