Community Editing
Community Editing
Community Editing allows selected registered users to add content to that app from the end user website. Any content registered users add, is in the format of the app. For example, content added to a Link Library App is a link. Content added to an Alumni Directory is an alumnus post.
All registered user content must be approved before it appears.
Turn community editing on
- Find the app you want to allow the community to edit.
- Select Options and select Social Settings.
- Select Community Editing.
- Select Assign User or Assign Group.
- Select the groups or users you want to assign.
- Type all or part of the group or user name.
- Select Search.
- Select the group or user you want.
- Repeat until you assign all groups or users.
- Select Add.
- Select Save.
Unselect Community Editing any time to turn it off.
Moderate community editing
- Find the workspace with community editing.
- Select Tools and Approve Community Editing.
- View a post.
- Select Approve or Decline.
- Select I'm Done.
Commenting
Commenting allows visitors to add their comments about your app. Visitors can also reply to comments left by other visitors and reply to comments.
If a visitor posts a comment and is not signed in, the name associated with the post is Anonymous. If a visitor posts a comment and is signed into your website, the name and email address of the visitor is pulled from the visitor’s user account. However, if you select the Allow visitors to change names and email addresses check box, visitors who are signed in to your website may modify their posting name and email address.
The email address associated with a post never displays on the end-user website.
Turn commenting on
- Find the app you want to allow visitors to comment on.
- Select Options and select Social Settings.
- Select Commenting.
- Optionally select these options.
- Require Approval (Recommended): You must approve all visitor comments before they display on your website.
- Allow visitors to change names and email addresses: Visitors who are signed in to your website change their display name and email address.
- Select Save.
Select Commenting Rights to limit who can comment on the app.
Manage Visitor Comments
- Navigate to Site Manager.
- Hover over the comments under Pending Comments.
- Select Approve to approve the comment and display it on your page. Select Review to review the comment and view the Author Name, Author Email, Date/Time, and the Comment. You can approve the comment in this window. Select Save when finished. Select Decline to remove the comment.
To remove approved comments, select Approved from Approve Visitor Comments. Find the comment you want to remove and select Unapprove. Select I'm Done.
Approve all comments
You can approve all comments for your page in one area.
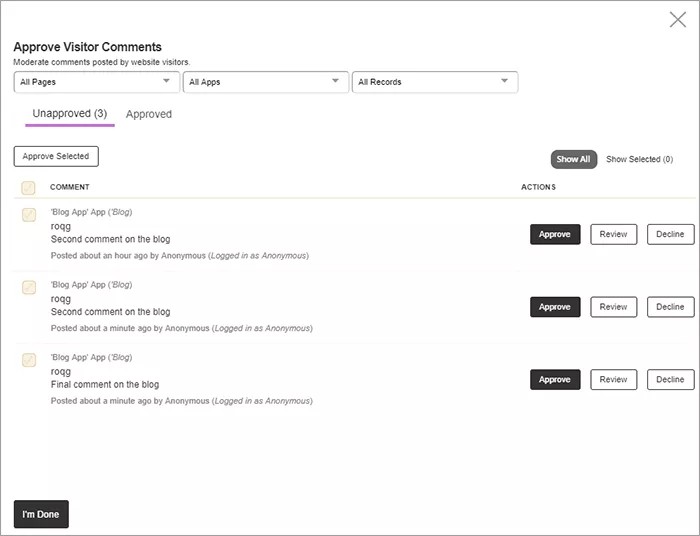
- Select All Comments.
- Select your All Pages, All Apps, and All Records options.
- Select each comment to approve and select Approve Selected.
- Optionally, Select Approve, Review, or Decline for each individual comment.
- Select I'm Done.