The Session Administration System (SAS) provides ASP clients with the ability to register users, create and schedule sessions, invite participants, access recorded sessions and the ability to generate usage reports. There are two ways to create a meeting using the SAS. This Quick Reference Guide show you how to use the quick and easy "Schedule a Meeting" feature. The second method is available under Utilities > Session Management > Meetings.
Download the PDF guide:
Schedule a Meeting
- Login to the SAS.
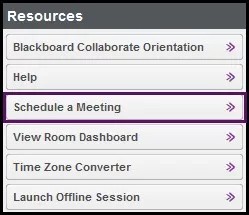
- In the Resources panel, click Schedule a Meeting. Note: you must be logged in as an Administrator or Supervisor to see this option.
- Complete the Basic Fields information.
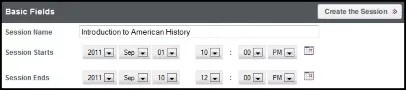
- Enter a Session Name
- Enter the Session Start and End Date/Time
- Click Create the Session
- Set the correct time zone by selecting Advanced Fields

- Select the correct Time Zone. This will default to the time selected in the Profile tab.
- Click Default Fields and set the desired session settings. Click Save as Defaults if you want the SAS to remember the settings as your defaults and apply them the next time you create a meeting.
Complete the fields:
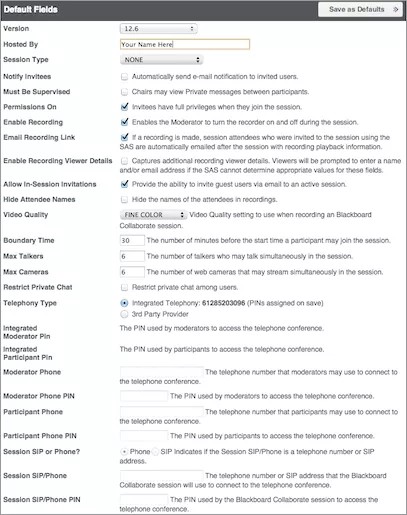
- Select the version of web conferencing desired. Note you may only see one version.
- Hosted By will contain the name of the person who is creating the meeting. This is an administrative function and you may leave the default.
- Session Type is an optional field and will be populated with NONE. If your organization is using this field, select the appropriate choice from the drop-down list.
- Check Notify Invitees to automatically notify all invitees, who are invited through the SAS, about the session.
- Check Must Be Supervised if you want the Moderator to view private messages sent between participants.
- Check Permissions On if you want participants to enter the session with privileges such as audio, video, chat and whiteboard.
- Check Enable Recording if you want to give the Moderator the ability to start and pause the recording during the session.
- To automatically email the recording link to invited participants, check Email Recording Link. Note that only participants who are invited through the SAS will receive the email from the server. Optionally, the moderator will receive the direct link to the recording in the email notification. Then using their own email client, the moderator can distribute the recording link. Enable Recording Viewer Details allows viewers to be prompted to enter a name and /or email address if the SAS cannot determine appropriate values for these fields (i.e. when recording link is accessed after logging into the SAS).
- To invite someone to your session from within the session, check Allow In-Session Invitations. The In-Session Invitation functionality will be enabled for the web conferencing session.
- Hide Attendee Names hides the names of all attendees in the recording.
- If using live video and recording the session, select the quality desired in the Video Quality field.
- Enter a Boundary Time. The boundary time determines how early participants can enter the session.
- Enter desired Max Talkers. Enter a number between 1 and 6. From within the session, the moderator can adjust this number.
- Enter desired Max Cameras. Enter a number between 1 and 6. From within the session, the moderator can adjust this number.
- Restrict Private Chat prevents participants from starting a private chat with another participant.
- Telephony Type: To use the provided integrated telephony, select "Integrated Telephony" and a phone number and pins will automatically be provided for your session when the session is saved. Long distance charges may apply. To use the 3rd Party Provider you will need to supply your own teleconference number and pins in the following fields:
- Enter the Moderator Phone number, which is the number the moderator of the teleconference, may use to connect.
- Enter the Moderator Phone PIN number.
- Enter the Participant Phone number which is the number anyone wishing to access the audio portion of the session will dial into.
- Enter the Participant Phone PIN number.
- Select Session SIP or Phone. Some teleconference providers will use a Session Initiation Protocol (SIP) instead of a phone number. Check with your Blackboard Collaborate administrator is you are unsure of which one to select.
- Enter the Session SIP/Phone PIN. If using a Phone PIN, it is recommended that you enter the Moderator PIN and have the session dial into the teleconference as the moderator of the phone conference. The moderator of the session will use VoIP. If the moderator of the session wants to use the teleconference, then enter the Participant PIN.
- To preload content into the session click Content Preloads.
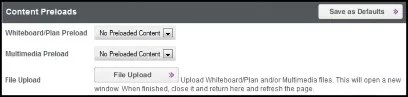
- To add a previously uploaded Whiteboard or Plan file, click on the drop-down arrow in the Whiteboard/Plan Preload field.
- To add a previously uploaded multimedia file, click on the drop-down arrow in the Multimedia Preload field.
- To upload a Whiteboard, Plan or Multimedia file so that it is available to be preloaded into a session, click the File Upload button.
- Optional Step. Click Save as Defaults. This will add the selected preloaded content to each meeting you create.
- To invite others to your meeting click Invitees.
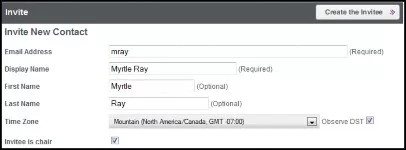
New Invitee
By default, when you create the meeting, you will be the moderator of the meeting and sent an invitation. This area allows you to invite users directly from the SAS either as moderators or participants. Create a new invitee/contact or choose from an existing contact.
To create a new invitee:
- Email Address: this field is required. Enter the email address for the invitee.
- Display Name: this field is required. Enter the name exactly as you wish for it to appear in the web conferencing session.
- First Name and Last Name: optional.
- Time Zone: It is important to enter the participant's time zone so that the email notification correctly identifies the session start time.
- Invitee is chair: Select this box if you would like the invitee to receive a Moderator link.
- After completing the required information, click Create the Invitee. The invitee will be added to the session, added to your Contacts and will receive an email notification for the session.
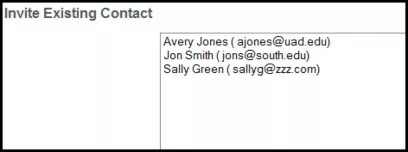
Existing Contact
All existing contacts will appear in the Invite Existing Contact list. Contacts can be added following the process described above or from Utilities > Contacts > New.
Click the Create the Session button at the top of the Basic Fields screen. The session will be created and added to My Schedule. The SAS will generate the Chair, Guest, and Recording URLs. The Moderator and Participant email notifications will be sent to the invitee if Notify Invitees was selected. The Guest link will be displayed in the SAS and will also be included in the email to the Chair and Owner of the Meeting.