Before you can begin creating sessions, you must configure the Building Block.
- Open the settings page.

- Click Edit to open the credentials dialog.

Fields marked with a red asterisk (*) are mandatory.
- Enter the Scheduling Server Address.
The building block requires a supported Blackboard Collaborate web conferencing scheduling server to create sessions. The scheduling server has a defined server address, user name and password for the service, which you need to provide to the building block to ensure that the Blackboard Collaborate scheduling server is reachable from the Blackboard server. Blackboard sends the institution's contact the URL and credentials via an email.
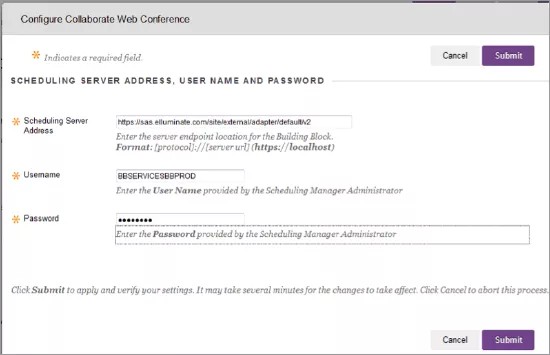
- Enter the User Name and Password of your account on the Blackboard Collaborate scheduling server.
- Repeat Steps 3 and 4 above for each institutional node you wish to configure separately. For more details on Institutional Nodes, refer to Institutional Hierarchy for more information.
- Click Submit to save the settings and test the connection.
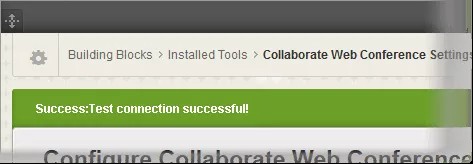
If the connection is successful, you will see a confirmation message similar to the following:
Institutional Hierarchy
Blackboard Collaborate makes use of the Institutional Hierarchy feature of Blackboard Learn 9.1, SP 11 or later.