Users Workspace
User accounts are created and managed in the Users Workspace or through integration services. Users are any visitor on your website who can sign in.
To access the UsersWorkspace, open Site Manager and expand USERS & GROUPS. Select Users.

View users
See all of your users from the Users tab. From here you can view and manage users on your site.
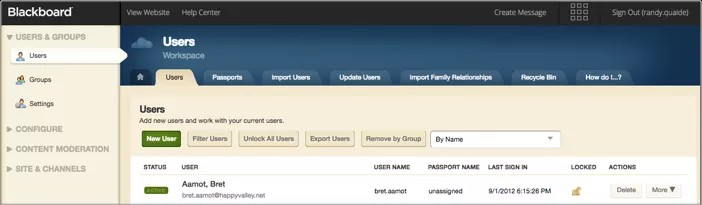
- Status: Users are active or inactive. By default, new user accounts are active. Select a user's status to change it. While a user’s status is inactive their account is disabled and they are prevented from signing in.
- User: Displays user last and first names. Select a user to edit the account. If available, you may also see an email or authentication integration method.
- User Name: Displays the user names for each user.
- Passport Name: Use passports to give users different administrative rights.
- Last Sign In: Displays the date and time a user last logged in.
- Locked: After five consecutive incorrect sign in attempts, a user’s account is locked. A locked account prevents a user from accessing the site or choosing the password reset option. When a user's account is considered locked, the padlock appears locked. There are three options to unlock a user account. Select Lock to unlock or lock an account.
- Actions: Manage user accounts. Depending on the account you can reset passwords and emulate users.
Edit Users
Some users may not be in your SIS, such as coaches, administrative personnel, and guidance counselors. You can update individual accounts manually.
Users created in the Users Workspace are not included in your SIS district updates. Changes to a user's email address, phone number, and other personal information is not added.
You can also update accounts using a .CSV file.
- From Site Manager, select USERS & GROUPS.
- Select Users.
- Find the user you want to edit and select their name.
- Make changes to the user account.
- Select Save.
Edit more than one user
If you have a Student Information System (SIS), use it to create and update user accounts. To learn more, see Universal Connector.
You can create an CSV file and update many user accounts all at once. If you want to create new user accounts, use Import Users instead.
- From Site Manager, expand USERS & GROUPS.
- Select Users.
- Select Update Users.
- Select Import.
- Browse and select your completed CSV file.
Only First Name, Last Name and User Name are required fields. You can add additional fields.
- Select Continue.
-
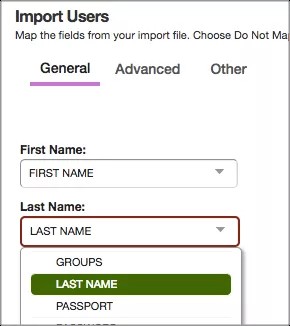
Under General, map the fields in the Site Manager to those in your import file. Select the name of your field from the Site Manager menus. For example, in the First Name menu select your first name field.
- Optionally, map other fields under Advanced and Other.
- Select Import.
Delete users
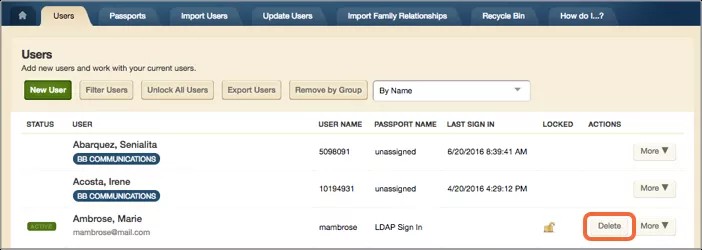
Select Delete by a user on the Users workspace to delete the account. Deleted accounts are not permanently deleted. They are sent to the Recycle Bin, where they can be restored or permanently deleted.
If you want to permanently delete the account, select Recycle Bin, find the user account, and select Delete. Accounts deleted from the Recycle Bin can't be restored.
When you permanently delete a user account assigned as a director (Site, Subsite, Channel) or as an editor (Homepage, Section), the user is also removed from Directors & Viewers and Editors & Viewers.
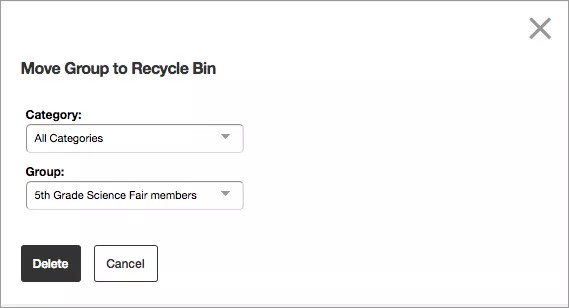
You can also remove all users of a certain group on your site. Select Remove by Group, select your Category and your Group and select Delete.
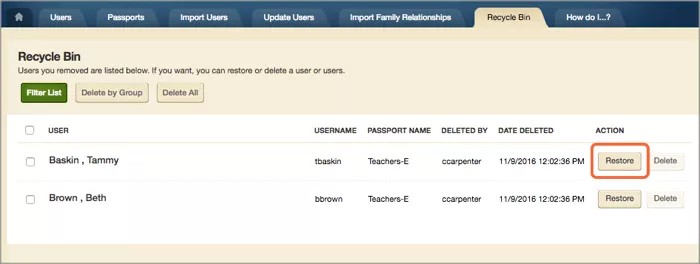
Restore deleted users
When user accounts are deleted they are sent to the Recycle Bin. They are not permanently deleted. You can still restore them.
Accounts deleted from the Recycle Bin can't be restored.
From the Users workspace, select Recycle Bin, find the user account, and select Restore.
Assign privileges
Use passports, privileges, and roles to set what your users can and can't do.
Create parent-student relationships
You connect parents and students by setting up family relationships. These relationships can be created using Import Family Relationships or by setting up relationships individually.
Create individual relationships
To add create a family relationship, add student accounts to parent accounts.
- From Site Manager, select USERS & GROUPS.
- Select Users.
- Find the parent user you want to edit and select their name.
- Select Family Relationships.
- Select Add a Student.
- Type all or part of a student’s first, last or user name and select Search.
- Find the student and select Select. Repeat until all students are selected.
- Select Add.
- Select Save.
Import family relationships
Create an import CSV file and import family relationships. The CSV file should consist of two columns: the parent identifier and the student identifier.
- From Site Manager, expand USERS & GROUPS.
- Select Users.
- Select Import Family Relationships.
- Select Import.
- Browse and locate your CSV file.
- Select Continue.
- Select User Codes or User Names. Identify the type of data used in the CSV file data. Did you use user codes or names?
- Map the fields in your import file. For example, in the Parent Identifier menu, select your parent field.
- Select Import.
- From the Import Family Relationships screen, you can view details, rollback the import, and view exceptions.
Export user account information
Need to look at your user account information offline? Export it.
User account information exports as a CSV file.
- From Site Manager expand USERS & GROUPS.
- SelectUsers.
- SelectExport Users.