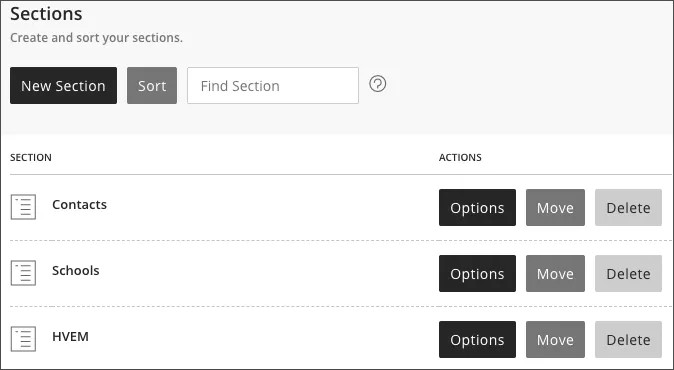
Each Channel typically contains one more sections. Sections represent the second highest level of content organization on the site. Sections are created by site directors, subsite directors, or channel directors.
Add sections
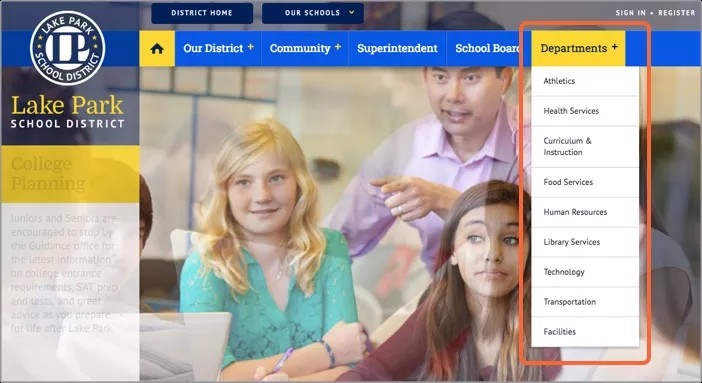
Adding multiple sections to a channel creates drop-down navigation for a channel on the website. Many districts and schools use sections to create their department, club, activity, sport, or teacher content and assign appropriate users editing rights to their section.
- From Site Manager, find the channel you want to add a section to.
- Select New Section.
- Type a Section Name.
- Type a Menu Name. The menu name appears in the navigation on the end-user website.
- Select a Section Configuration from the menu.
- Optionally, add contact information.
- Select Save.
Sort, edit, move, and delete sections
Select Options beside a section name to edit it and delete it. Select Sort to drag-and-drop the sections in the order you want. Select Move beside a section name to move it to another site. Select Delete beside a section name to delete it.
Use a friendly web address
Use a web address that is easy to read and remember.
- In Site Manager, find the section you want to edit.
- Select Options.
- Select Advanced.
- Type your Friendly Web Address without spaces. For example, Basketball.
- Select Save.
Hide or show a section
- In Site Manager, find the section you want to edit.
- Select Options.
- Select Advanced.
- Select the Hide Section in Channel Navigation check box to hide it. Unselect the check box to show it.
- Select Save.
Map sections to files, pages, and websites
- In Site Manager, find the section you want to edit.
- Select Options.
- Select Advanced.
- Paste the file or website address or browse for a page in the Map Section to Web Address field.
- Select Save.