Use the Template Library in the Templates workspace to download and preview any templates that are available for licensing. After you download, preview, and license a template, apply it to your sites.
From the Templates workspace you can set template defaults and sharing rights for a template. You can delete licensed subscription templates from Licensed Templates and remove templates from Available Templates. You can also access the workspace Files & Folders where you upload images for school logos and global icons.
More on showing school logos and global icons
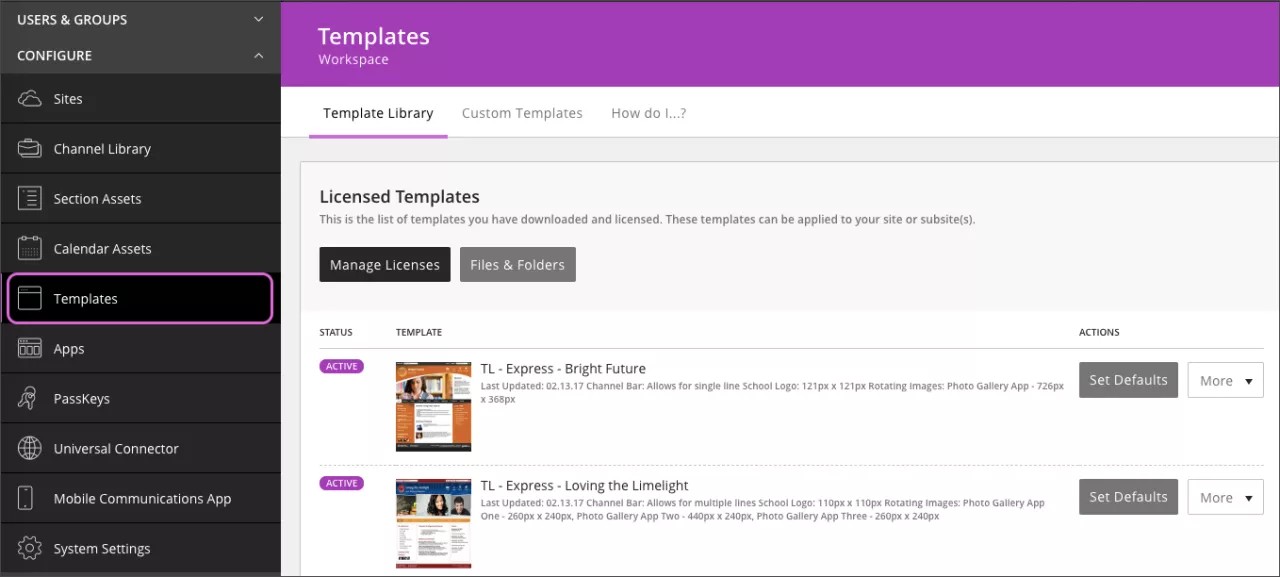
- From Site Manager select CONFIGURE.
- Select Templates.
Available templates
View templates you can download and license.
Templates with green flags are available for free with your current subscription. Templates with yellow flags are not included in your current subscription and require an additional license.
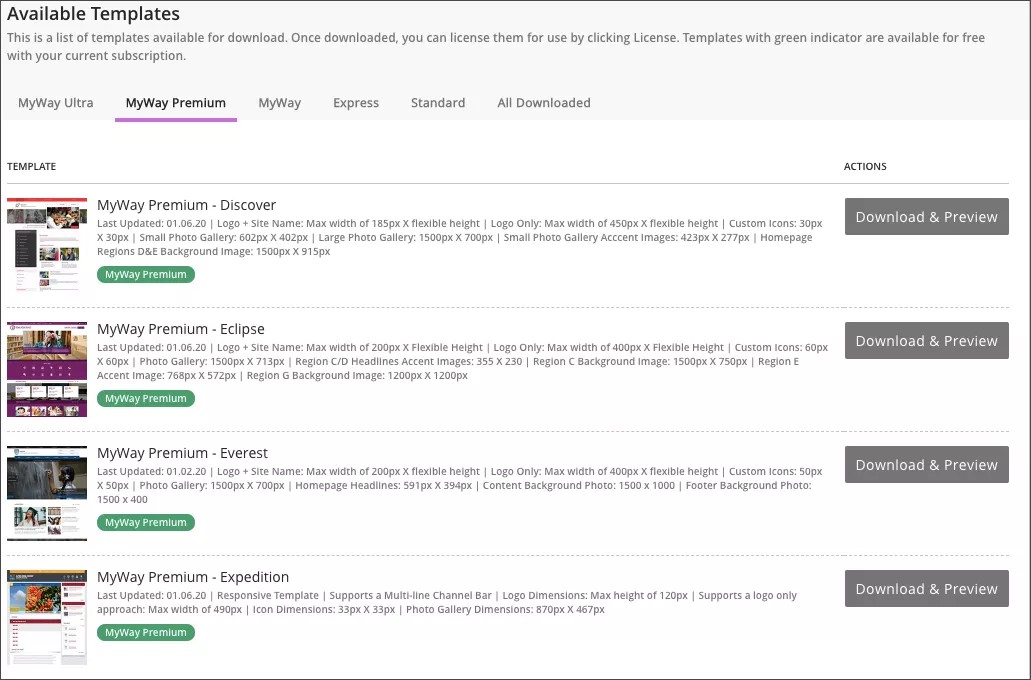
Download and preview available templates
You can download and preview any of the available templates, green and yellow. If you want to use the yellow templates you must get a license.
- From the Templates workspace scroll down the page to view the list of available templates.
- Find a template you want to preview.
- Select Download & Preview.
If you want to preview a template you already downloaded, select Preview.
After downloading, the template displays in Template Configuration. The preview you see uses content from your district site and displays it in real time.
If you change the settings of a template you are previewing, you must remove the template and download and preview it again to restore the original template settings.
License a template
After you download and preview a template, you need to license it to use it.
You can license templates that are part of your subscription or you can license individual templates that are not part of your subscription.
- If the template is part of your subscription, it moves to Licensed Templates from Available Templates.
- If the template isn't pat of your subscription, but you have an individual template license, a dialog displays asking you if you are sure that you want to purchase the template. Select Yes to confirm.
Remember, once you license a template using an Individual template license, you cannot undo it. If you license a template by mistake, contact Blackboard Support.
- If the template you are trying to license isn't part of your subscription and you have no Individual template license, you are told how to get one.
License templates from Manage Licenses.
- From the Templates workspace select Manage Licenses.
- Find the license and select Choose Template.
- Select the template you want to license.
- Select Choose.
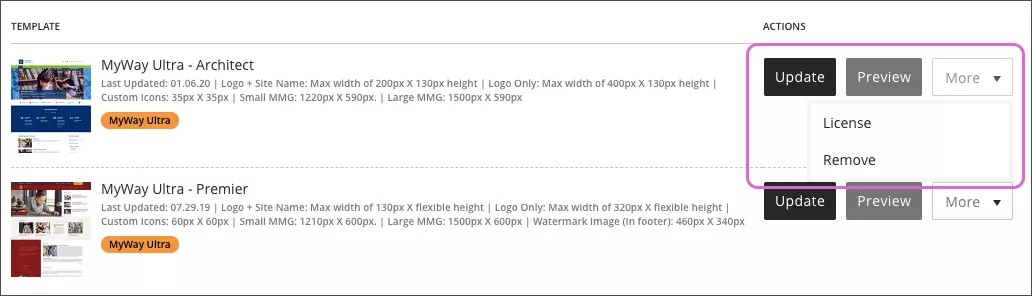
License templates from Available Templates.
- From the Templates workspace scroll down the page to view the list of available templates.
- Under Available Templates select All Downloaded.
- Find the template you want to license.
- Select More.
- Select License.
Change the status of a licensed template
After you license a template, it is inactive by default. You need to make it active to apply it to your site.
- From the Templates workspace view the list of licensed templates.
- Under Licensed Templates find the template you want to make active or inactive.
- Select ACTIVE or INACTIVE to change the status.
The current status appears. Select it to change it. For example, select INACTIVE to make the template active.
Set template defaults
You can decide the default settings for the templates you want to use.
For example, you decide you want to the district home button to show on every site. You set it to show in your template. Any site that uses this template shows a district home button on their website.
- From the Templates workspace view the list of licensed templates.
- Under Licensed Templates find the template you want.
- Select Set Defaults.
- Make the changes you want in Template Configuration.
Update templates
When updates are made to your template code an Update button appears beside the template. Select it to update your template.
Updates are only made to the code. No changes are made to your content or appearance of your website.
- From the Templates workspace view the list of licensed templates.
- Under Licensed Templates find the template you want.
- Select Update.
Sharing rights
By default all site directors and subsite directors can apply all templates to their sites. You decide who else can apply the templates.
- From the Templates workspace view the list of licensed templates.
- Under Licensed Templates find the template you want.
- Select More.
- Select Sharing Rights.
- Select Assign Group or Assign User.
- Select the groups or users you want to assign.
- Type all or part of the group or user name.
- Select Search.
- Select the group or user you want.
- Repeat until you assign all groups or users.
- Select I'm Done.
After sharing rights are added, remove them by selecting More, Sharing Rights, and Remove beside the user or group you want to remove.
Delete licensed templates
You can delete licensed templates. You can only delete templates that are associated with your subscription level. You can't delete templates that you have individually licensed.
You can't delete a template used by a site.
- From the Templates workspace view the list of licensed templates.
- Under Licensed Templates find the template you want.
- Select More.
- Select Delete.
Upload custom logos and icons
Have a school logo or icons you want to use? Upload them in the Templates workspace Files & Folders. Upload any template files here. Any files you upload here can be accessed from the Template Library and Custom Templates tabs.
- From the Templates workspace select Files & Folders.
- Select Site Files.
- Upload icon images to the Icons folder and template images to the Images folder.
Use images with the PNG file extension for the best experience.
After the images are uploaded, you can choose from these custom images as well as default image sets when you are configuring a template with school logo and global icon options.