No matter how large...organize, manage, and monitor your virtual groups easily
On the Groups page, you can access all groups, groups sets, and all users. You can also perform these tasks:
- Import and export groups and group memberships
- Sort columns, perform bulk actions for deleting groups, and create Grade Center smart views for one or more groups
- Optionally, manage tool availability for all groups
View Options menu
Use the View Options menu to see different types of group information.
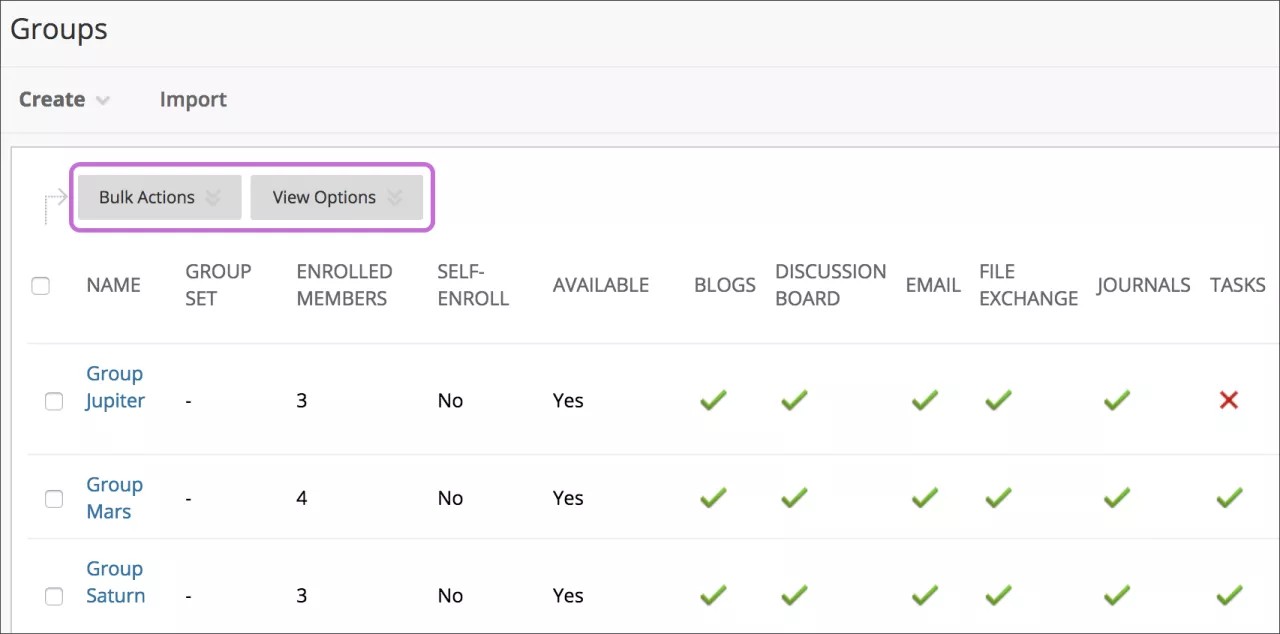
For example, you can choose to see which groups have access to certain tools. You can make tools available or unavailable for groups. Select the check mark in a tool's column to make it unavailable-an X appears. Select the X in a tool's column to make it available—a check mark appears.
Bulk Actions menu
In the Bulk Actions menu, you can create smart views in the Grade Center for each group. A smart view shows only the columns that match a set of criteria, and the view is saved for continued use. When the Grade Center includes a great number of students and columns, you can use smart views to quickly find data. You can also use bulk actions options to select multiple groups for deletion.
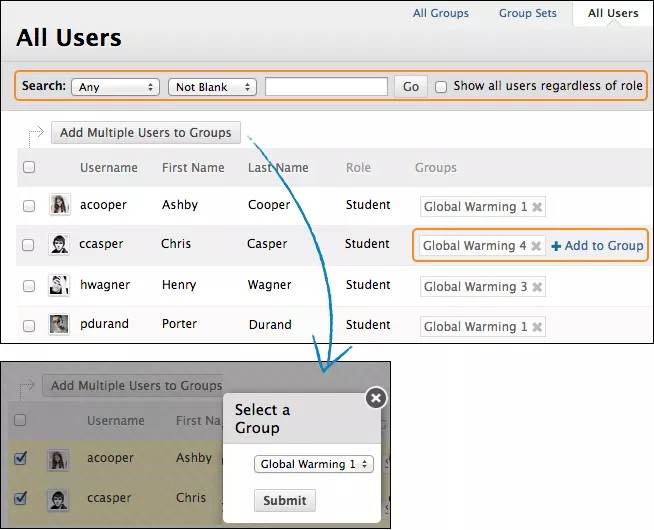
All Users page
On the All Users page, you can view which groups students belong to, search for users, add multiple users to a group, and delete users from groups.
Manage groups
On the Groups listing page, you can create groups as well as edit and manage them.
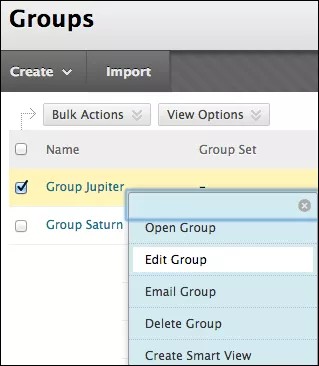
Each group's menu provides quick access to the group homepage and group email. You can also access the options to edit group properties, delete groups, and create smart views.
When you edit a group, you can add or remove members as well as change its name, availability, and tools.
You can allow students to create their own self-enroll groups. On the Groups page, select Group Settings and make your selections.
Delete a group
You can delete a group you no longer need.
You can retain any group-related grade columns that exist in the Grade Center such as gradable group blogs, journals, or wikis. On the Delete Confirmation page, don't select the check boxes for any columns that you need to preserve.
Group tools
On the group homepage, students can access the tools you added for them. Only you and the group members can access tools enabled for a group. However, group blogs and wikis appear to all course members when the tools are accessed on the course Tools page.
Available group tools
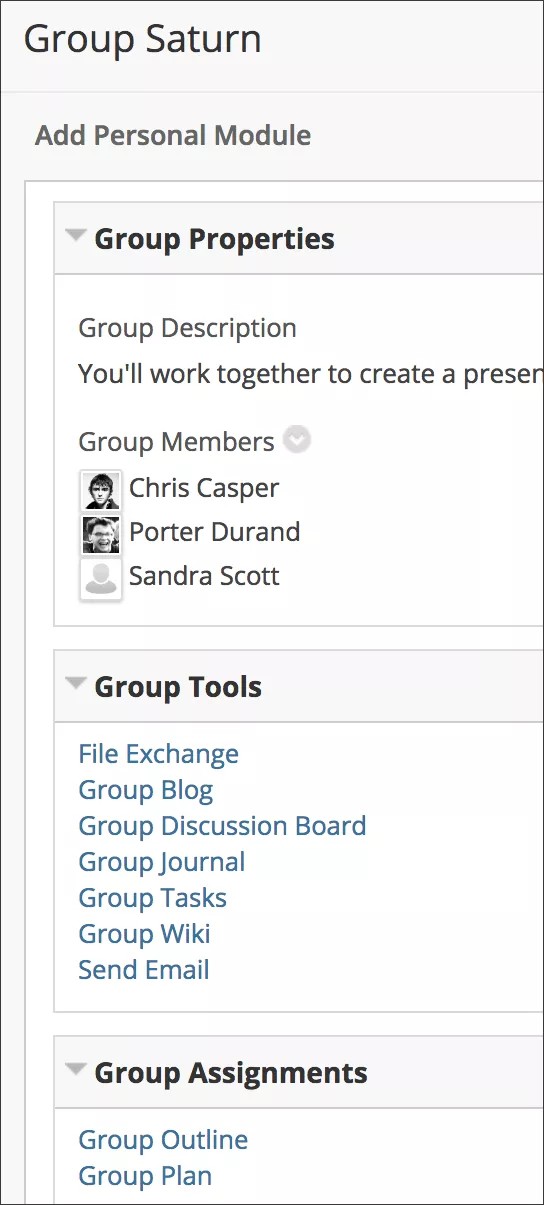
- Collaborate Ultra: You and members of a group can share content and use the whiteboard, as well as create recordings.
- Group Blog: Members of a group can add entries and comments to the group blog to share ideas. You can grade group blogs.
- Group Discussion Board: Members of a group can communicate as a group, as well as create and manage their own forums.
- Email: Use the group email tool for quick and efficient communication among group members.
- File Exchange: You and group members can use this tool to upload documents to the group area, and delete files, regardless of who added them. This tool is only available to groups.
- Group Journal: Members of a group can share their thoughts with each other and communicate with you. You can grade group journals.
- Group Tasks: Members of a group can define and separate the workload into tasks and distribute the list to the entire group. Each task has a status and a due date to help keep members on track. Group members can view the group assigned tasks in the group tasks tool or in the course tasks tool. You and other course members won't see tasks for groups they aren't enrolled in when viewing the course tasks tool.
- Group Wiki: Use group wikis to create a collaborative space for group members to view, contribute, and edit content. You can grade group wikis.
After a group blog, journal, or wiki is set to be graded, you can't reverse this setting.
Add a groups link to the course menu
You can add links to groups in your course so students can access their groups easily.
Each new course has a default groups link on the course menu. If you deleted the groups link, you can add the link again. You can also customize the name of the link.
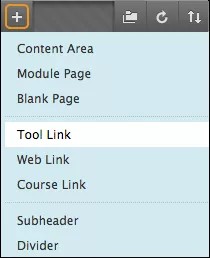
- Select the Add Menu Item icon above the course menu to access the menu.
- Select Tool Link and type a name.
- From the Type menu, select Groups.
- Select the Available to Users check box if you're ready for students to see it.
- Select Submit.
The new tool link appears at the bottom of the course menu. Press and drag the arrows icon to move the link into a new position. You can drag it to a new location or use the keyboard accessible reordering tool.
Add a group link in a course area
You can manually add links to individual groups and sign-up sheets in course areas, such as content areas and folders.
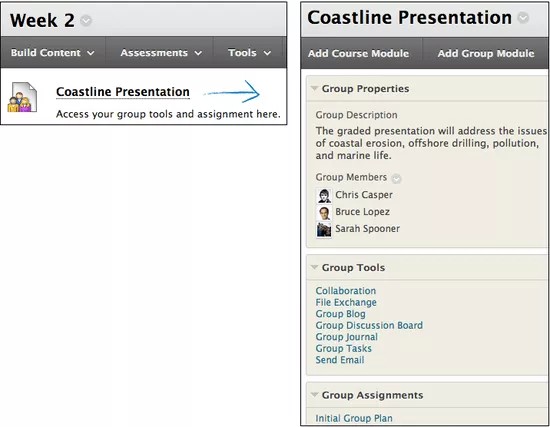
For example, you can set up a content area to include all the content and tools your students need for the week. After they read the weekly lecture and view the slide presentation, students can also access the groups tool to complete the group assignment. Students don't need to navigate anywhere else in your course to complete all of the required activities for the week.
When you add a link to a specific group in a content area, all students will see the link. Any students who aren't members of the group won't be able to access the group homepage.
To add a group link in a course area:
- Access the course area where you want to add a group link, such as the Week 2 content area.
- Select Tools > Groups.
- On the Create Link: Group page, select the type of link: groups page, to a group, or to a group set. If you want to link to a group or group set, select it from the list and select Next.
- On the next Create Link: Group page, type the Link Information to specify how it will appear in the content area. Select the options you need and select Submit.
- The link to the group page will appear in the content area.