This information applies only to the Original Course View. Your institution controls which tools are available.
You can create rules to apply color to the cells in the Grade Center, either by grade or status. Color in the Grade Center provides visual indicators to help you interpret information quickly. For example, you can use yellow to highlight graded items with failing scores so that students and columns that require attention are prominent.
Watch a video about color coding
The following narrated | unnarrated video provides a visual | visual and auditory representation of some of the information included on this page. For a detailed description of what is portrayed in the video, open the video on YouTube, navigate to More actions, and select Open transcript.
Video: Color Code the Grade Center explains how to create rules to apply color to the cells in the Grade Center.
Enable and apply color coding
- In the Grade Center, access the Manage menu and select Grading Color Codes.
- On the Grading Color Codes page, select the check box for Enable Grading Color Codes.

- In the Color Coding Options section, you can perform these tasks:
- For each Grading Status, select the down-pointing arrow icon in the Background Color column to access the Swatch Color box.
- In the Swatch Color box, select a color and select Apply to save it.
- In the Grade Ranges section, you can perform these tasks:
- Select Add Criteria to create a color rule.
- In the Criteria menu, select Between, More Than, or Less Than.
- Type a percentage in the box or boxes.
- For Background Color and Text, select the down-pointing arrow icon to access the Swatch Color box.
- Select a color and select Apply to save it.
- Select Add Criteria to create an additional Grade Ranges field. If you create a rule that contains some of the same information as another rule, the system generates a warning so that you can edit your criteria.
- Select Submit.
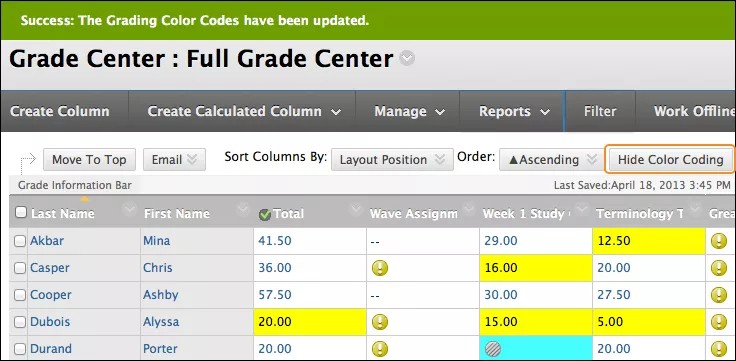
The Grade Center page appears with a success message. Colors based on your rules appear in the affected cells.
Manage grading color codes
You can choose to turn color coding on and off or edit the color rules you created. After you enable color coding, the Hide/Show Color Coding function appears in the Grade Center.
In any view of the Grade Center, select Hide Color Coding to remove all defined colors from the cells. The color rules are retained. Select Show Color Coding to reapply the defined color to the affected cells.
Edit grading color codes
You can edit the colors you chose or delete existing criteria. You can also create additional criteria.
- From the Manage menu, select Grading Color Codes.
- On the Grading Color Codes page, clear the check box for Enable Grading Color Codes to remove all defined color from the cells in the Grade Center. The color rules you created remain on the Grading Color Codes page and you can reapply them. When you disable color coding, no function for showing or hiding color coding appears in the Grade Center.
- Select a new color or select the Reset icon to remove a color rule.
- Edit existing Grade Ranges criteria. You can preview your color choices in the Indicator Preview column.
- Select Delete Criteria to remove existing criteria. The action is final. Select OK in the pop-up window to verify the deletion.
- Select Add Criteria to create an additional Grade Ranges field.
- Select Submit.