This information applies only to the Original experience. Your institution controls which tools are available.
With Course Files, you can rename, move, copy, overwrite, download, and perform a quick search for files and folders.
Rename, copy, and move files and folders
When you rename or move files and folders, the links to content in your course remain intact.
You can rename, copy, and move any file and any folder except the top-level course ID folder.

- In Course Files, open a file or folder's menu and select Copy or Move. To select multiple items, use the check boxes and select Copy or Move. To rename a file or folder, select Edit Settings in the item's menu.
- On the Copy or Move page, select Browse to find a destination folder for the file or folder.
- In the Browse Course window, navigate to the appropriate folder and select it. Select Submit.
- Select Submit again on the Copy or Move page. The copied or moved file or folder appears in the folder selected.
When you copy a folder, links to the content in the folder are not copied. Links remain to the items in the original folder if you linked to them in a course area. The files inside the copied folder lose their original permissions and inherit any new ones associated with its new parent folder.
You can move a file to a different folder, and you can move a folder into another folder. When you move a file or folder, the links to content in your course go with it and remain intact. If you move a file to a different folder, it maintains its original permissions. It does not inherit permissions associated with the parent folder. The same is true for all files in a moved folder.
More on permissions in Course Files
Overwrite a file
You can edit and overwrite individual files in Course Files while maintaining the links to those files. When you overwrite a file, the new version remains in the original location and the old version goes to the overwritten files folder.
Example: When you create a content item in the Getting Started content area, you create a link to the syllabus file in Course Files. Later, you need to make changes to the syllabus. You edit a copy of the file on your computer and upload the new version of the syllabus to Course Files with the Overwrite File function. The link to the file in the content area remains intact. When students access the syllabus in your course, they see the revised content.
To get started, make changes to a file on your computer that was previously uploaded to Course Files as well as linked in your course.
Two ways to overwrite a file
- In Course Files, use the Overwrite File function in a file's menu to browse for the edited file on your computer. The system overwrites the existing file in Course Files with the same name, even if the file from your computer has a different name. If the file is linked in your course, the link remains intact and the edits appear.
-
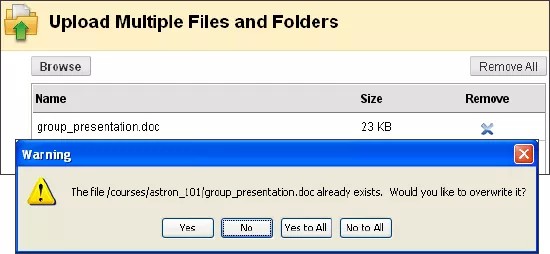
Name the new file so it exactly matches the name of the file you wish you overwrite in Course Files. When you upload the new file to Course Files, the system asks you if you want to overwrite the existing file with the new file. Overwriting a file is permanent and final. To keep both versions, change the name of one file or store one of the files in a different folder.
When you edit or overwrite a file, changes made to the file appear in your course. You don't need to edit the link in your course. For example, you can edit and overwrite one or more files in an unzipped package, such as a lesson linked in your course. You do not need to remove the entire unzipped package and upload it again after editing. The link to the lesson will remain intact in your course.
More about adding a zip package to Course Files
When you overwrite files in Course Files, file names and link titles in your course aren't affected.
Download files and folders
You can select files and folders in Course Files and download them to your computer in a zipped package. This is helpful if you want to reuse selected files and folders in other courses or edit several files and folders offline.
Select the check boxes next to the files and folders to include in the zipped package and select Download Package. The file name for the zipped package saved to your computer is the course ID with the .zip extension.
Files and folders you edit on your computer and upload again into Course Files retain their links in your course as long as the original file names remain. If you change the name of a file or folder while it is on your computer, a new file or folder is saved in Course Files when uploading. The edits you make to the file or folder will not show in your course where it is linked.
Use the Overwrite function to overwrite files whose name you may have changed while on your computer. Then, you can be sure course links remain intact.
Search Course Files
Use the Search function in the Files section of the Control Panel to search for files and folders within Course Files.
If this feature is not available, your institution may have disabled it.
Quick and basic search
To perform a quick search of Course Files, expand the Files section of the Control Panel. Type a keyword or text string in the box and select Go. Searches are not case sensitive. Results appear on the Search Content page. The search produces files and folders in the specific course, not from across courses.
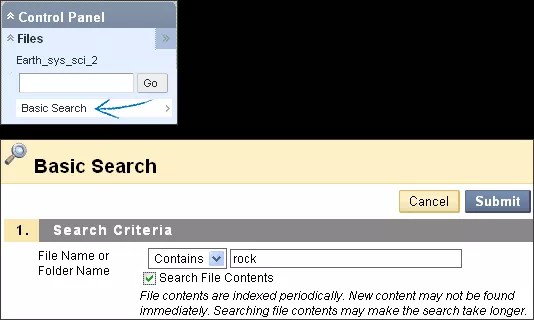
Alternatively, select Basic Search in the Files section to open the Basic Search page in the content frame. A basic search locates files and folders based on a keyword or single text string AND allows you to search file contents. Select the check box for Search File Contents. File contents are indexed periodically, so new content may not be found immediately. Searching file contents can increase the search time.