Your institution controls which tools are available in the Original Course View. Assignments are always available to instructors in the Ultra Course View.
You can create assignments alongside other content.
With assignments, you can create coursework and manage the grades and feedback for each student separately. You can create assignments in content areas, learning modules, lesson plans, and folders.
When you create an assignment, a Grade Center column is created automatically. From the Grade Center or Needs Grading page, you can see who has submitted their work and start grading. Students access their grades from their My Grades pages or the assignment's Review Submission History page.
You can also create a group assignment and release it to one or more groups in your course. Each group submits one collaborative assignment and all members receive the same grade. You can create a single assignment and assign it to all groups, or create several unique assignments and assign them to individual groups.
Create an assignment
You can create assignments in content areas, learning modules, lesson plans, and folders.
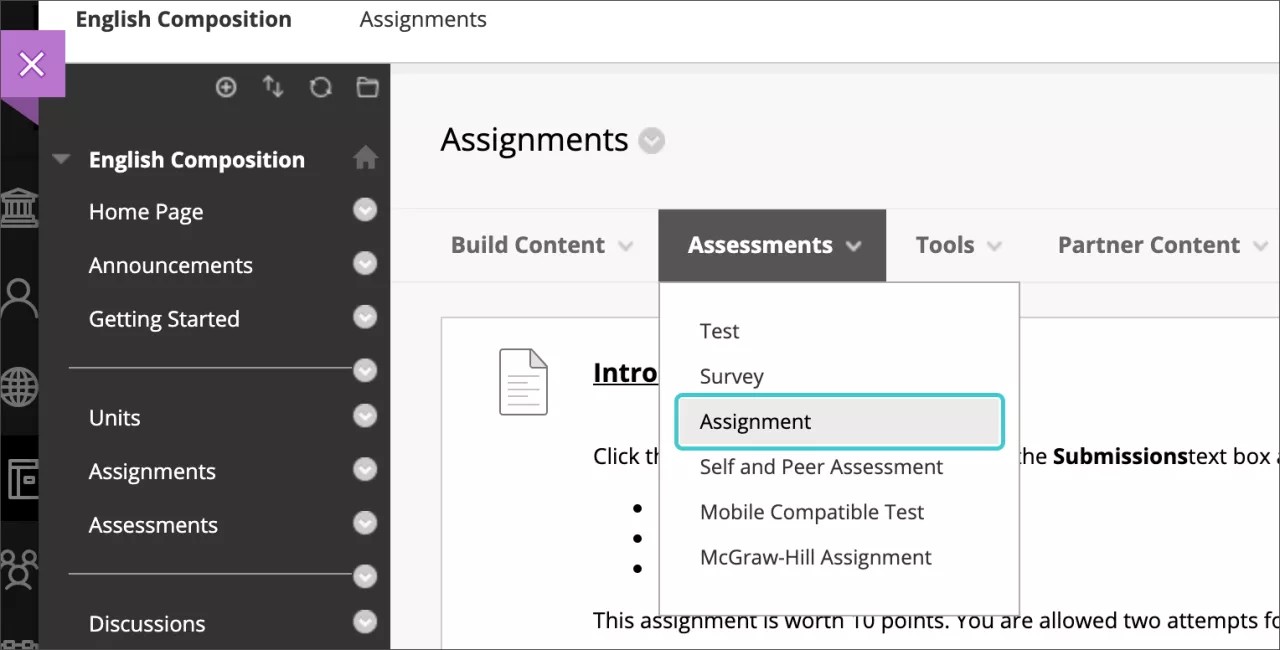
- From the Assessments menu, select Assignment and provide the name, instructions, and the files students need. You can use the functions in the editor to format text and add files. You can also add files in the Assignment Files section.
In the Blackboard mobile app, assignment instructions for Original courses show after students begin an attempt.
- Select Browse My Computer to upload a file from your computer. The file is saved in the top-level folder in your course's file repository: Course Files or the Content Collection. You can also attach a file from the repository.
-OR-
Drag files from your computer to the "hot spot" in the Attach Files area. If your browser allows, you can also drag a folder of files. The files will upload individually. If the browser doesn't allow you to submit your assignment after you upload a folder, select Do not attach in the folder's row to remove it. You can drag the files individually and submit again.
You won't be able to drag files to upload if your institution uses an older version of Blackboard Learn.
You can use the file name or provide another name for the file.
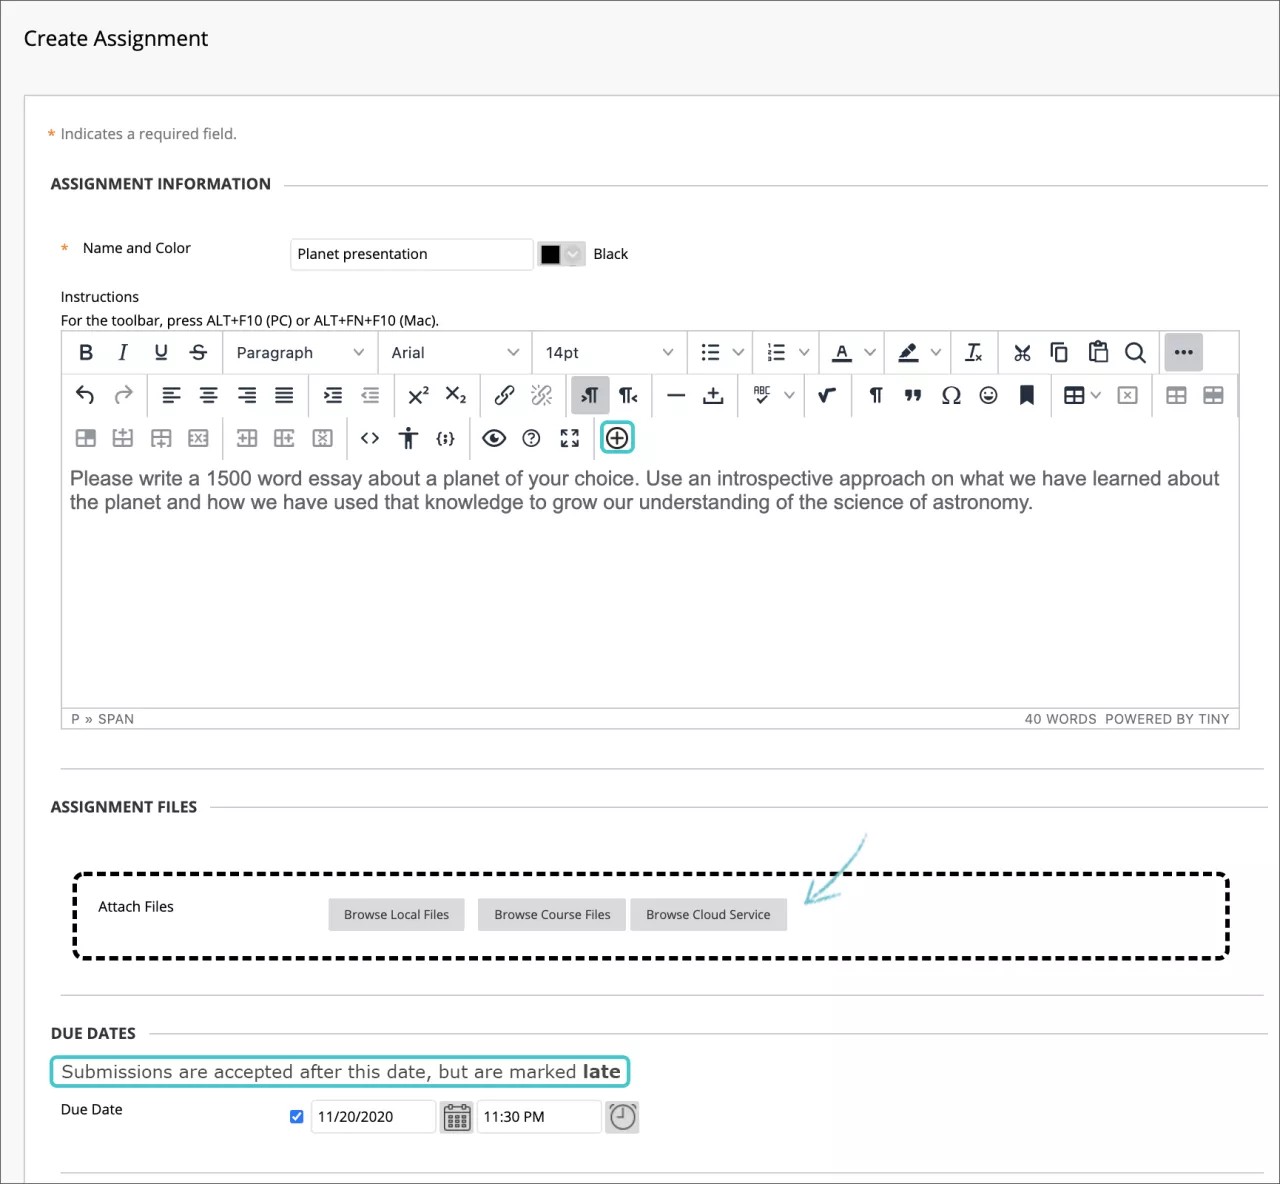
- Optionally, select a Due Date. Assignments with due dates automatically show in the course calendar and in the To Do module. Submissions are accepted after this date but are marked late. If you don’t want students to access an assignment after the due date, choose the appropriate display dates.
- In the Grading section, type the Points Possible.
If you set the points possible to a non-whole number, letter grades may not be assigned correctly.
- Optionally, add a rubric. Expand the sections to make selections such as anonymous grading, how the grade is displayed, and the number of attempts. You can allow more than one attempt on an assignment.
- Make the assignment available when you're ready for students to access it. Select the appropriate options for availability, tracking, and display dates. Display dates don't affect an assignment's availability, only when it appears.
- Select Submit.
More on assignment grade settings
Video: Create an Assignment
Watch a video about creating an assignment
The following narrated video provides a visual and auditory representation of some of the information included on this page. For a detailed description of what is portrayed in the video, open the video on YouTube, navigate to More actions, and select Open transcript.
Video: Create an assignment explains how to create an assignment.
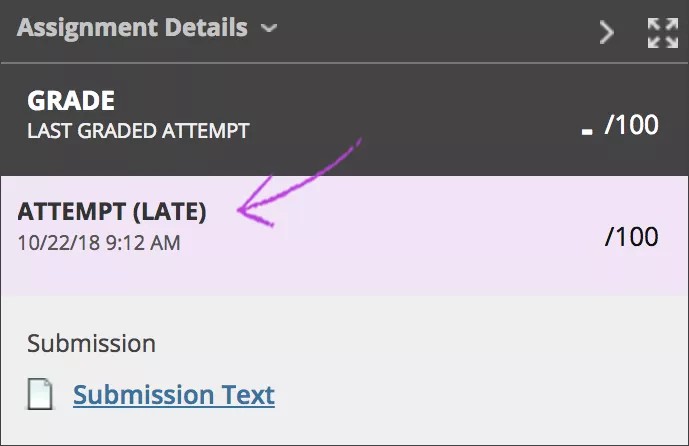
Late assignments
When you assign a due date for an assignment, students can still submit attempts after the date passes. Submissions after the due date are marked late. If you penalize late submissions, inform students in the assignment instructions.
You can view the late label in these areas:
- Student's submission page in the grade panel
- Student's Grade Details page
- Needs Grading page
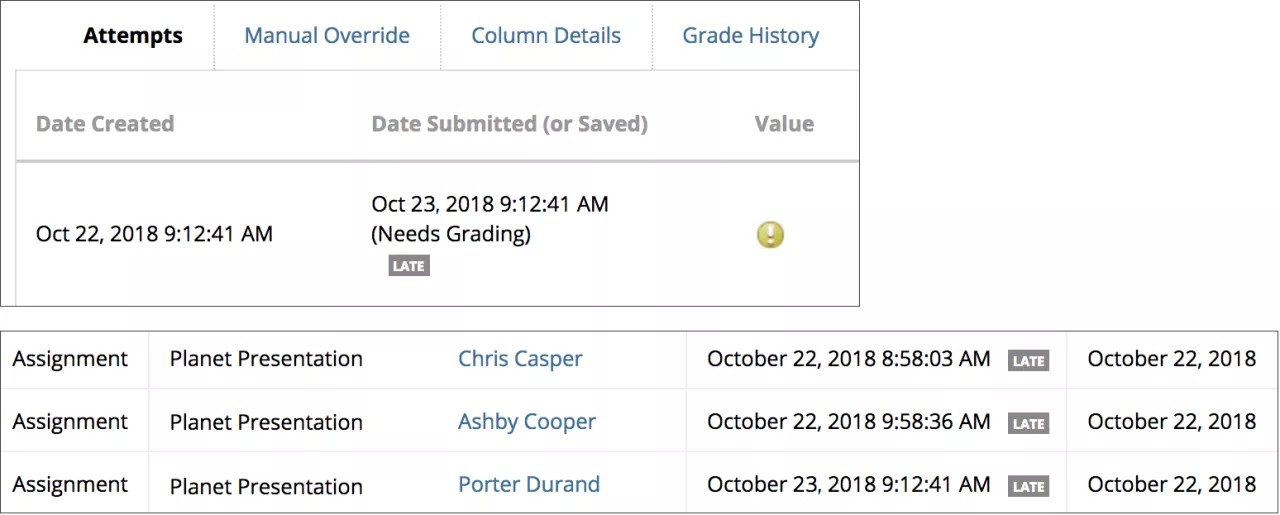
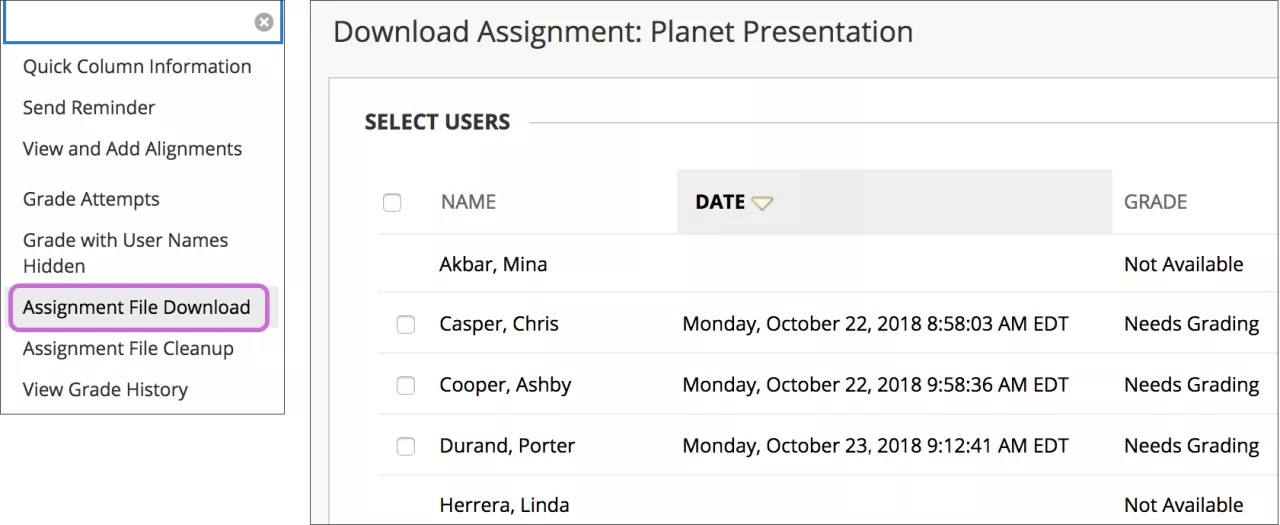
From the Grade Center, you can also view a list of all submissions with the Assignment File Download option in an assignment's menu. View who has submitted, submission dates, and the grading statuses. You can sort by date to easily see who submitted after the due date.
If you don’t want students to access an assignment after the due date, choose the appropriate display dates. Inform students that you won’t accept submissions after the due date and the assignment will no longer be available.
Students see the late label after they make a submission after the due date.
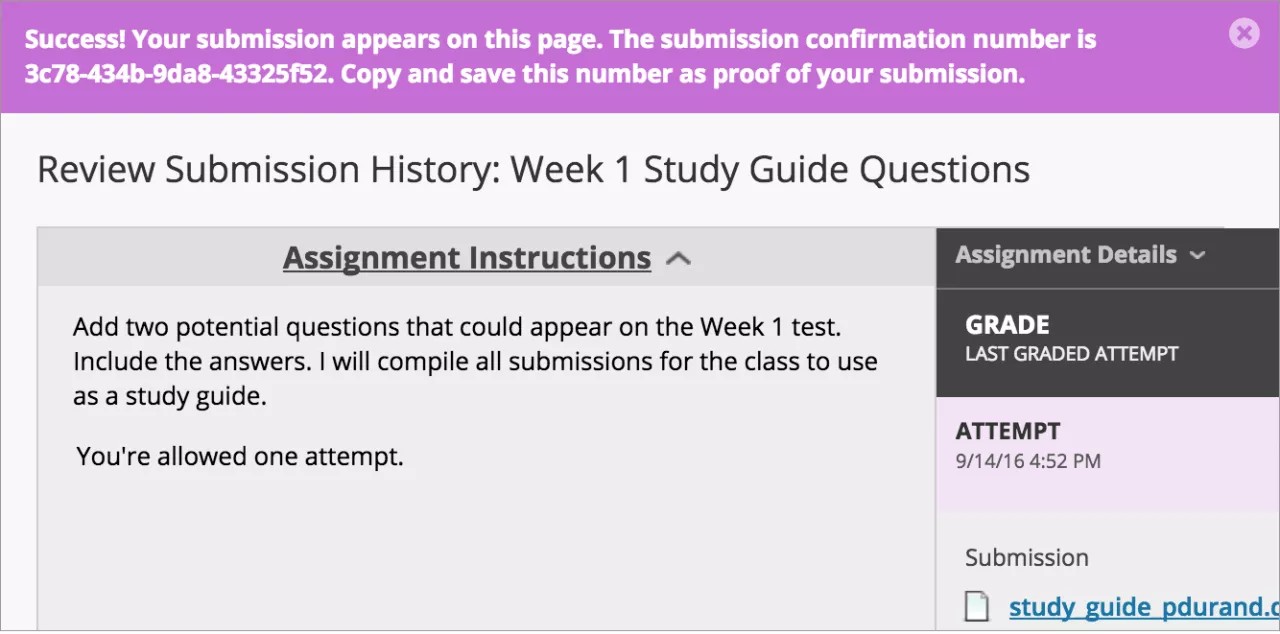
Student assignment submission confirmations
When students submit assignments successfully, the Review Submission History page appears with information about their submitted assignments and a success message with a confirmation number. Students can copy and save this number as proof of their submissions and evidence for academic disputes. For assignments with multiple attempts, students receive a different number for each submission. If your institution has enabled email notifications for submission receipts, students will also receive an email with a confirmation number and other details for each submission.
You and your students won't be able to view confirmation numbers if your institution uses Blackboard Learn 9.1 Q4 2016 or earlier. Student email notifications and student access to receipt history were introduced in Blackboard Learn 9.1 Q2 2017.
You and your administrators have a retrievable record in the system even if an attempt, assignment, or student is later deleted. These records are maintained in the course and also retrievable after the archive and restore process.
You can access all of your students' confirmation numbers from the Grade Center. Open the Reports menu and select Submission Receipts.
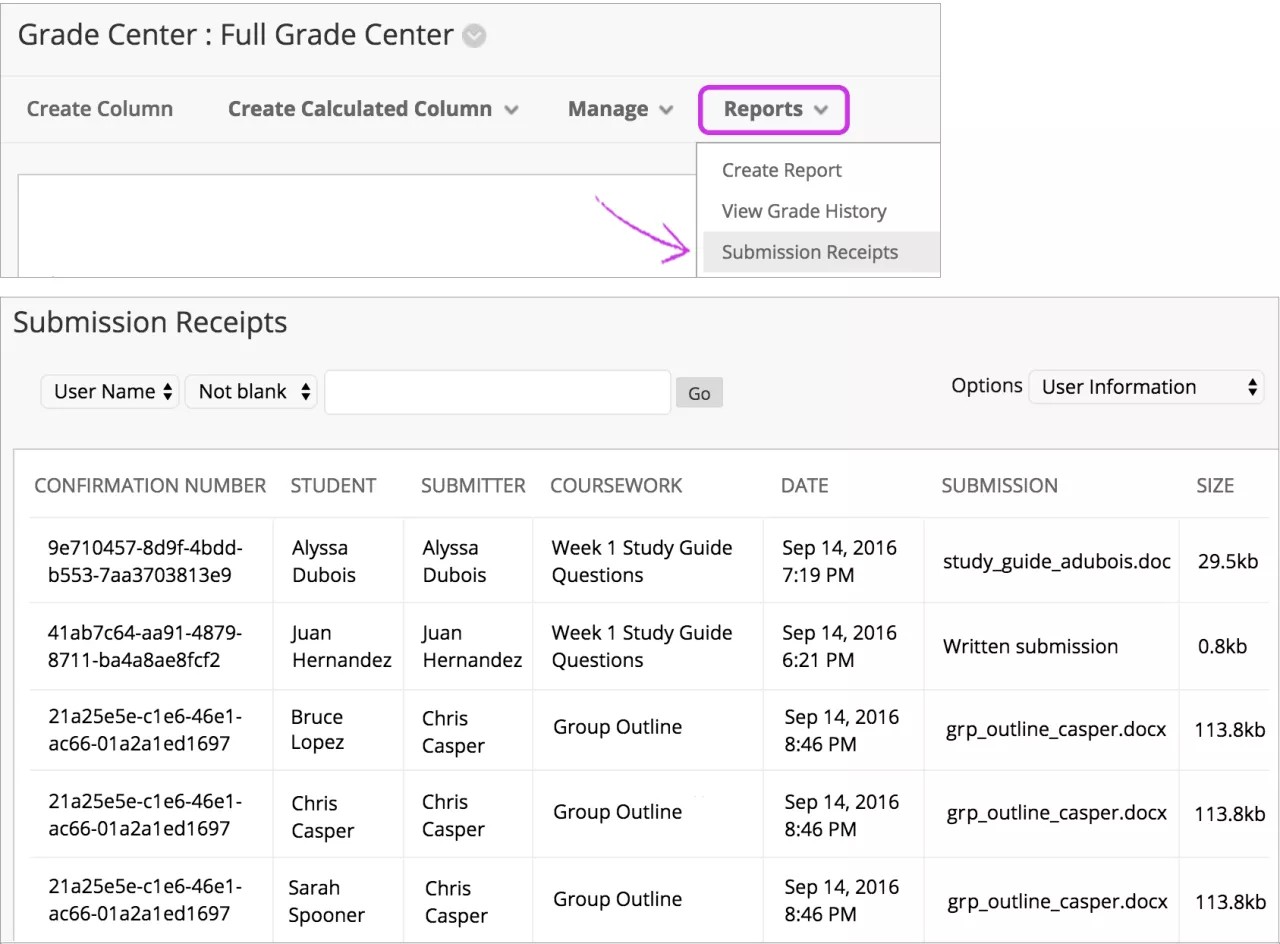
On the Submission Receipts page, you can view information for each assignment, such as who submitted and when. Group assignments are also logged and the Submitter column lists who submitted for the group. In the Submission column, view if a student submitted a file or wrote the submission in the assignment's editor.
Use the menus at the top of the page to filter the items. In the second menu, select Not blank and leave the search box empty to show all of the submission receipts. Select a column heading to sort the items.
Edit, reorder, and delete assignments
You can edit, reorder, and delete your assignments. Change the order of assignments with the drag-and-drop function or the keyboard accessible reordering tool. For example, reorder the assignments to keep the current one at the top.
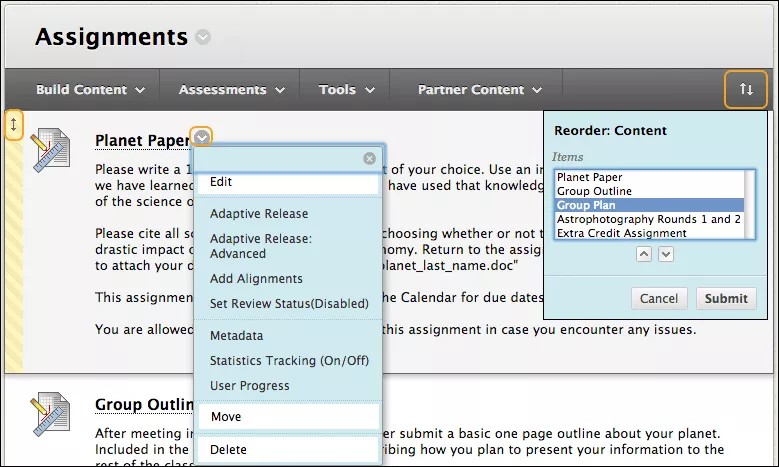
From an assignment's menu, select on option:
- Move an assignment to another location in your course. When you move an assignment, it's removed from its original location. You can't copy an assignment.
- Edit an assignment. If you change the instructions, students who have already made submissions will see the new instructions only on subsequent attempts.
- Apply release criteria, tracking, metadata, and review status.
Delete assignments
You can delete an assignment from a course area and if no student submissions exist, the Grade Center column is also deleted.
When you delete an assignment that has student submissions, you also delete all the submissions. You have two options:
- Preserve the scores in the Grade Center, but delete the assignment and all submissions. Though the scores remain in the Grade Center, you can't access the students' submissions again. The action is irreversible.
- Delete the assignment, the Grade Center column, all assigned grades, and all submissions. The action is irreversible.
Alternatively, make the gradable item unavailable in your course to preserve the submissions and the scores in the Grade Center.