Select recipients by groups, schools, grades, a map and even individually. There are various ways to select recipients.
To send a message to community members - users outside the district that sign up to receive notifications - select the Community Member group.
- From Send Messages select the Choose link next to Recipients.
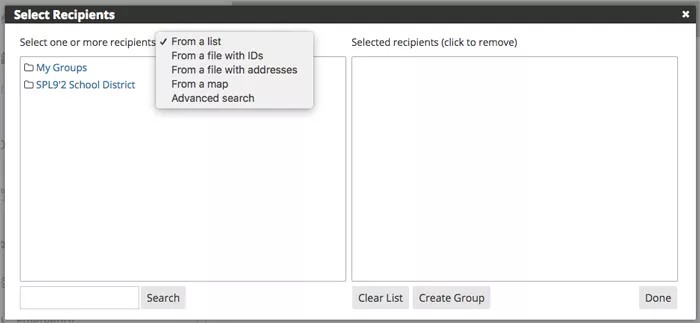
- Select a search method to add recipients.
- From a list: A standard search. Type a recipient's name in the Search box. Or select a group from the list, or open the group and select specific users.
- From a file with IDs: Upload a file with a list user IDs.
- From a file with addresses: Upload a file with a list of email addresses.
- From a map: Select users based on their location on a map.
- Advanced search: Select users based on set parameters.
- Select Done.
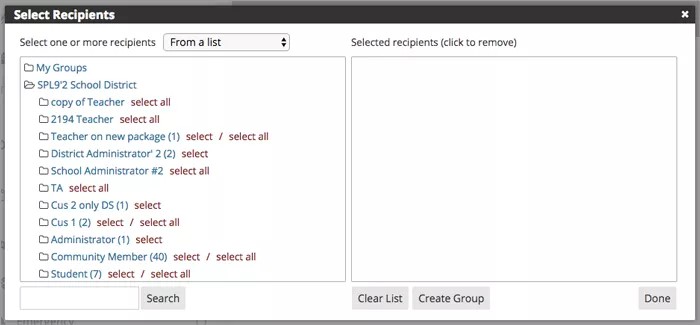
From a list
Browse for lists or search for individuals with this standard search.
- Type a recipient's name in the Search box
- Select a group from the list
- Open the group and select specific users
From a file
Select From a File to upload a pre-created text file of users phone numbers and email addresses to upload.
When a file is uploaded with phone numbers and email addresses, the system creates temporary accounts that are deleted after the message is delivered.
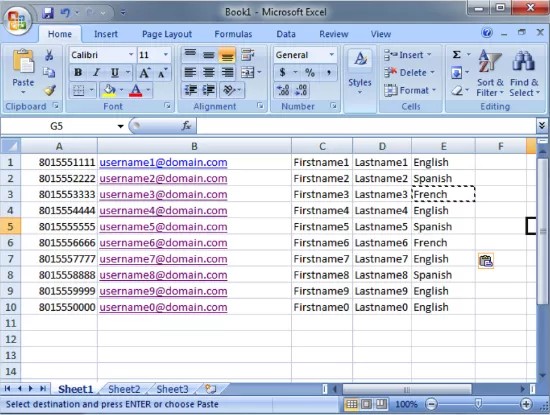
You can create the file in Excel and save as a text (tab-delimited) file. Columns include Phone, Email, First Name, Last Name, and Language. Do NOT add labels or headers.
If a recipient doesn't have an email address, leave the cell blank. If sending a phone message, and the recipient doesn't have a phone number - delete that recipient. Make sure that all recipients have ten digit phone numbers.
Select Upload to select the file. The Select Recipients page updates with the rows of information. Even though you didn't add headers to the spreadsheet, you must select the field names for each column. If an option doesn't exist for the field, select Ignore. Select Looks Good when finished.
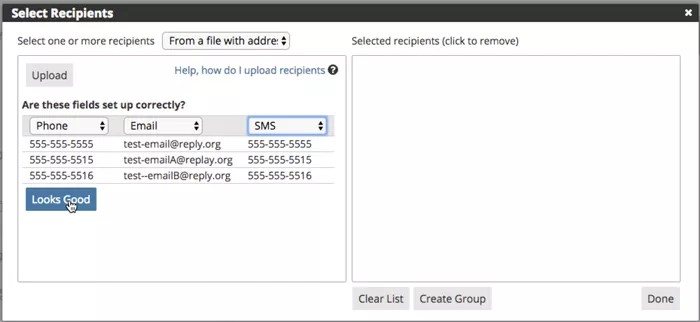
The addresses are added to the message.
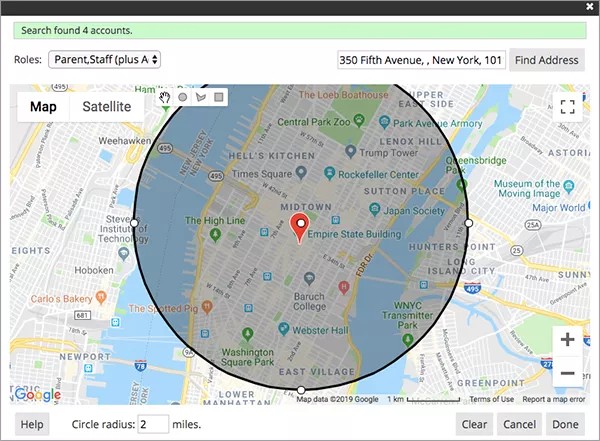
From a map
Choose users based on their location on a map.
- Select the Roles you want to search.
- Provide the address and select Find Address.
- Use the drawing tools to draw a sending area on the map.
-
If you draw a circle, you can set up to a six-mile radius for the sending area. Select Draw a circle. Click on the address pinpoint to draw your circle. In the Circle radius field type the number of miles, up to six, for the area.
-
- Search results display the number of accounts found within the search radius.
- Select Done.
Advanced search
Select Advanced Search to send messages to groups of users based on set parameters to locate recipients. For example, you can send message to parents with students in a specific grade level.
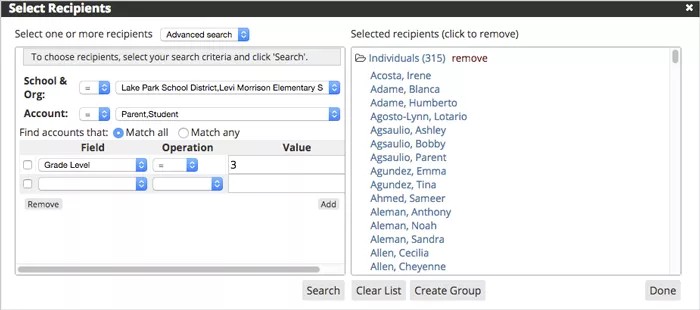
- Select the specific School to limit the recipients to a specific school in your district.
- Select the specific Role for the user types include.
- From the drop-down list in Field and Operation, select the search parameters.
- Type any specific variable in the Value box.
- Select Search when ready.