Use Section Robot to rapidly create sections with default pages for each user to edit and manage.
Start with a section configuration. This is a collection of pages the users can use to create their content.
You then create sections as you import users or for existing users.
- Create sections as you import users. Use Import Users.
- Create sections for existing users. Use a site or subsite Section Robot tool.
Before you begin, consider these items.
- If your website is using Universal Connector, you don't need to import users with the Section Robot.
- If your site is using LDAP, you can run the Section Robot to create sections and assign section editor privileges for your existing users.
- Break your User Import run into batches, by site or subsite. When using Import Users with Section Robot option, you can only select one site (or subsite) and one channel for the import.
- Test run Import Users and Section Robot with just a few records in the CSV files to make sure you are getting the results you expect.
Create Section Configurations
Create Section Configurations
You can use the default configurations or create a collection of page types you want to use.
- From Site Manager select CONFIGURE.
- Select Section Assets and Section Configurations.
- Select New Configuration.
- Type a name.
- Optionally, type a description.
- Select Save. The Section Configurations window displays.
- Find the configuration and select the name.
- Select Pages and select Add Page.
- Type a page name.
- Select the type of page you want from the Page Type menu.
- Select Save.
- Repeat until you have all the pages you want in your configuration.
Import users with Section Robot
If you want to create sections for existing users, use the site or subsite Section Robot instead.
Select the Section Robot option when importing users to create new user accounts, new sections with default pages, and assign section editor privileges.
Import Users
Start with the CSV. Include these fields.
- First name (required)
- Last name (required)
- User name (required)
- Password
- Email address
- Phone number
- Passport ID: You can get the Passport ID numbers from the Users workspace Passports tab.
- Groups ID: You can get the Groups ID numbers from the Groups workspace.
- User code
- Title
- Address
Upload the file and map the fields.
- From Site Manager, expand USERS & GROUPS.
- Select Users.
- Select Import Users.
- Select Import.
- Browse and select your completed CSV file.
Only First Name, Last Name and User Name are required fields. You can add additional fields.
- Optionally, select Use Section Robot to create a section for each user.
If you select Use Section Robot to create a section for each user, a Section workspace is created in a location you specify for each user. This gives each user their own space to work in.
- Select Continue.
-
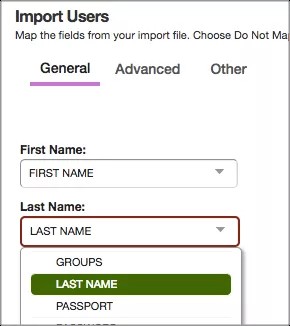
Under General, map the fields in the Site Manager to those in your import file. Select the name of your field from the Site Manager menus. For example, in the First Name menu select your first name field.
- Optionally, if you mapped Email addresses, select Notify user via email of account creation. If an email address is provided, users receive an email telling them an account has been created on your site. The email includes a link to the site, the user's user name, and a link to set their password.
- Optionally, map other fields under Advanced and Other.
- Optionally, if you are using Section Robot to create sections for users, you must select where you want sections to be created and how they'll look.
- Select a site from the Select a Site menu.
- Select a channel from the Select a Channel menu and select Continue.
- Select a configuration option from the Select a Section Configuration menu and select Continue.
- Select section name and menu name formats and select Continue.
- Select Import.
Use the site or subsite Section Robot
If you want to create sections as you create users, use the Section Robot option when you import users instead.
Use the Section Robot to create user sections with default pages and assign editing privileges for user accounts that you have already created.
Start with the CSV file. Include these fields.
- Section Name: The name of the section that appears in Site Manager.
- Menu Name: The name of the section that displays on the website.
- Channel ID: Select the site or subsite Channels tab to get the IDs.
- Editor: The user name for the user.
Upload the file in Section Robot.
- From Site Manager find the site or subsite you want to create sections in and select it.
- Select Tools and select Section Robot.
- Select Import Sections.
- Browse and select your completed CSV file.
- Select the section configuration you want to use in the Configuration menu.
- Select Import.