Case Tab Overview
The Case tab will appear as a selectable tab once a Contact has been selected on the Caller tab. Use the Case tab to create a new case on behalf of the selected Contact, or view an existing case that was previously created on behalf of the selected Contact.
The main areas of the Case tab are:
- The Case Information section
- Canned Responses
- The Internal Comments section
- The External Comments section
- The Resolution/Escalation Details section
- Action button section
Creating a Detailed Case
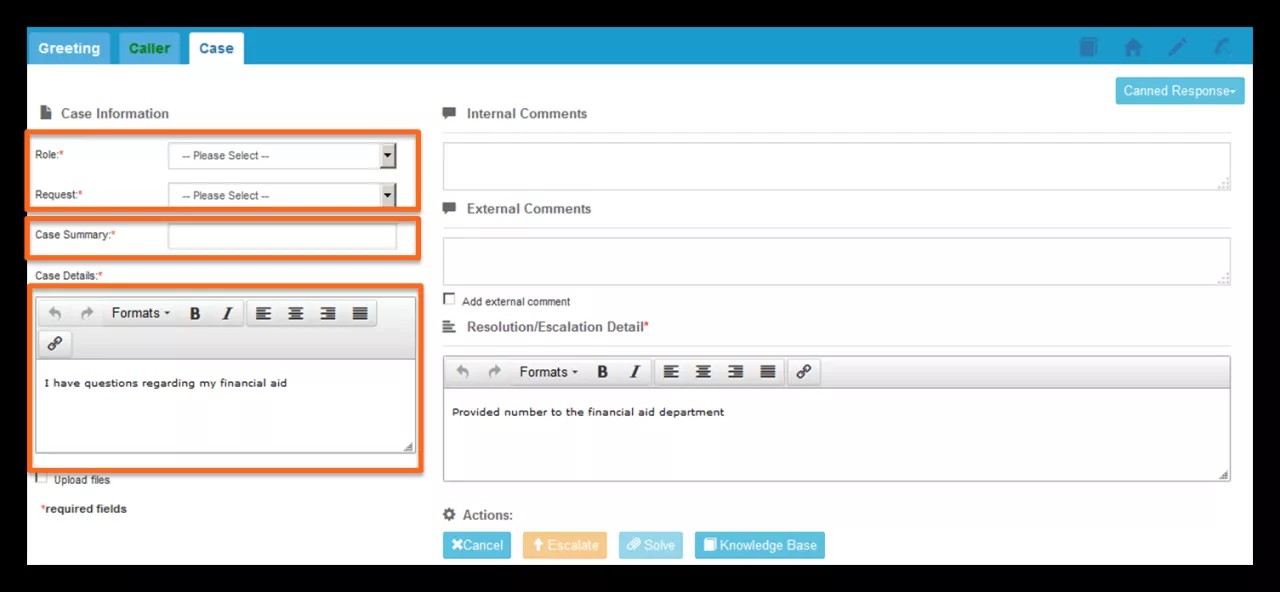
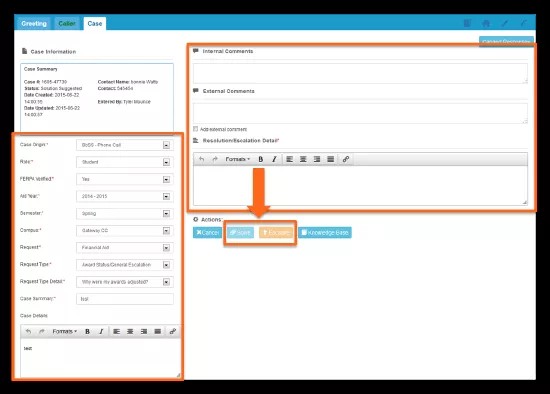
The Case Information Section
The Case Information section will list out the case template that will allow you to categorize the issue in a structured manner. The template will allow you to make option selections, input free-form information, upload attachments, etc. all per the structure of your case template.
Information that may be configured on the template includes:
- Role options
- Request options
- Case Summaries
- Case Details
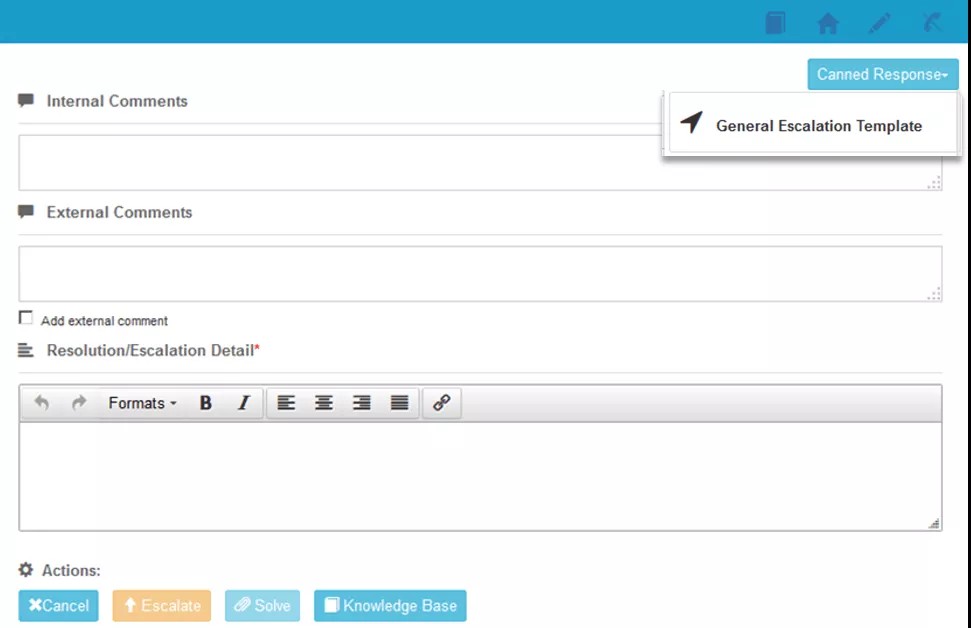
Canned Responses
The Canned Response feature provides for a collection of common messages to be easily accessed by clicking on the Canned Response button, and then dragging and dropping the appropriate Canned Response in to either the Internal Comment, External Comment or Resolution/Escalation Detail field.
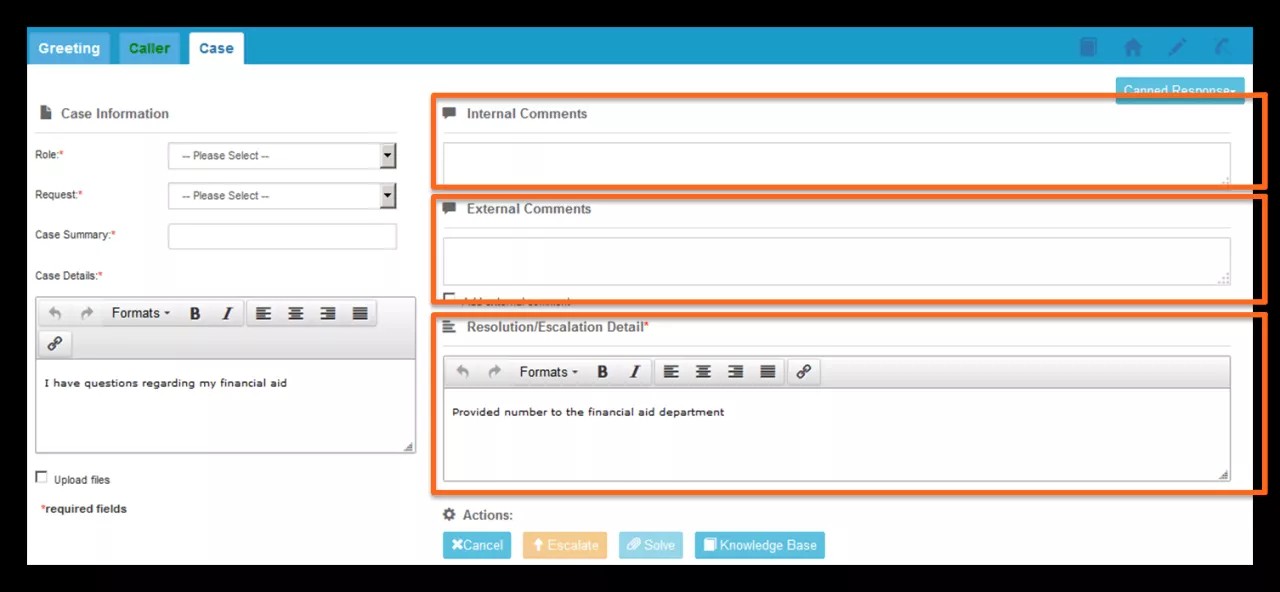
Internal Comments
Use this section to add comments that serve as the internal record of the steps you took to resolve the issue. These comments will be added to the Case History of the Case. You might also include internal Knowledge Base articles that were referenced in the interaction.
External Comments
Use this section to add comments that will be shared with constituents via email notifications. Information typed in this field is typically emailed to the Contact in an post comment email template.
You may also send a real-time email to a selected user by entering information (manually typed in or dragged in Knowledge Base article), checking the Add external comment checkbox, and selecting Send Email. You will also have the option to enter an alternate email address to CC on the real-time email sent with the Send Email button.
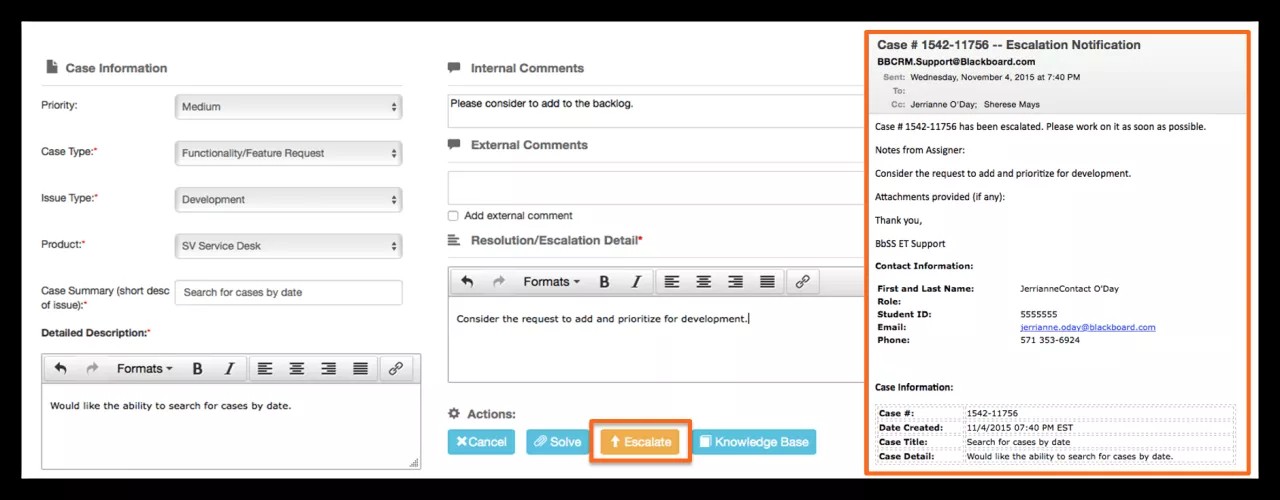
Resolution/Escalation Detail and Action Buttons
Enter the details of the solution, or the needed information that must be included in the case escalation, and select the corresponding button.
- Click the Escalate button to complete the creation of the case, and carry out the Escalate action
- The information entered in the Resolution/Escalation Detail field will be added to the Case History and forwarded to the Advisor recipient of the escalation email template.
- Click Solve button to create the case.
- The information entered in the Resolution/Escalation Detail field will be added to the Case History and forwarded to the Contact recipient of the solution suggested email template
Escalated Case Example:
Solved Case Example:

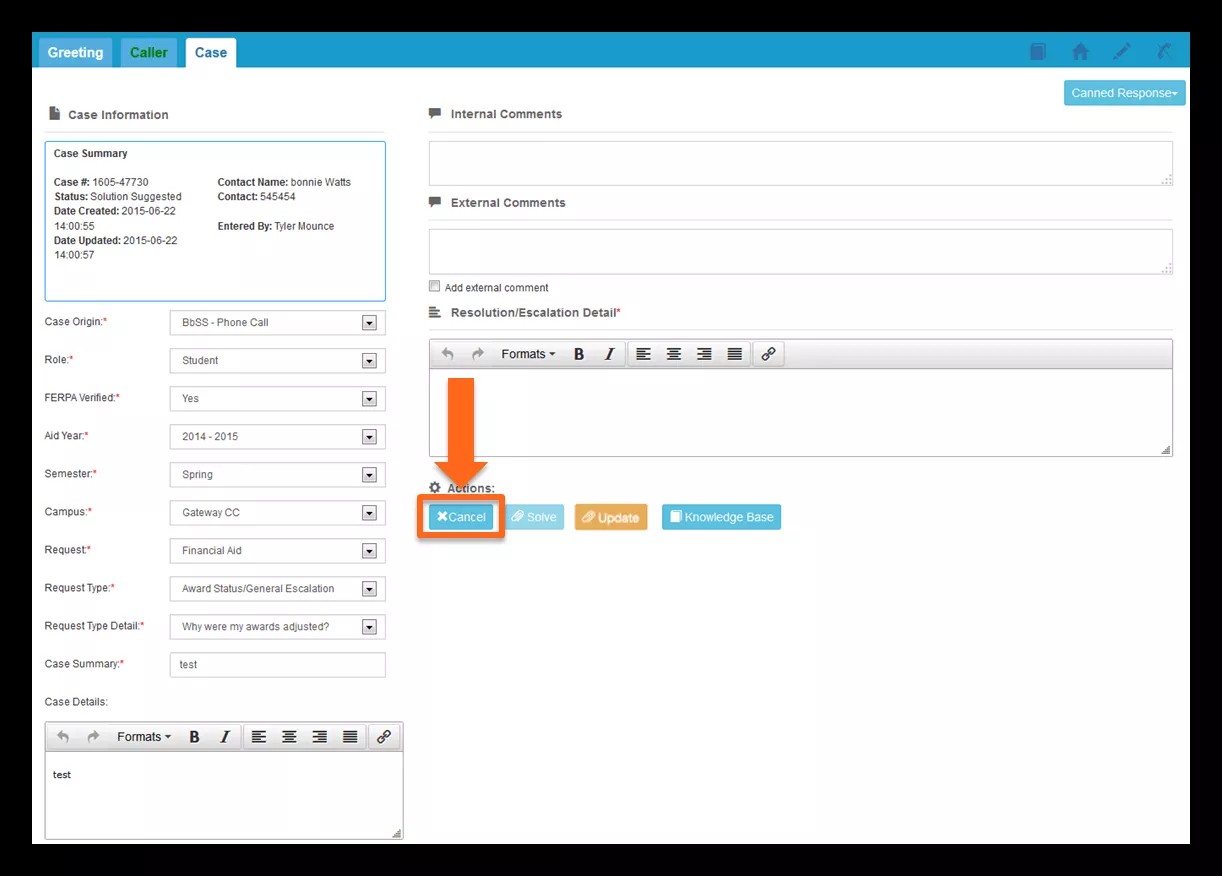
- The Cancel button will cancel the creation of the Case, and will clear all fields on the Case tab.
- The Knowledge Base button is a second way to access the Knowledge Base as you work on the Case.
Previously Created Cases - Updating and Viewing Cases
Update the Case
- In the Case Search Results of the Caller tab, locate the case you would like to review.
- Click on the corresponding View icon.

- You will be redirected to the Case Tab with the selected case loaded.
- The Case Information will include:
- A Case Summary panel that provides information about the current status of the case
- The Case Template with previously selected or entered information
- The Case History
- If the case is in an unresolved status, you will have the option to Solve or Update the case.
- Entry in Resolution/Escalation Detail field is not required for the Update action.
- If the case is in a resolved status, you will have the option to Escalate or Solve the case.
- Add Internal and/or External Comments as needed and select Update.

- The Case will be updated with the added information without an update to the status, or to the Case assignment (Advisor or Queue).
Cancel and Create a New Case
- If after viewing a previously created Case, it is determined that a new Case is needed, simply click the Cancel button.
- You will be redirected back to the Caller tab, where you may select another Case to view, or select the Case tab in order to create a new Case on behalf of the selected Contact.
Solve the Case
- If you determine that you are now able to Solve the unresolved Case, and it is appropriate for you to do so, you may add Internal and/or External Comments as needed, enter the Resolution Details and select Solve.
- The Case status will update to Solution Suggested, and the Case History will reflect the Suggest Solution at the first level of action (Level 1), with the trigger of email notifications that are configured for that Level 1 Suggest Solution Action.