This information applies only to the Ultra Course View.
This information applies only to the Ultra experience.
About course groups
Create groups based on the real-life practicalities of teamwork.
Collaborative learning offers many benefits over traditional instruction. Studies show that when students work as a team, they:
- develop positive attitudes
- solve problems more effectively
- experience a greater sense of accomplishment
You can organize students into groups so they can interact with each other and demonstrate their knowledge while they learn to appreciate the perspectives of others.
You can create group sets to use for graded work, such as:
- assignments
- tests
- discussions
You can also create groups for activities other than graded work, such as volunteering or field trips.
You can also create breakout groups in Collaborate so students can hold virtual meetings with their group members.
You and students can access course groups on the Course Content page in the Groups tab.
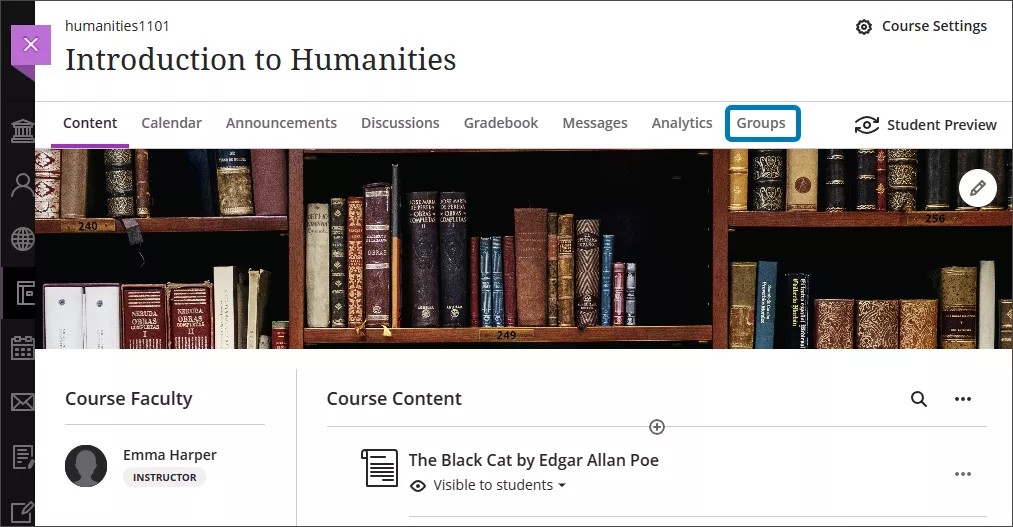
Students can view members of the groups they belong to on the Groups tab. Groups can be tied to assessments, but can also be created independently of assessments to encourage collaboration.
Users don’t have the ability to make Collaborate recordings in Ultra assignment groups. There is no place to list, manage, or watch recordings from groups. An instructor can join a group and access the record button, but this recording will not be listed or be accessible to view.
Visit the “Group Spaces” topic for more information about Group Spaces.
Topics on this page include:
Watch a video about creating course groups
The following narrated video provides a visual and auditory representation of some of the information included on this page. For a detailed description of what is portrayed in the video, open the video on YouTube, navigate to More actions, and select Open transcript.
Video: Create course groups explains how to create course group sets.
Create course groups
Select New Group Set on the Groups tag.
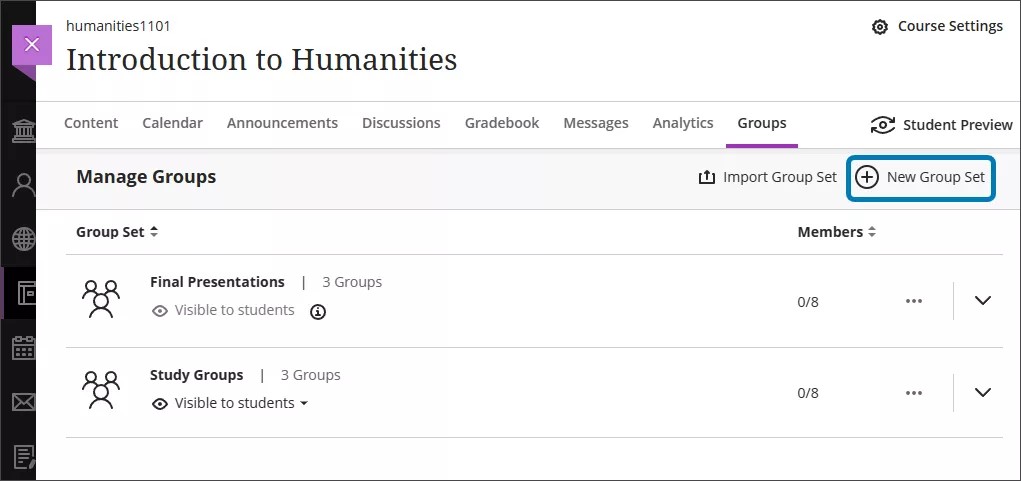
You can create as many course groups as you want, with any number of students in each group. You can also create new course groups or remove course groups.
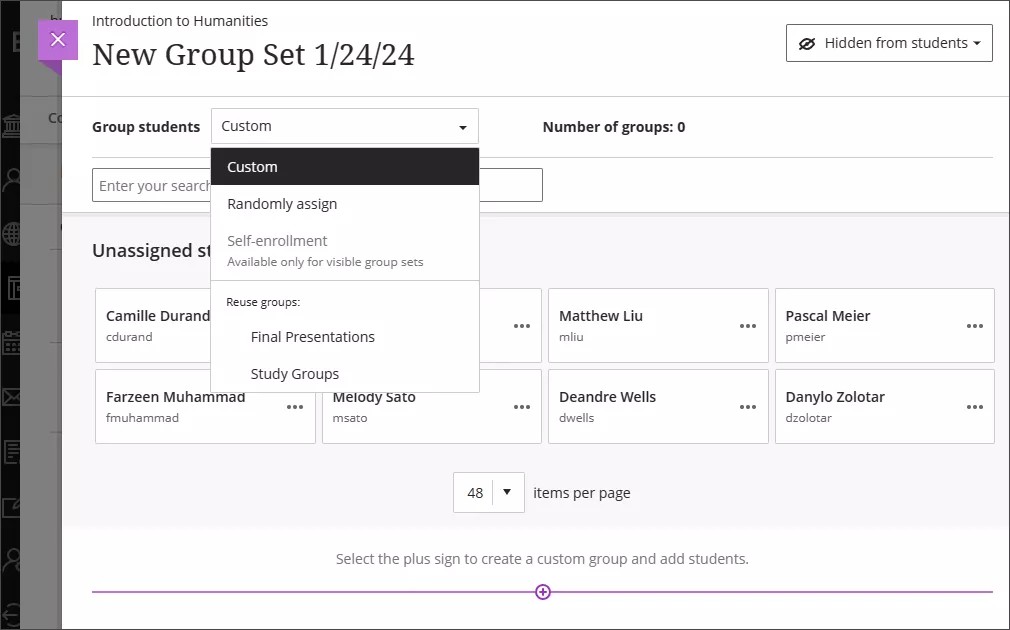
From the Group students menu, you can divide your students among groups in these ways:
- Custom
- Randomly assign
- Self-enrollment
- Reuse groups
You can also select the plus sign below the graphic to create as many groups as you need and add students.
Create custom groups
You can create one or many custom groups, with any number of students in each group.

- In the Group students menu, select Custom and enter a name at the top of the page.
- Select each student's name one after the other to select them as a group. Select a student's name again to remove the selection.
- After you select the students, open the menu next to one of their names and select Create a new group. You can also move multiple students to a group listed in the menu.
- Edit the group name if you want to change the default naming by selecting the pencil icon next to the group's name.
- Provide an optional group description that will appear to that group's members. You have no limit on the number of characters.
Select the plus sign wherever you want to add another group. You can also repeat steps 2-5.
If you save a Custom group set, return to that group set, and select Custom again, your groups are deleted.
Create randomly assigned groups
Students are randomly assigned to the number of groups you choose. This option assigns students quickly and without preparation. You need at least four students so the system can randomly assign two students to at least two groups.
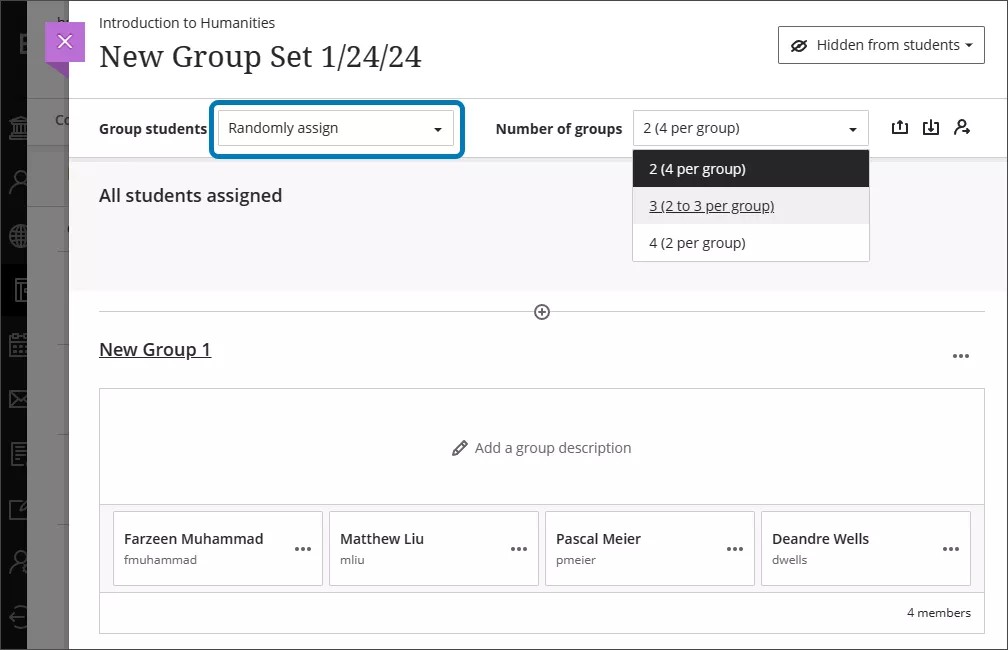
- In the Group students menu, select Randomly assign and enter a name at the top of the page.
- In the Number of groups menu, select how many groups to create. You need to create at least two. Students are equally assigned to the number of groups you choose.
- To remove all students from the current group set, select Unassign all by hovering over the person icon at the top of the page. The menu option changes to Custom if you move students to different groups after they're grouped and before you save.
- Edit each group name if you want to change the default naming.
- Provide an optional group description that will appear to that group's members. You have no limit on the number of characters.
Select the plus sign wherever you want to create a group in addition to the groups the system created. When you add or delete groups, the menu option changes to Custom and any affected students aren't redistributed.
Create self-enrollment groups
You can ask students to self-enroll in course groups. Only students may join. Students receive a course announcement and an activity stream notification about groups they need to join.
You can also add an enrollment period. Students are notified when the enrollment deadline approaches. When the enrollment period ends, students can no longer join groups, and they’re enrolled automatically.
If you added a preview user, that user is also enrolled automatically in a group. You can remove the preview user before or after you create self-enrollment groups.
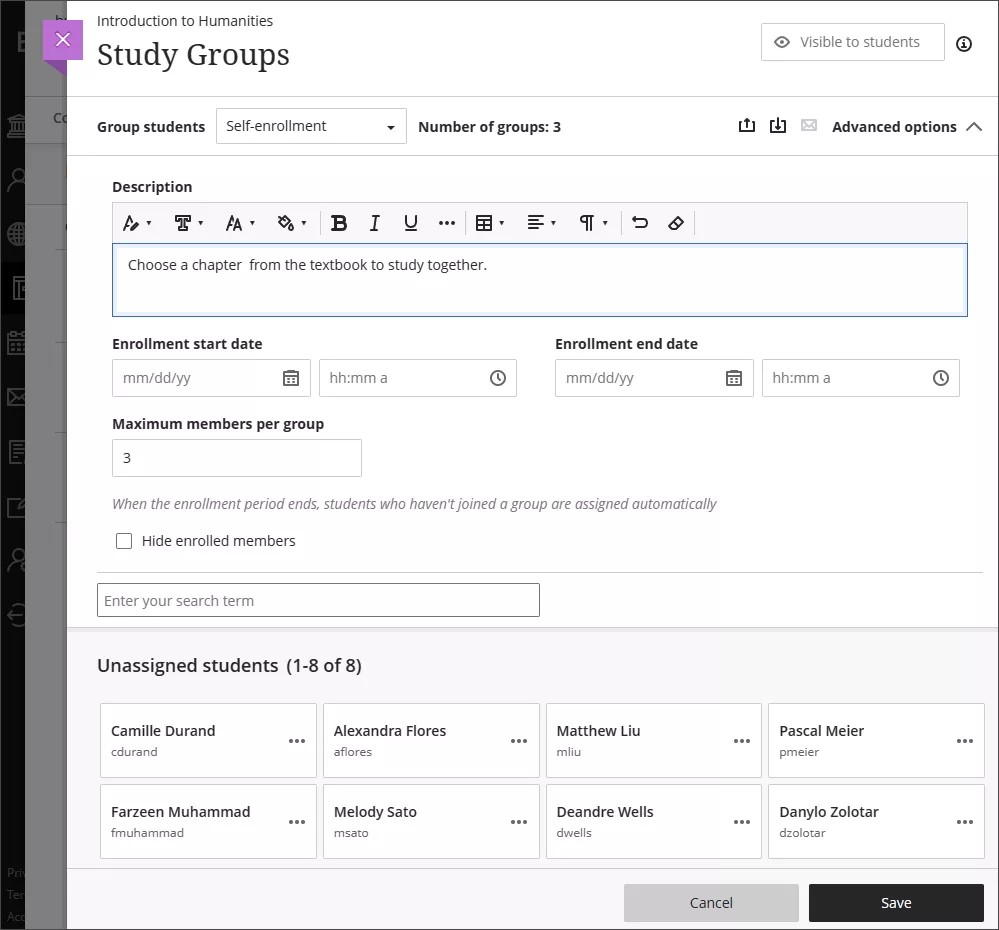
- To select Self-enrollment, you must first make the groups visible to students by selecting Visible to students on the top right corner of the New Group Set page.
- In the Group students menu, select Self-enrollment.
- Your students are evenly divided among the groups listed next to Number of groups. You need to create at least two self-enrollment course groups.
- Select the plus sign wherever you want to add another group. The Number of groups updates automatically. You can add and delete groups even after students have started to join. If you delete a group that students have already joined, they’re moved to the unassigned list. You'll need to notify them to join one of the remaining groups or add them to a group. Reminder: If you add an enrollment period, unassigned students are enrolled automatically when the period ends.
- You can add an enrollment start and end date. Select the arrow next to Advanced options to collapse the enrollment section.
You can change or clear the Maximum number of members per group that appears by default. The optional maximum must be 1 or greater. If you add or delete groups, the maximum number doesn’t update.
Pay attention to the maximum members per group and the number of groups. For example, if you lower the maximum number, some students won’t be allowed to enroll in a group at the end of the enrollment period. You’ll need to create new groups and enroll the students.
To allow unlimited members per group, leave the Maximum number of members per group field blank. Students see the maximum number allowed when they make their group selections. If you allow an unlimited number per group, students see the total number of students in their class.
You can override the maximum membership for a group. For example, you can add a newly enrolled student to a group.
- Select Hide enrolled members if you don't want students to see who's already joined.
- Edit each group name if you want to change the default naming.
- Add optional group descriptions. You can add information to help students choose a group. You have no limit on the number of characters.
- You can open the menu next to a group to access the management options.
Reuse groups
You can reuse an existing course group or group set.
If you make changes to a group set you've reused, those changes affect any group assignments and discussions based on that group set.
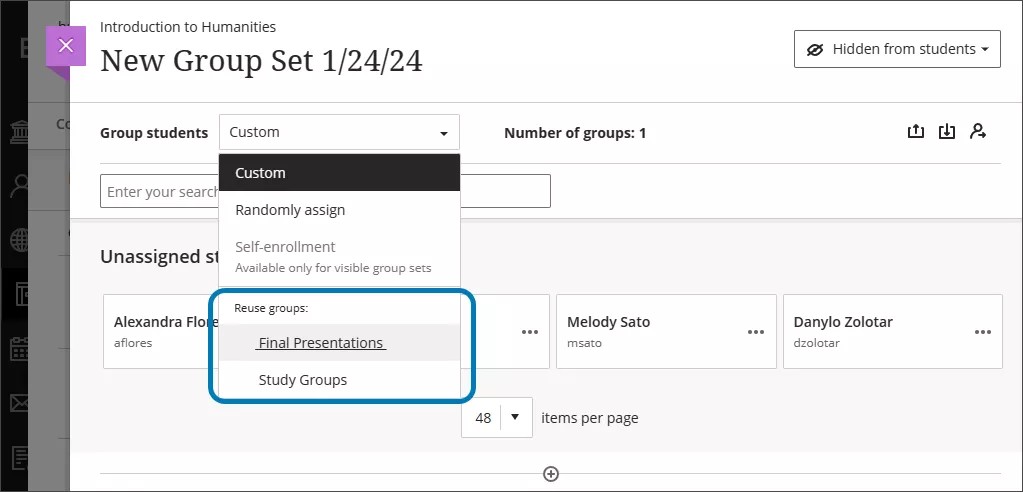
- In the Group students menu, select a title from the Reuse groups section. Groups with no members also appear in the list.
- Provide a name at the top of the page, edit the individual group names, and add optional group descriptions that are shown to group members. You have no limit on the number of characters.
The same students are added to your new group or group set. You may need to add newly enrolled students to your new groups.
Course Groups page
All course groups you've created appear on the Course Groups page, reached by selecting the Groups tab on the Course Content page. Group sets with no members also appear. At the top of the page, the number of group sets and individual groups are listed.
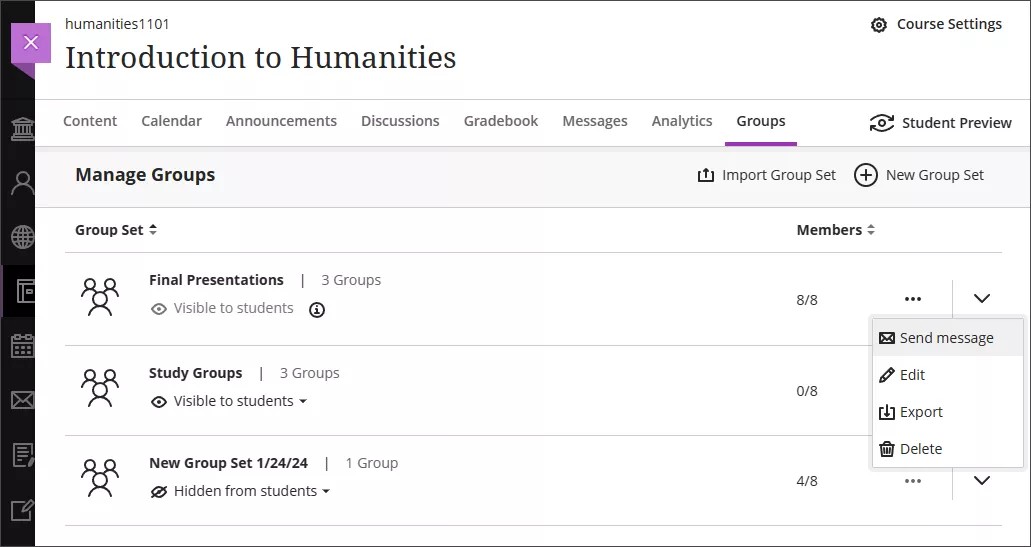
There are a number of options at the top of the Course Groups page.
- Sort your groups or the number of members in ascending or descending order by selecting Group Set.
- Select the arrow beside a group set’s name to show or hide the groups in a group set.
- Open a group set's menu to edit or delete the group. D.• View the number of members in each group out of the total number of students in the course.
- Select Show Members of an individual group to display this group's members on a panel on the right side of the page. This display lists members and indicates which have course accommodations. You can search for members in a group from the search bar in the Show Members panel.
Manage individual groups
After you create a group or a group set, you can add or delete individual groups, and manage student membership. You can also edit group names, add or edit group descriptions, and send messages to your groups to kick off collaboration. Go to the group by going to the Course Groups page, then select either the group's name or Edit from the More options menu.
If you save a Custom group set, return to the group set, and select Custom again, your groups are deleted.
Add and delete groups
Select the plus sign wherever you want to add a group.
If you no longer need a group, open the group's menu and select Delete group. The students in that group are unassigned automatically and appear at the top of the page. You can manually assign these students to new groups. Or, you can randomly assign all students—not only the students you unassigned—to the number of groups you choose.
Ramifications
- If you add or delete a group in a group set used to create a new group set, the new group set is unaffected.
- If you add or delete a group in a group set that you used to create a group assessment or discussion, that content item’s groups are updated. Edits to group titles and descriptions also affect the content items.
- If you add or delete a group in a group assessment or discussion that's based on a course group set, the course group set is updated. Edits to group titles and descriptions also affect the course group set.
- If you delete a group set used to create a new group set, the new group set is unaffected.
- If you delete an entire group set used to create a group assessment or discussion, the content item’s groups are removed.
- If you delete a group assessment or discussion based on a course group set, the group set is unaffected.
Manage student membership
Open the menu next to a student's name to access these options:
- Create a new group with the student as a member.
- Select Unassign to remove the student from the group. Unassigned students appear at the top of the page.
- Assign the student to a different group that already exists. Select the group's name in the menu to assign the student to that group. Groups with no members don't appear.
You can select multiple students to move to a different group, create a new group for them, or unassign them all in one action. Select the menu next to any of the selected students to perform a group action.
To remove all students from all groups, select Unassign All at the top of the page.
Ramifications
- Membership changes in a group set affect the content-level items where the groups are used, such as in group discussions and assessments.
- Membership changes in a content-level item based on a course group set affect the course group set.
- Membership changes in a group set do NOT affect other group sets that are based on the group set.
Course groups and conversion
If you have course groups and group sets in your Original Course View that you convert to the Ultra Course View, the group sets appear on the Course Groups page. Groups not part of a group set don't appear on the Course Groups page.
If you used course group sets to create group assignments in your Original course, those group assignments convert.