Watch a video about recording feedback
The following narrated video provides a visual and auditory representation of some of the information included on this page. For a detailed description of what is portrayed in the video, open the video on YouTube, navigate to More actions, and select Open transcript.
Video: Feedback recording explains how you can include a recording of your feedback so it appears with any text you've added for a student.
Record feedback
You can include a recording of your feedback so it appears with any text you've added for a student. Add feedback wherever you start grading. Blackboard Learn provides auto-captioning for assessment feedback to increase accessibility for students. You do not need to turn on this feature.
To get started recording feedback, select Insert Content (the plus button) and then Recording in the dropdown menu of the content editor in the assessment you are grading.
This feature isn't supported on all browsers. For the best experience, use Chrome or Firefox.

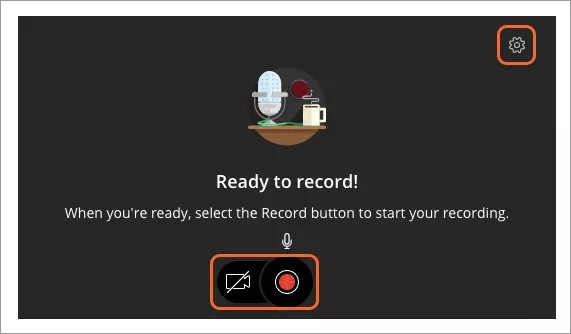
In the window that opens, select the camera icon on the recording interface to enable your camera. Without the camera enabled, the tool only records audio when you begin. When you're ready, select the Record button to capture your audio and video feedback.
When you've got your microphone and camera set up, you're ready to go.
- Select the red record button and watch as the tool counts down. You can make a recording up to five minutes long.
- Select Pause recording to stop and resume recording your feedback or select Stop recording to review the recording and save or discard. You can delete the recording and start over if you want to re-record.
- Review your recording and select Save and exit if you're satisfied and want to share it with the student.
- The recording is automatically inserted in the editor.
Rename your recording
You may rename the recording's display name and add alternative text to make it accessible to all users. The system uses the recording time and date for these fields by default. Select the recording in the editor and select Insert/Edit Recording again in the menu. Edit the display name and alternative text. By default, the alternative text field automatically uses the display name, but you can edit the alternative text separately if you want.
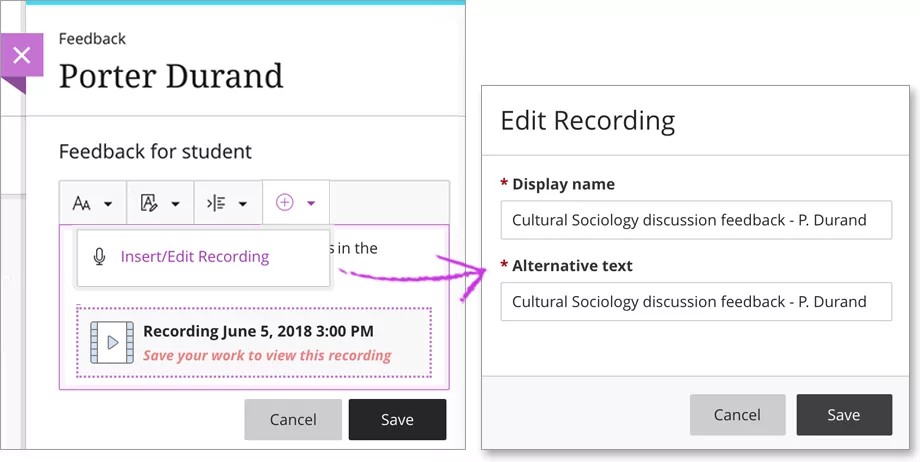
Select Save when you're finished editing.
Recording files
Recording files aren't included in course archives or backups, though the file association is retained. The recording should appear within the data retention window when the course is restored on the same Blackboard Learn system. Contact your administrator for more specific information about data retention at your institution.
Your administrator can copy a course with users and retain grades and recording files.
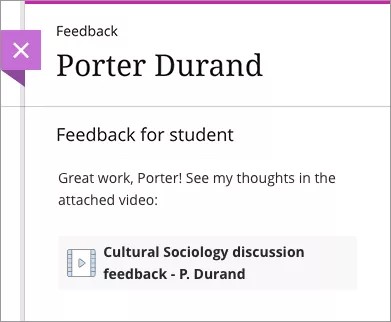
What do students see?
Students can access the recording with grade details and any other feedback you add. The recordings stream to student devices and don't require them to download anything. Students can play the recordings on most modern browsers without any additional plugins or extensions. Students can't download or save recordings.
Setup your microphone and camera
Select the gear icon to set up and test your microphone and camera.
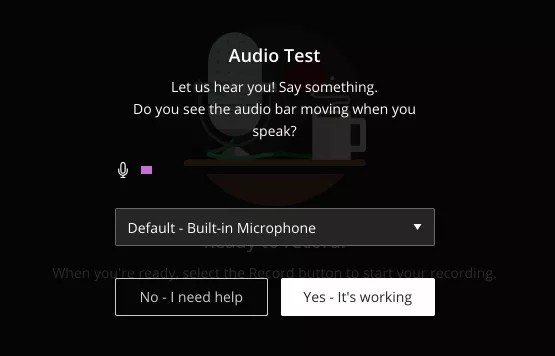
- Set up microphone: Having trouble recording audio? Use this option to test your audio and select the input source. If the volume level moves, your device's audio is being detected and should record as expected. Select Yes - It's working to exit the test.
- Set up camera: Select an input source for your camera. If you see your image on the screen, you're all set! Select Yes - It's working to exit the test.
Issues with your audio or video?
- Does the browser have permission to access your camera and microphone?
- Are the audio or video controls enabled? A line through the icons means that a device is not enabled.
- Have you installed the latest version of your browser?