Self-Enrollment
If self-enrollment is enabled by your system administrator, you can allow students to self-enroll in your course.
- From your browser, copy any URL from inside your course.
- Send it as a link within Learn to users you want to enroll in the course.
Link recipients select the link, which leads them to the self-enrollment page. From there, students can join the course by selecting Submit. If the link is sent outside of Learn, the recipient is required to log into Learn.
If an access code is required by the system administrator, send this code with your URL link. A student needs to enter the access code before selecting Submit.
Administrators must select the self-enroll option for courses before instructors share the course URL. Administrators may also select the "require access code to enroll" option.
Manage and enroll users
On the Roster page, access a person's menu. Select Edit member information to open the Member Information panel. You can change anyone's role, deny access to your course, or remove a person from your course. Your institution controls what you can do.
In the panel, you can also update your personal information. Your changes are reflected in your profile and throughout the system. Students can edit their information in the same way.
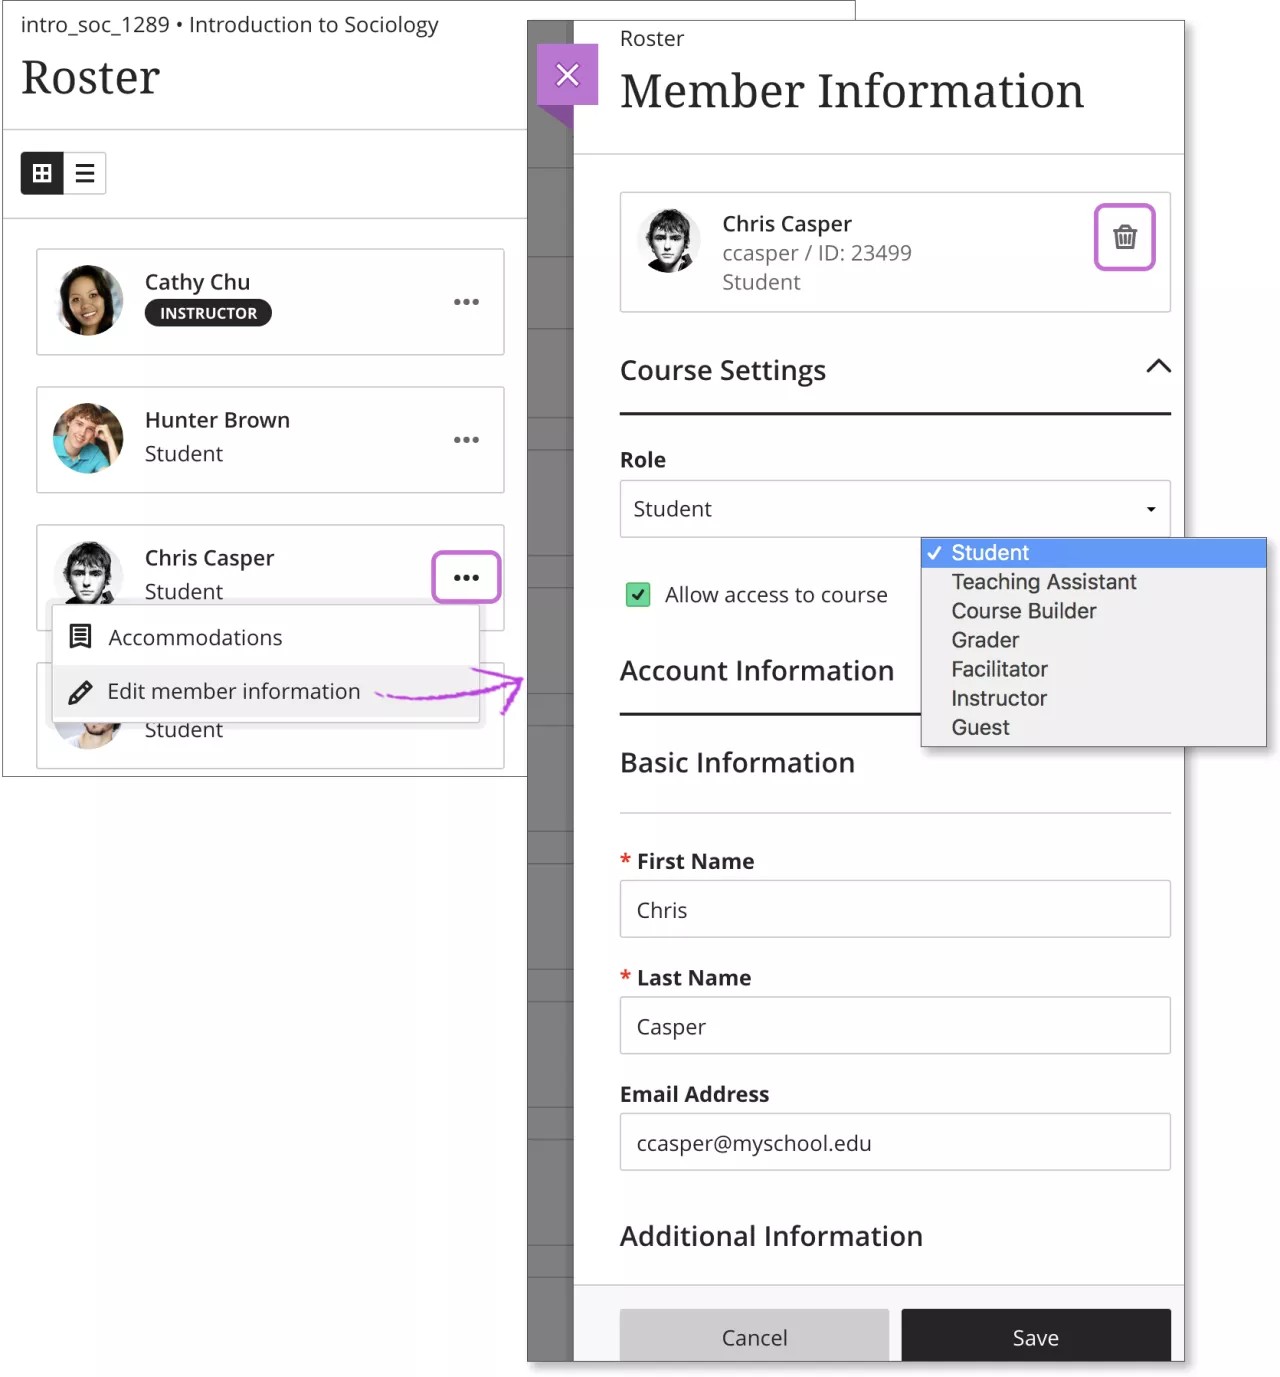
Change roles. When you change a person's role, the person is repositioned in the roster list if you're in Grades view. Roles appear in this order: instructors, teaching assistants, graders, course builders, and students. In Gradable Items view, all members appear in alphabetical order.
Deny access. Clear the check mark for Allow access to course to deny course access yet retain the person's course record and activity. The roster indicates the person's status with a gray profile picture with a diagonal line. The person no longer sees your course on the Courses page.
Administrators make users unavailable at the system level, which is different than when you deny a user access to your course from the roster. Unavailable users at the system level can't log into the system.
Remove people. Select Remove Member to remove a person from your course. This action also deletes all data and grades associated with the person. You'll receive a pop-up confirmation window. To keep the data, you can cancel and deny the person's access to your course instead.
Enroll people
If allowed by your institution, you can enroll people in your course. Select the plus sign button at the top of the roster to open the Enroll People panel.
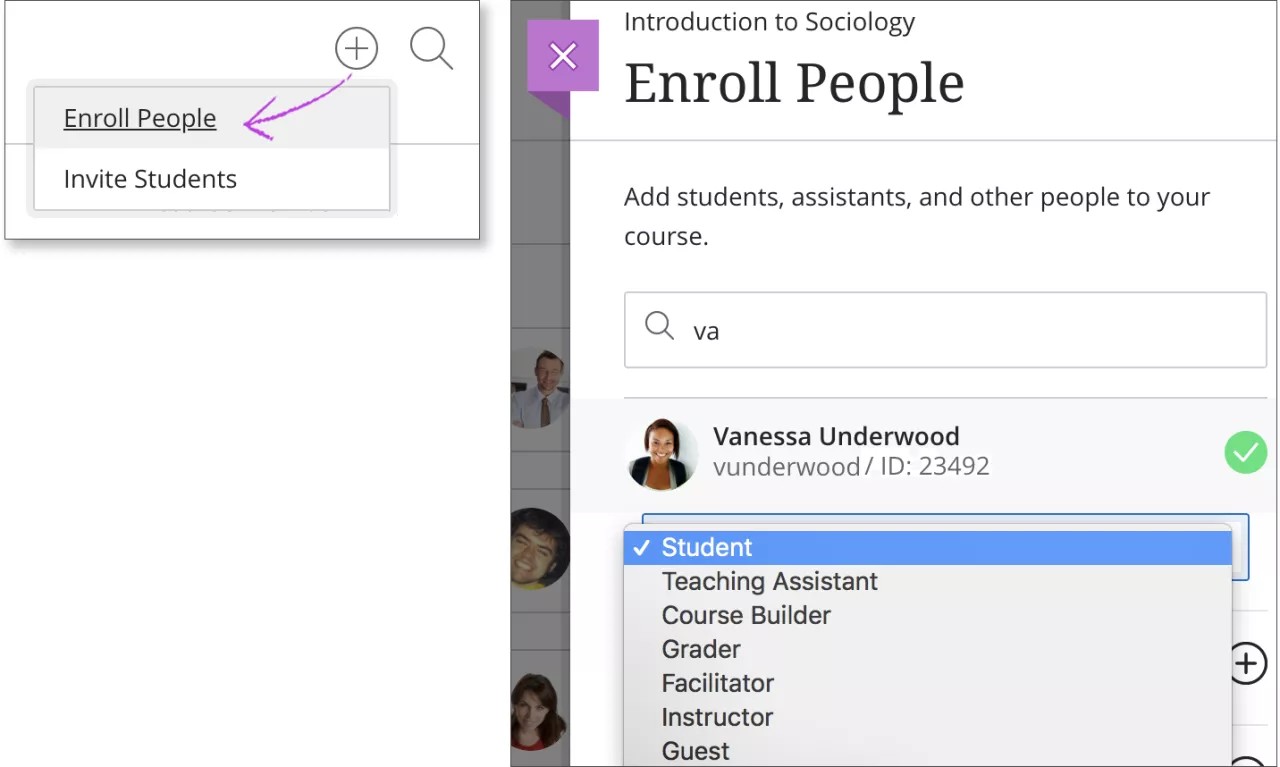
- In the search box, enter a name, username, or at least two letters to reveal a list of matches. People already enrolled in your course don't appear in the search results.
- Select one or more people. They immediately appear in the roster list. To reverse a selection, select a person's name again.
- Choose a role for each selected person.
- Select Save. The panel closes. At the bottom of the roster, a message appears with the names of the people you added.
Unavailable users at the system level can't be enrolled in courses and don't show in the search results.
Accommodations
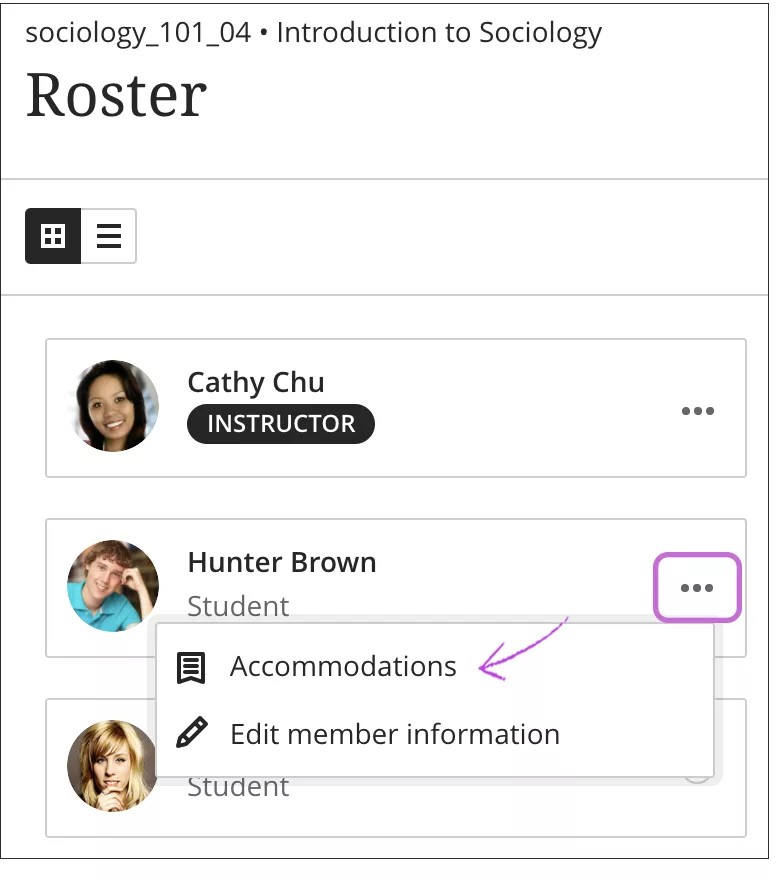
You can set accommodations for individual students and exempt them from requirements, such as assessment due dates or time limits. Use accommodations to help students progress in the course even though they may have difficulty with some requirements.
On the Roster page, open a student's menu and select Accommodations.
In the panel, select the accommodations for this student:
Due date accommodation: Students with this accommodation will never have their work marked late.
Time limit accommodation: Students with a time limit accommodation have more time to finish their work during timed assessments. After you select this accommodation, choose the amount of extra time:
- + 50% extra time
- + 100% extra time
- Unlimited time
A student with the Unlimited time accommodation never sees the time limit for the assessment, reducing the pressure or anxiety that comes with coursework.