Your Course View
You can easily navigate, provide content, edit items, and change options that affect how users interact with the interface.
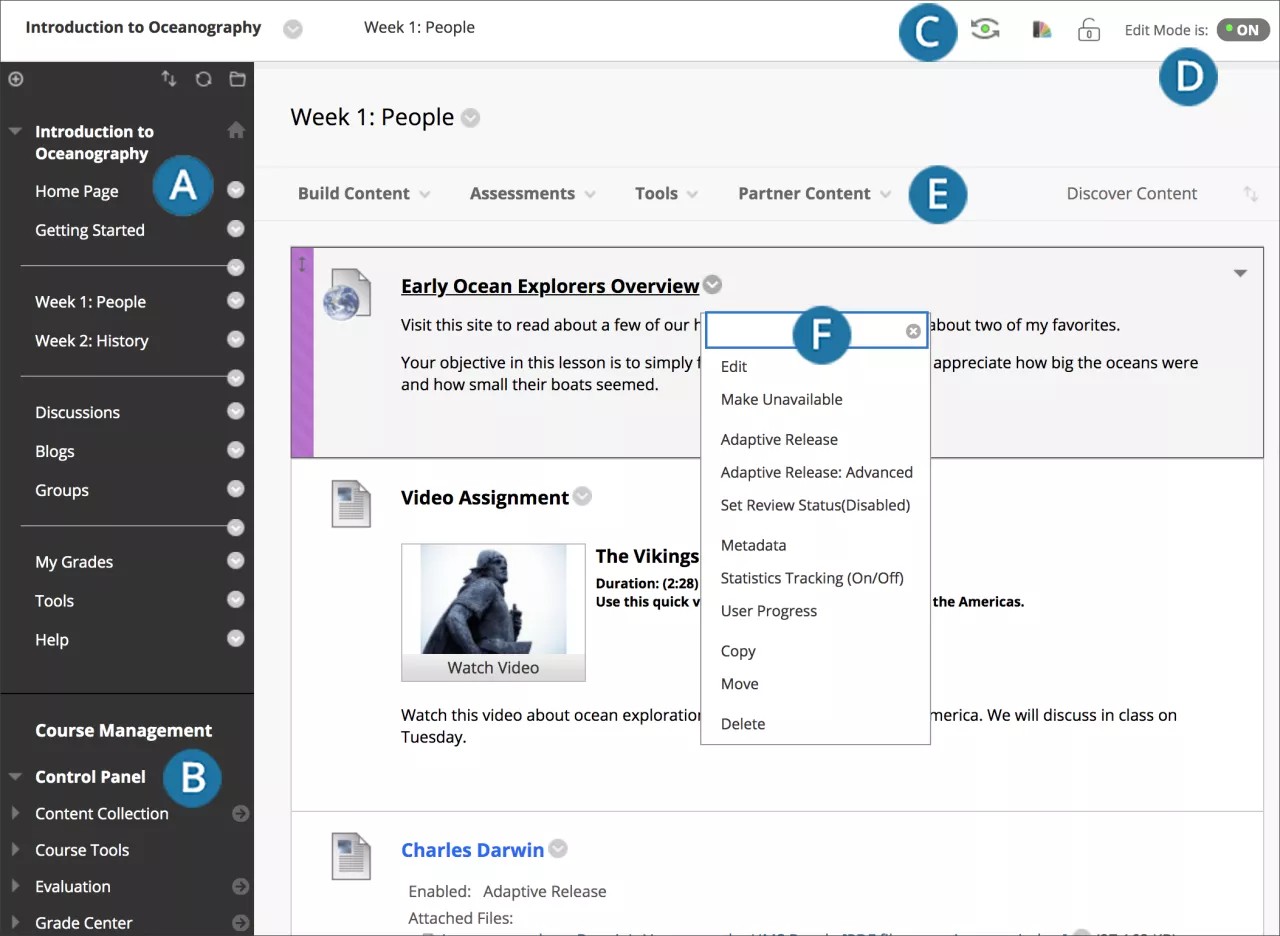
- Course menu: Users' access point for all course content. You control which links appear on the course menu.
- Control Panel: The area after the course menu is your access point for course management functions, such as course style, course tools, and users. Students don't see the Control Panel.
- Student preview: You can review course content and validate course behaviors from a student's perspective. You're logged in with a student account—the preview user account—and enrolled in the current course.
- Edit Mode: When Edit Mode is ON, all the instructor functions appear, such as Build Content or the appearance of menus. When Edit Mode is OFF, all instructor functions are hidden. The Edit Mode function appears to users with the role of instructor, teaching assistant, course builder, and administrator.
- Functions: In one or more rows above the content, access page-level functions such as Build Content, Search, Delete, and Upload. The functions change based on where you are in your course.
- Menus: An options icon appears for components with menus, such as content items, course menu links, or Grade Center columns. The options in the menu vary based on the component.
If you see a gauge icon next to your files, your institution uses Blackboard Ally to measure the accessibility of your course content. To learn more, visit Ally help for instructors.
Video: Introduction to Blackboard Learn for Instructors
Watch a video about the course environment
The following narrated video provides a visual and auditory representation of some of the information included on this page. For a detailed description of what is portrayed in the video, open the video on YouTube, navigate to More actions, and select Open transcript.
Video: Introduction to Blackboard Learn provides an overview of the course environment.
Course menu
The course menu appears on the left side of your course window and is the cornerstone for the organization and navigation of your course. You create links on the course menu to present tools and materials to users. You can customize its appearance and order the links.
The course menu appears in a list view, which displays only the top level of course materials. You can choose buttons or text for your links.
Select the Display Course Menu in New Window icon to view the course materials as a directory tree in a new window. Users can expand the view to show the hierarchy of course navigation.
Your institution can restrict options to maintain a consistent style for all courses.
Create a link on the course menu
Create an uncluttered course menu to maintain efficient navigation for your users, and try to limit the number of links included in the course menu. Use content areas to hold related items and give your course organization and structure.
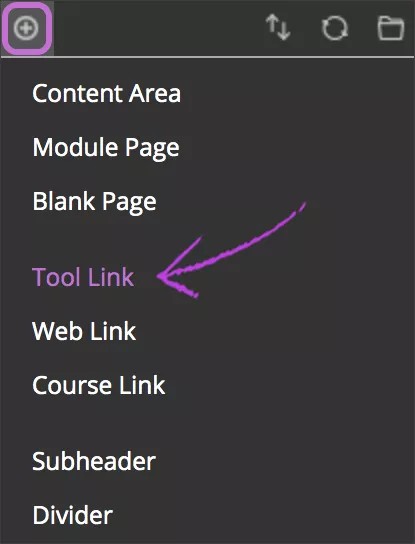
- Select the Add Menu Item icon above the course menu to open the menu.
- Select the type of content to create and type a name. Complete any other required text boxes, such as URL for Web Link.
- Select the Available to Users check box if you're ready for students to see it. You can create content ahead of time, hide the link, and then show the link at the appropriate time.
- Select Submit. A link to the new content appears on the course menu.
If you link to content hidden from students, the link in the course menu is also hidden. To make the course menu link visible, first make the content available.
Course menu components
This table lists the types of content and tools you can add to the course menu. You can also include subheaders and divider lines to help visually organize the links for your students.
| Option | Description |
|---|---|
| Content area | Content areas are the top-level course areas and hold all of your course materials. You create, link, and manage them on the course menu. After you create a content area, you add content to it, such as online lectures, multimedia, tests, and communication tools. |
| Blank page | You can include files, images, and text together on one page. With the editor, you have creative control over how your content appears and the flexibility to change the order and appearance when you want. Students select the title in the content list to view the content. No description appears with the title, so you want to be sure to use a meaningful title. This content type saves screen real estate and reduces the amount of scrolling. |
| Tool link | Create a link to an available tool in your course, such as the calendar or journals. You can also create a link to the Tools page. |
| Course link | You can create a shortcut to an item, tool, or area in your course for quick access to relevant materials. |
| Web link | You can link to an outside website or resource. |
| Module page | A module page is a specialized content page that presents content in boxes, such as on a course Home Page. Students can keep track of tasks, tests, assignments, and new content created in the course. You can't add your own content to a module page. The system generates the information in each module. |
| Subheader | A subheader is unlinked text. You can group related links below a subheader to help students find information. |
| Divider | A divider is a line that visually divides the course menu into sections. After you create a divider, you can move it to another position. |
Reorder and manage course menu links
You can organize and rename the course menu links.
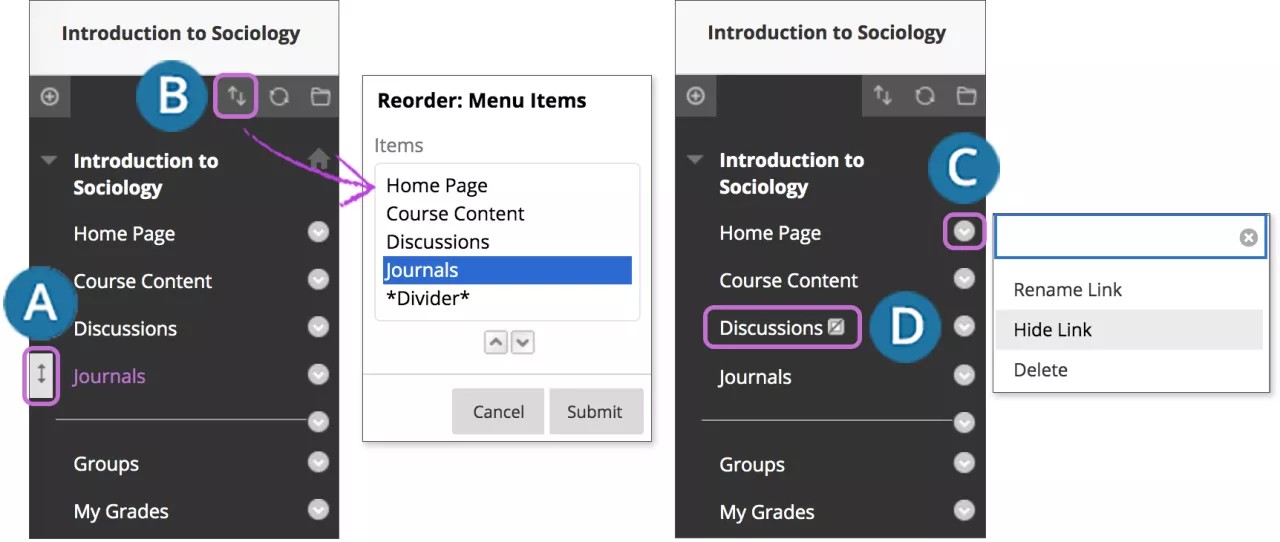
- Use the drag-and-drop function to reorder course menu links.
- Or, use the keyboard accessible reordering tool to reorder the links.
- Open a link's menu and select Rename to change its title. Select Hide Link to make it unavailable to students. Select Show Link to make it available to students. If you Delete a content area, all content items within it are also permanently deleted. This action is final.
- When Edit Mode is ON, an unavailable link title appears with the This link is hidden from students icon. Students don't see the link on the course menu.
For course menu items that allow guest or observer access, you must open the item's menu and permit their access.
Menus
Throughout Blackboard Learn, items have a menu associated with them if you can perform actions on them.
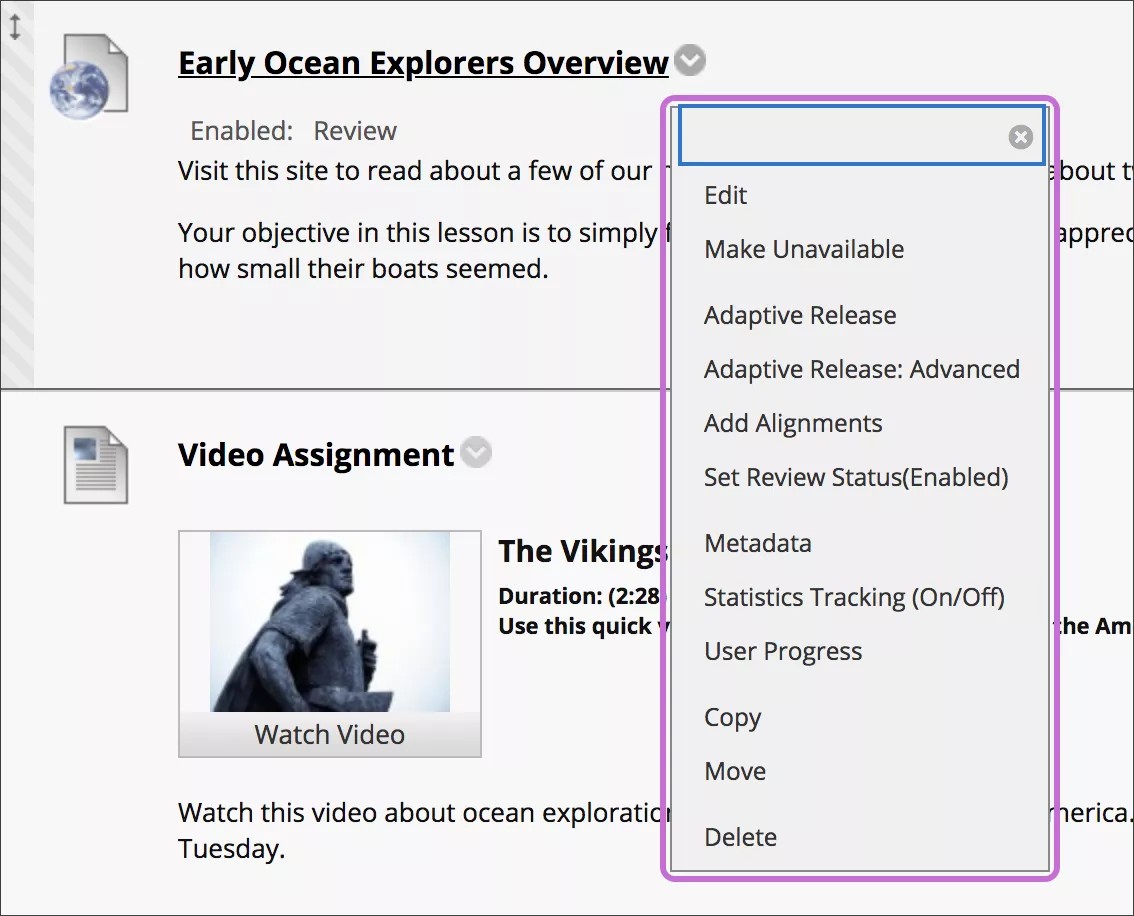
Examples of items with menus include content items, course menu links, and Grade Center columns. The options in the menu vary based on the component.
Select the arrow next an item's title to open the menu. Examples of options include Edit, Delete, Copy, and Move.
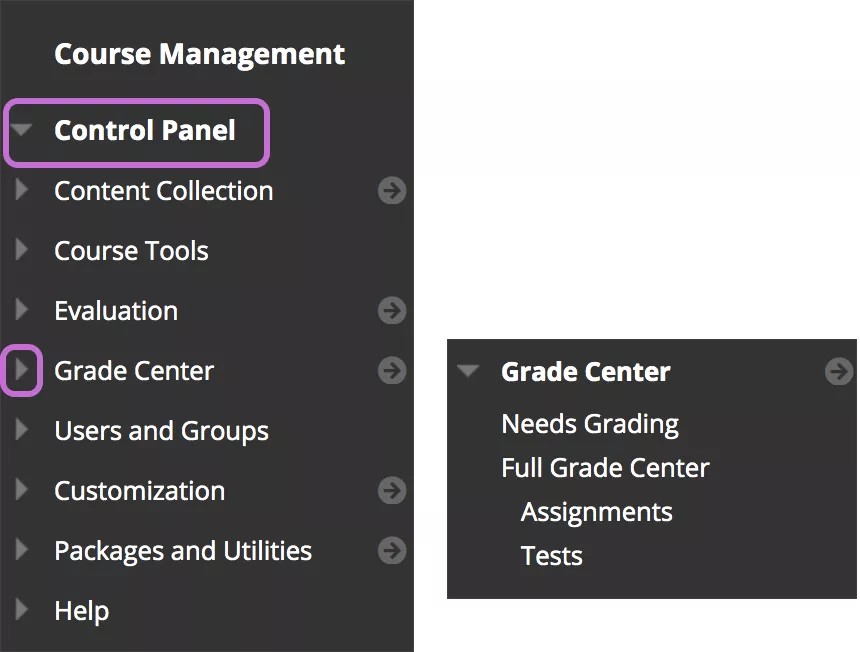
Control Panel
The Control Panel appears below the course menu and provides access to all course administration. The table describes each section.
Use the arrows next to each link to expand or collapse the area.
The Control Panel is only available if you have one of these course roles:
- Instructor
- Teaching Assistant
- Grader
- Course Builder
- Administrator
| Option | Description |
|---|---|
| Files or Content Collection | Course Files is the file repository available for all Blackboard Learn courses. But, if your institution has access to the content management features, the Content Collection is the file repository. Course Files provides file storage on the Blackboard server for a single course. Content in the repository is content you can reuse. You can't share content across courses that you teach. The section heading Files appears in the Control Panel. If your institution has access to the content management features, the Content Collection is available through this area. With the Content Collection, institutions have a common content repository where users can share content. You can add content to your course from other courses and from your computer, and manage it through the Content Collection. The section heading Content Collection appears instead of Files in the Control Panel. |
| Course Tools | Contains all the available tools that are added to your course. |
| Evaluation | Provides links to course reports, the Retention Center, and the Performance Dashboard. Use these tools to view information about student activity and content usage. You can also be notified about performance based on criteria you create. |
| Grade Center | Provides links to the Needs Grading page, the Full Grade Center, default smart views of the Grade Center, and any smart views you create. Smart views appear in an indented list in the Full Grade Center section. |
| Users and Groups | List, enroll, edit, and remove users from your course. Create formal groups of students to collaborate on work. |
| Customization | Control enrollment options and guest and observer access. You can change the properties of your course, such as its name, availability, and language pack. You can use the Quick Setup Guide and Teaching Style page to modify the appearance of your course. Change tool availability to control which tools are available in your course and which users have access to them. |
| Packages and Utilities | Import, export, and archive a course, check course links, copy all or part of the course, and move selected files to Course Files or the Content Collection. |
| Help | Offers online documentation. |
Paging options
You can edit the paging options to specify how many items appear on a page. For example, you can determine how many forums appear on the main discussion board page or how many items appear on the Needs Grading page.
The default is 25 items per page and the maximum number of items is 1,000 per page. Show All displays all items and causes the other controls to disappear. For performance, the items per page shouldn't be greatly expanded.
Use these steps to edit the paging options:
- Select Edit Paging.
- Type a number in the Items per page box. If the number is greater than the total number of items, then all items appear.
- Select OK.
Course home page
By default, your Original course includes a Home Page on the course menu. The Home Page is a course module page. You can rename or delete this page, and create other course module pages.
Course module pages contain details about new content and due dates for the course you're in. Information is presented in boxes called modules, such as My Announcements, My Tasks, and What's New. The system generates the information in each module. You can't add your own content to module pages.
The Home Page is often the default course entry point—the first page students see when they enter your course.