Add a syllabus
You can upload an existing syllabus file and students select the link to open it. Or, you can use the syllabus builder. The syllabus will appear as a standalone item in the content list. Your institution controls if this tool is available.
Use the syllabus builder
You can use the syllabus builder to create a syllabus in a modular format. You can also specify the design and add lesson information.
Be sure Edit Mode is ON so you can access all of the instructor's options.
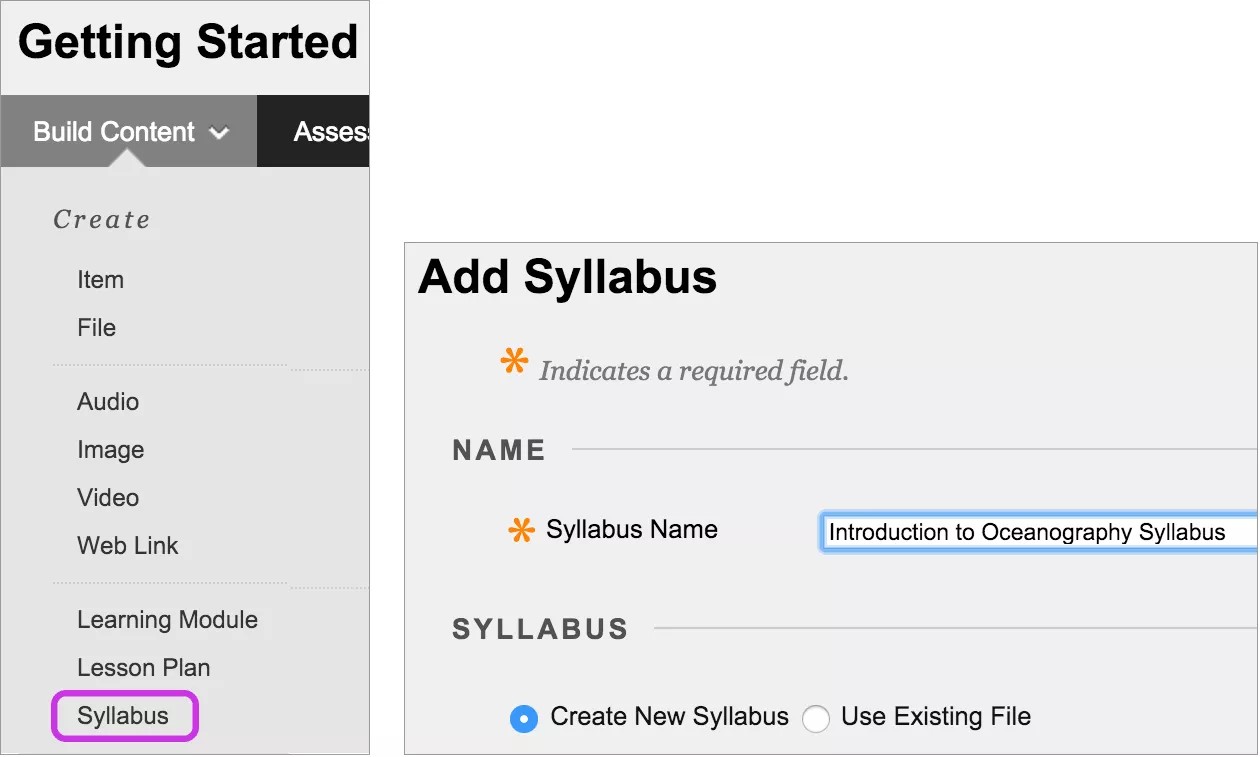
In a content area or folder, select Build Content to access the menu and select Syllabus. On the Add Syllabus page, type a name and select the Create New Syllabus option. After you submit, the Syllabus Builder page appears.
Default body text boxes
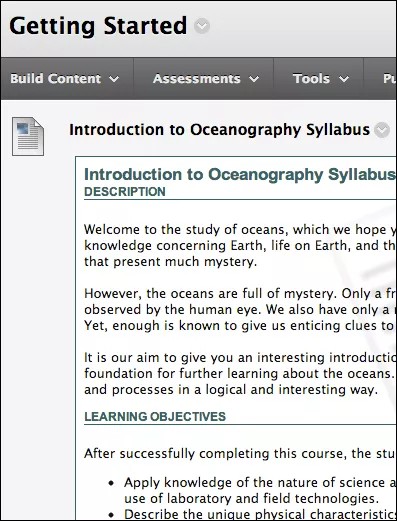
On the Syllabus Builder page, three sections appear by default: Description, Learning Objectives, and Required Materials. You can edit the section headings. Type instructions or a description in each box. You can format the text with the options in the editor.
Design, lessons, and options
In the Syllabus Design section, select the style and colors for your syllabus.
In the Build Lessons section, select the Create Specified Number of Lesson Shells option and type a number. You provide lesson information in later steps. Alternatively, you can select the Do Not Create Lesson Shells option.
Select the appropriate options for availability, tracking, and display dates. Display dates don't affect a syllabus's availability, only when it appears.
After you submit, you can view your syllabus and provide the details for the lessons. You can change the syllabus content at any time. Open the syllabus's menu and select Edit.
Add lesson information
Access the syllabus you created. Open a lesson's menu and select Edit. On the Edit Lesson page, type a name and description. Optionally, select a date and time when the lesson will appear in the syllabus. Select Submit and select OK to view the syllabus.
To remove a lesson, select a lesson's check box and select Delete Lesson above the syllabus information. You can also add more lessons.
Upload a syllabus file
If you don't want to use the modular syllabus that takes up space in the content list, you can upload an existing syllabus file.
Be sure Edit Mode is ON so you can access all of the instructor's options.
In a content area or folder, select Build Content to access the menu and select Syllabus. On the Add Syllabus page, type a name and select the Use Existing File option.
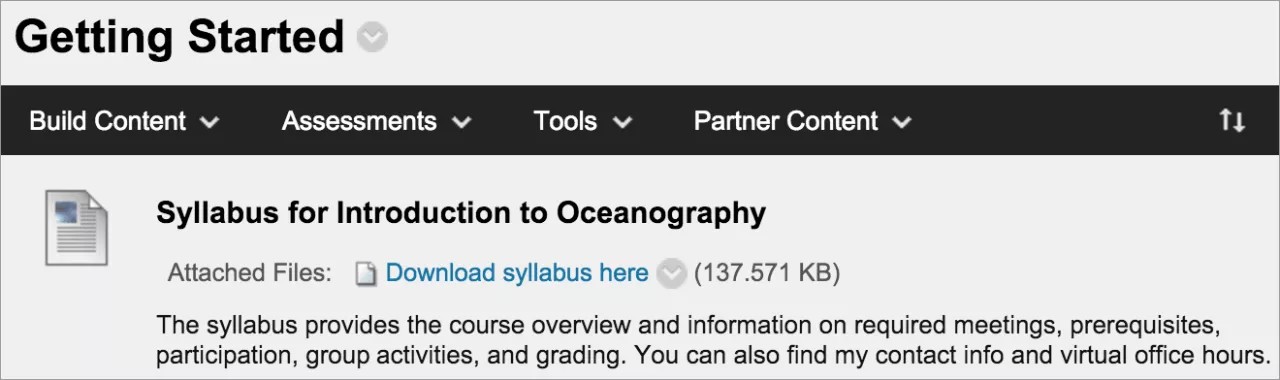
Browse for a file from your computer or the course's file repository: Course Files or the Content Collection. You can attach more than one file. You can also edit the Link Title to provide a meaningful name for students.
You can use the options in the editor to type a description, add images, and format the text. Select the appropriate options for availability, tracking, and display dates. Display dates don't affect a syllabus's availability, only when it appears.
After you submit, you can view your syllabus in the content list.
You can change the syllabus content at any time. Open the syllabus's menu and select Edit. You can change where the syllabus appears in the list with the drag-and-drop function or the keyboard accessible reordering tool.