Set triggers to notify you of possible issues.
District administrators can configure notifications to help manage late data files. When you don't receive an expected data file by a certain time, you can send yourself a notification to investigate any issues.
Set message triggers for late data
- From the Blackboard Communications HQ interface menu, select Settings > Global Settings.
- Select File Monitoring.
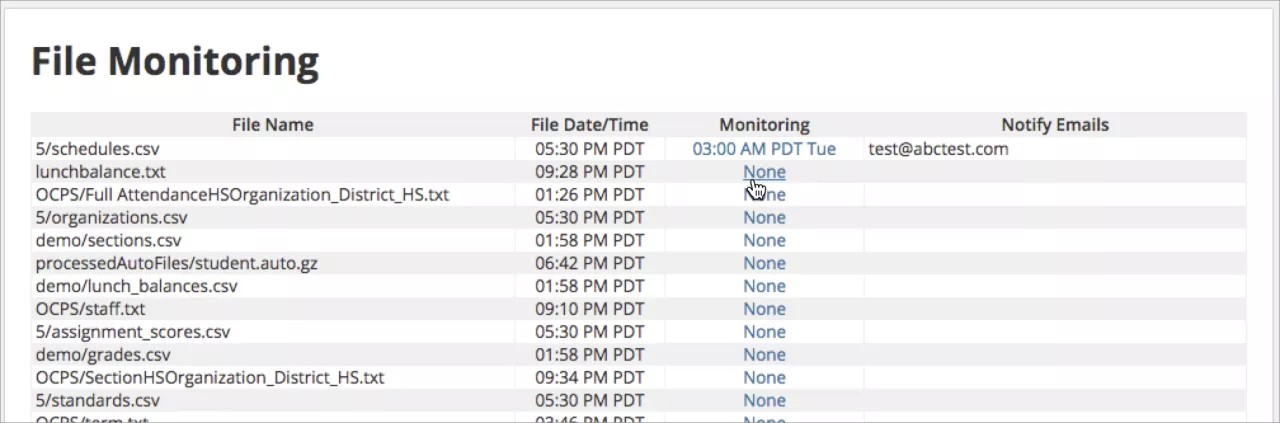
On the File Monitoring page, you can add triggers for when you receive files late.
- Select the Monitoring link for any file you want to track.
- Type the Monitor Time for the notification to be sent if the file has not been received.
For example, if you normally receive the student user accounts by 4:00 AM, you can set a notification to contact you by 5:00 AM if the file has not been received.
- Select the Days of the Week the file should be received.
- Type the Monitor Emails for those individuals to be contacted if files are not received by the time.
- Select Done when finished.
Automated messages monitoring
Configure notifications to help manage automated message triggers with the Monitor Configuration page. Automated messages can be sent in cases of attendance issues or grade levels, based on the files uploaded to the system. When the number of automated messages sent isn't as expected, you can send yourself a notification to investigate any issues.
Learn more about automated messages
Set the message triggers
- From the Blackboard Communications HQ interface menu, select Settings > Global Settings.
- Select Automated Message Monitoring.

On the Automated Message Monitoring page, you can add triggers for when automatic messages are sent out late.
- Add when to be notified for late automated messages:
- Select the Monitoring link for any file you want to track.

- Type the Monitor Time for the notification to be sent if the file has not been received.
For example, if you normally receive the student user accounts by 4:00 AM, you can set a notification to contact you by 5:00 AM if the file has not been received.
- Select the Days of the Week the file should be received.
- Select the trigger Number of messages that if below will send an email to warn those monitoring the content.
- Type the Monitor Emails for those individuals to be contacted if files are not received by the time.
- Select Done when finished.
- Select the Monitoring link for any file you want to track.
Import monitoring email
Import email monitoring provides an additional level of transparency when a file is received but isn't successfully imported. When more than 10% of the records in an import fail, an email is sent to the designated user. The email contains information that helps streamline any support requests and determine the root cause of the issues faster.
Settings > Organization Config > District > Import Monitoring Email
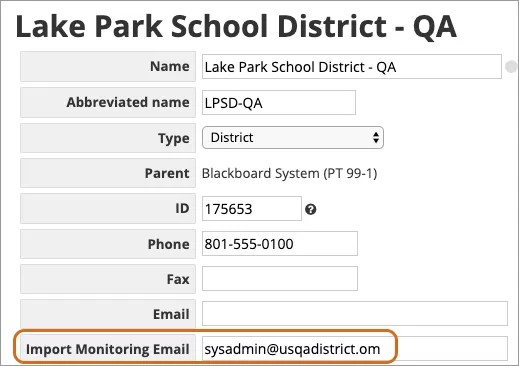
Type the email address of who you want to receive an email if there are errors with the import. If the import is at a child institution, without an import monitoring email set, and it fails, the email is sent to the parent institution's import monitoring email address.
Sample email
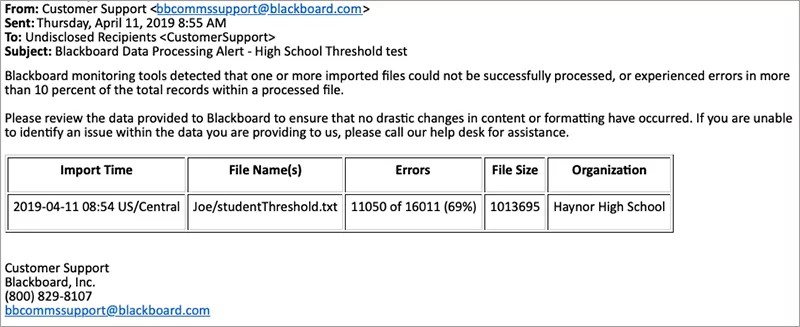
The email provides the Import name that failed, file name, errors, and organization. If you receive this email, please forward it to [email protected]