Check any missing information or discrepancies in your data!
The Data Reports are listed on the Reports page. Only the reports available to your district or school will be displayed.
Bad Phone/Email Report
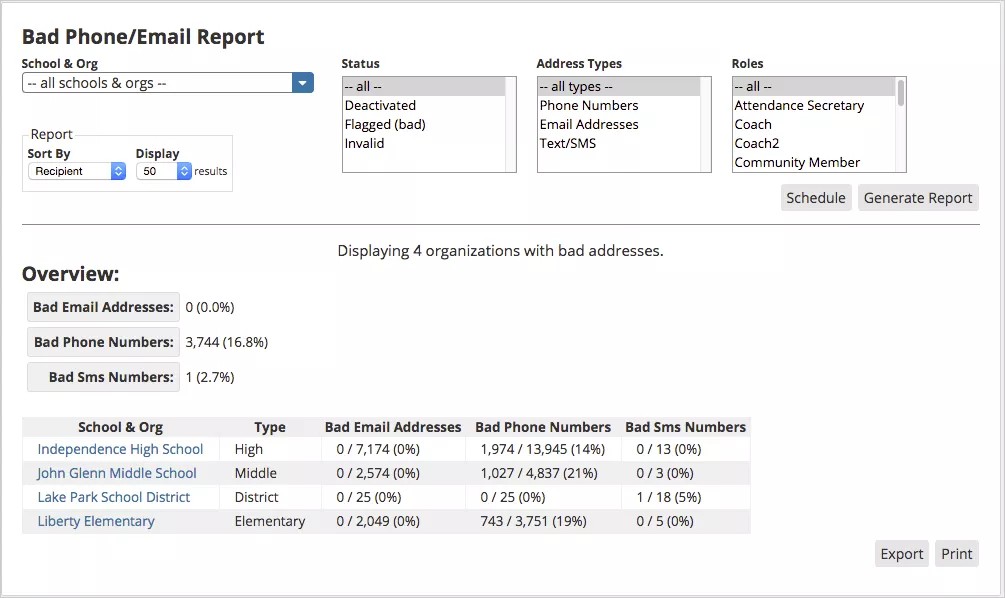
Use this report to see the number of accounts that have inaccurate phone numbers or email addresses. This report allows you to better correct any issues when parents, students, or community members are not receiving communication from their district or school. This report features carrier integration which automatically disables phone numbers that have been deactivated. The Bad Phone/Email report includes the numbers that have been deactivated.
You can schedule this report on a regular basis!
- Select Reports > Bad Phone/Email report.
- Set your report criteria:
- Select the School to track a specific school's user changes.
- Select the specific Address Types to review, such as Phone Numbers.
- Select the user Roles to track a specific type of user's changes, such as Parents.
- Select which information to Sort By when displaying results, and select the number of records to Display per page.
- Select Generate Report.
The report will display the recipient, the role, the bad information, a possible new number for the user, the date the account was flagged, the date the carrier deactivated the number, the known good contact information for the user, and the status of the flagged information. Status levels can include Invalid address format, Deactivated by carrier, or Flagged after failed delivery attempt.
Check out the delivery status details!
Change Log Report
Use this report to see what user information has been updated during a specific time frame. Only school administrators and district administrators have access to this report.
Changes made through data file imports are saved for 30 days. Changes made manually by users are saved for a year.

You can schedule this report on a regular basis!
- Select Reports > Change Log report.
- Set your report criteria:
- Select the School to track a specific school's user changes.
- Select the specific Date Range to track the user changes during a specific time frame.
- Select the user Role, to track a specific type of user's changes, such as Parents.
- Select the type of change Event to track - Add for new accounts, Change for updated user information, or Delete for deleted accounts.
- Select the number of record to Display per page of the report.
- Select which information to Sort By when displaying results.
- Select how the information was Changed By - An import, A person, or a SIF agent.
- Select the type of Items to include in the report - such as Phone Numbers or Birth Dates.
- Select Generate Report.
The report will display the change history regarding those accounts specified by selecting the search criteria.
Do Not Contact Report
The Do Not Contact report not only provides the ability to list all the numbers and emails that have opted out of contact with your district or school, this section also allows you to list who not to contact. You can create a Do Not Contact list that contains phone numbers and email addresses that should not be contacted (for example, 911). Any messages you send will not be sent to the members on the list.
Add phone numbers and emails to the Do Not Contact list
- Select Reports > Do Not Contact report.
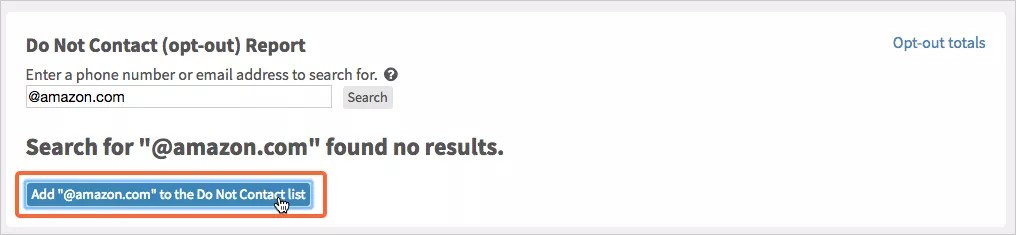
- Type an email address or phone number you want to add to the do not contact list.
- Select Search to view if the contact already exists on the do not contact list.
- If the number or email is not already on the list, click Add to the Do Not Contact list.
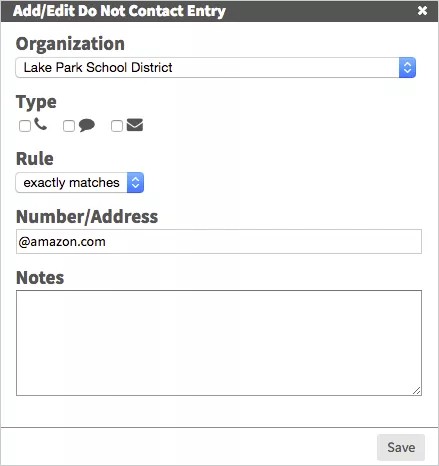
- Select the Type of communications to block - Phone, Text, or Email.
- For Phone opt-out, select the types of calls to block.
- For Phone and Text opt-out, set the Rule to exactly matches or to ends with to ensure the number is blocked with or without the area code information.
- Type any additional Notes about the contact.
- Select Save when finished.
Upload phone numbers and emails to the Do Not Contact list
You can upload a list of opt-out phone numbers, SMS/text numbers, and email addresses for the Do Not Contact list. These numbers and addresses will not be sent any messages.
- From the Reports menu, select Do Not Contact report.

- Select Upload. The file must be a tab delimited text file (.TXT) with the headers Phone, Email, and Text.
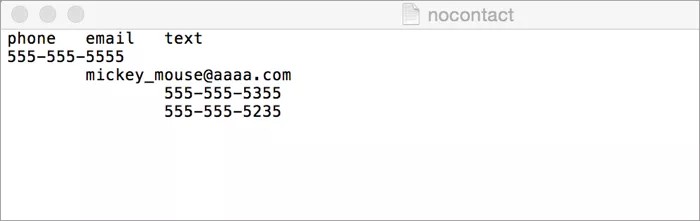
- Once you upload the file, the numbers and addresses will be added to the Do Not Contact list.
View the Opt-out totals
Use the opt-out totals to see which users have chosen to opt-out of specific type of contact notifications.
- Select Reports > Do Not Contact report.
- To view the users that have opted out of contacts, select the Opt-out totals.
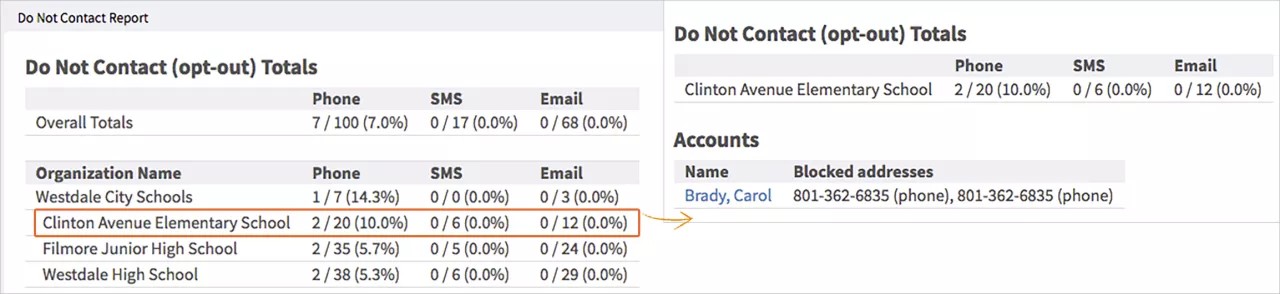
- Select the individual Organization Name to see the accounts per school that have opted out of contact.
- Select the account Name to view the user's account information.
Remove a contact from the list
You can remove a contact from the Do Not Contact list. The user will receive contact from your district and schools again.
- Select Reports > Do Not Contact report.
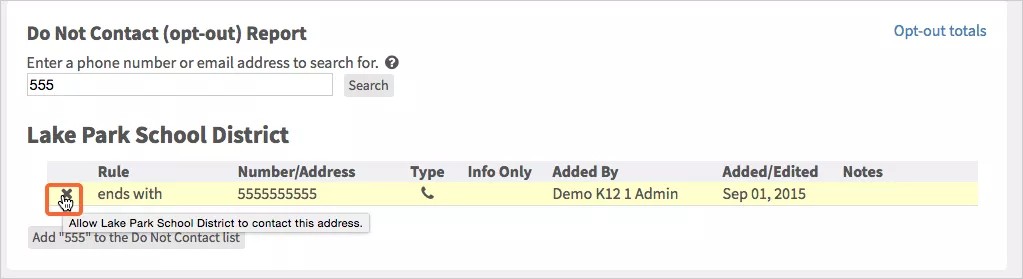
- Type an email address or phone number you want to remove from the do not contact list.
- Select Search.
- Select the Remove icon from the contact. The contact will be added back.