Create a group discussion
When you create a discussion, you can assign groups to help students feel more comfortable because fewer people are involved. You can also assign a specific topic to each group.
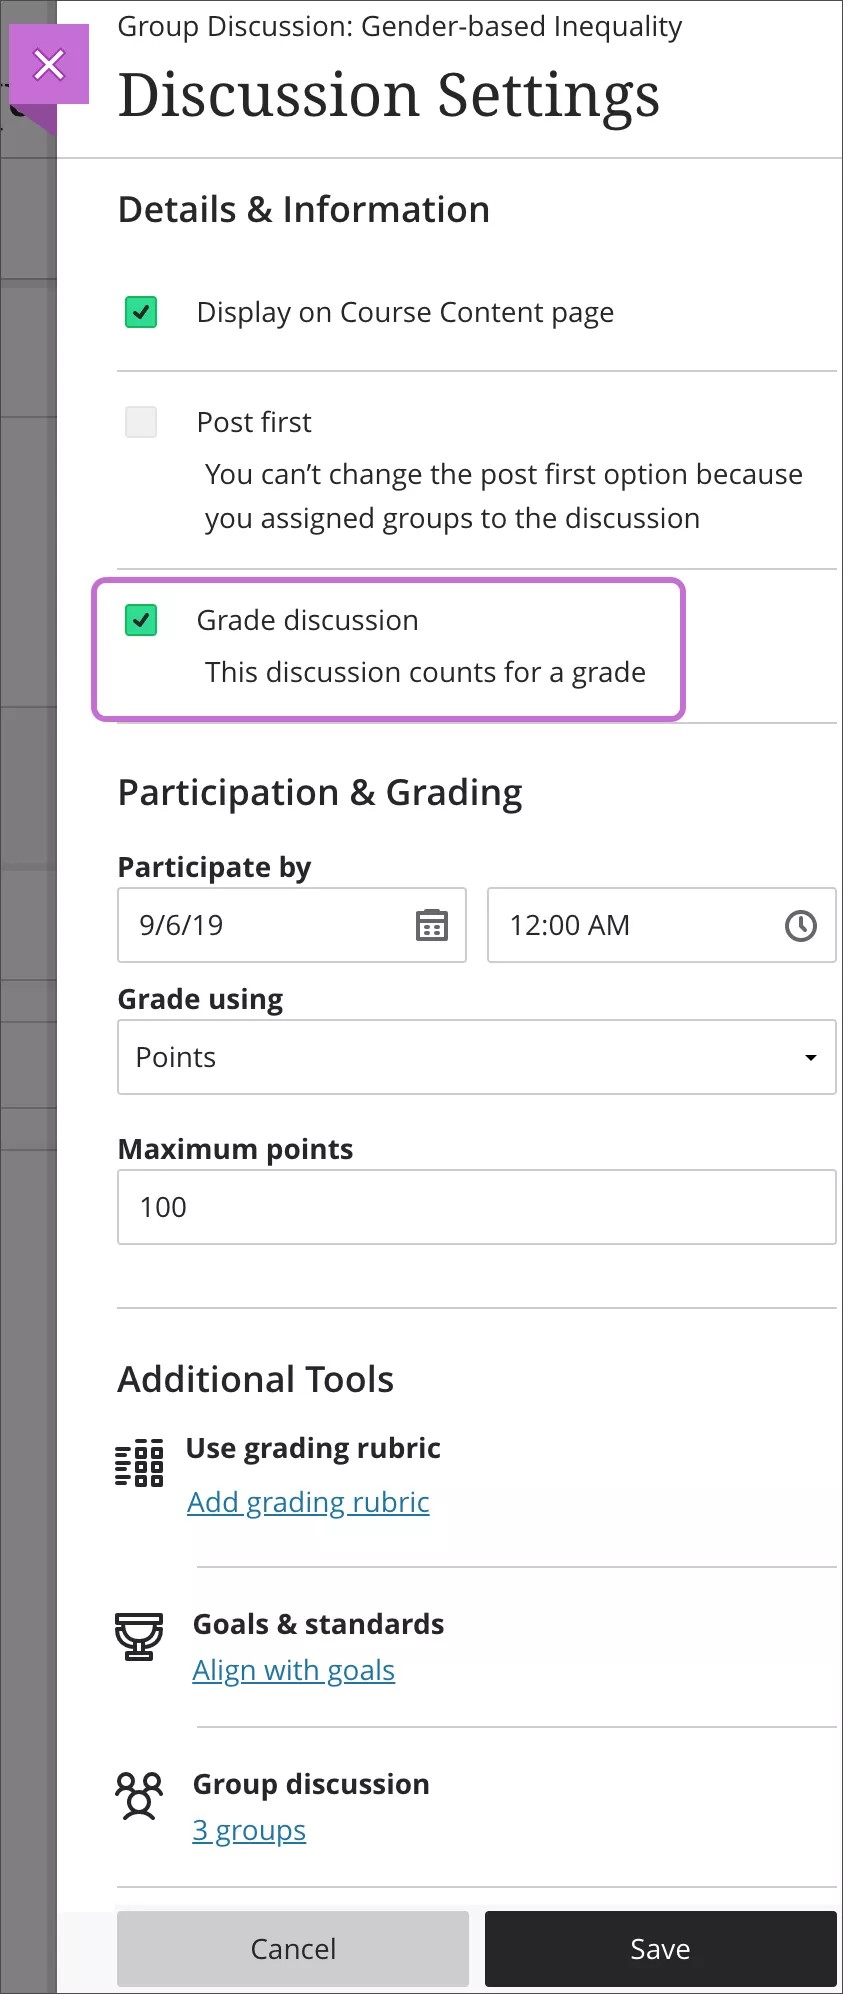
You assign groups to a discussion in the Discussion Settings:
Discussions Settings icon > Discussion Settings panel > Assign to groups > groups page
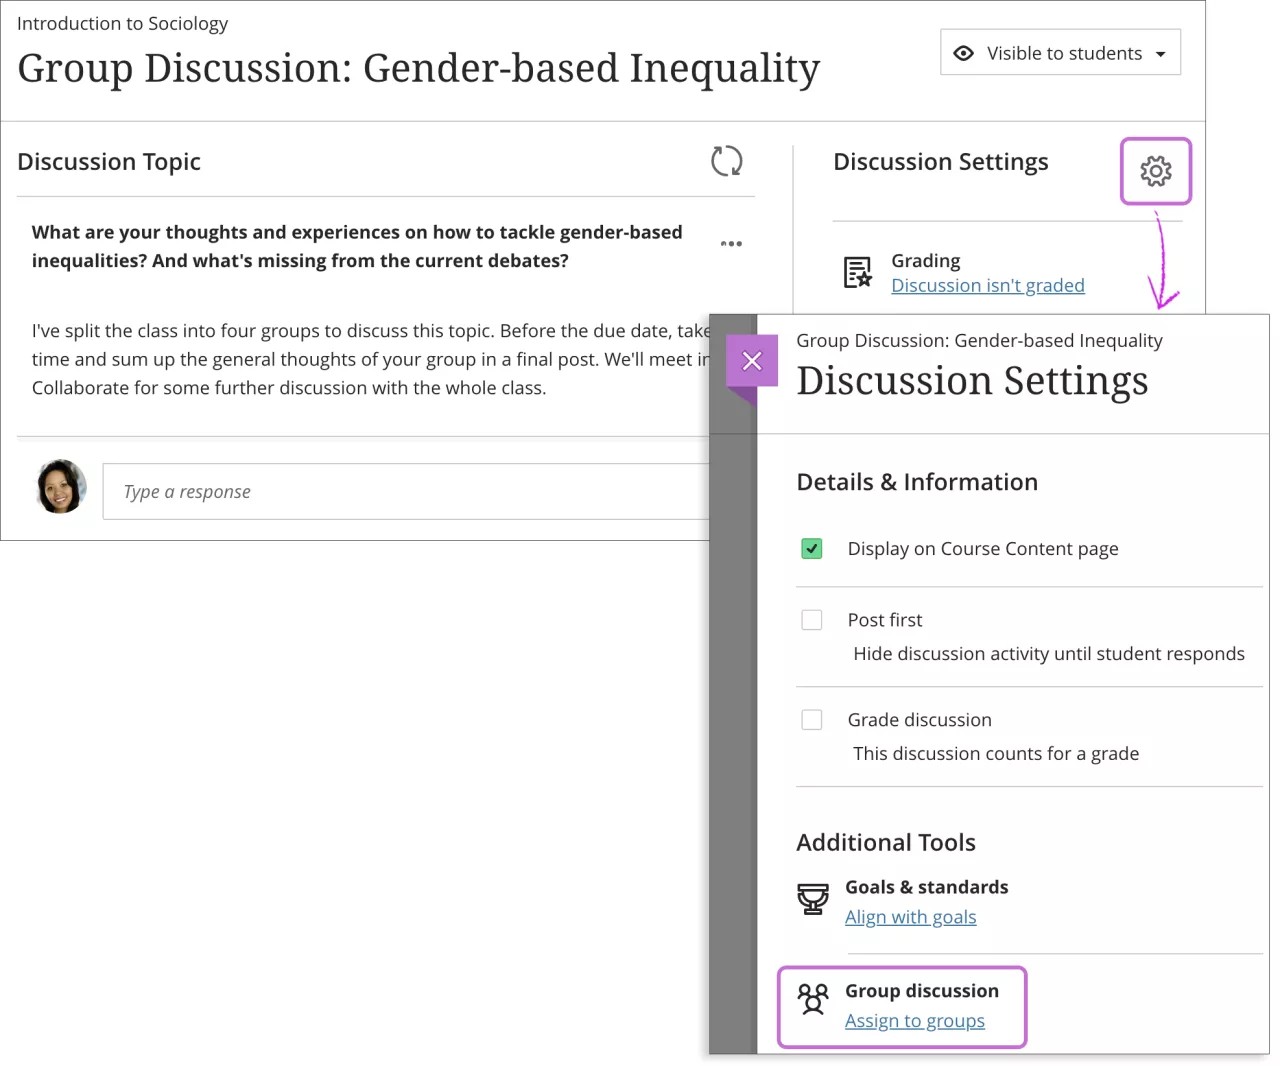
You can align goals with a group discussion. When you want to use both post first and groups, select Post first before you assign groups. If you select the Grade discussion check box, more settings appear.
Create groups
On the groups page, a partial list of your students appears in the Unassigned students section. Select Show All to view the entire list. You can create multiple groups to deliver the discussion to. You can also select the plus sign below the graphic to create a custom group and add students.
Students who aren't assigned to a group won't have access to the group discussion because it won't appear on their Course Content pages. If you ask students to self-enroll in a group, they can't access the discussion until they join a group.
If you want to release the group discussion in the future, students can't access the content, but they can join a group.
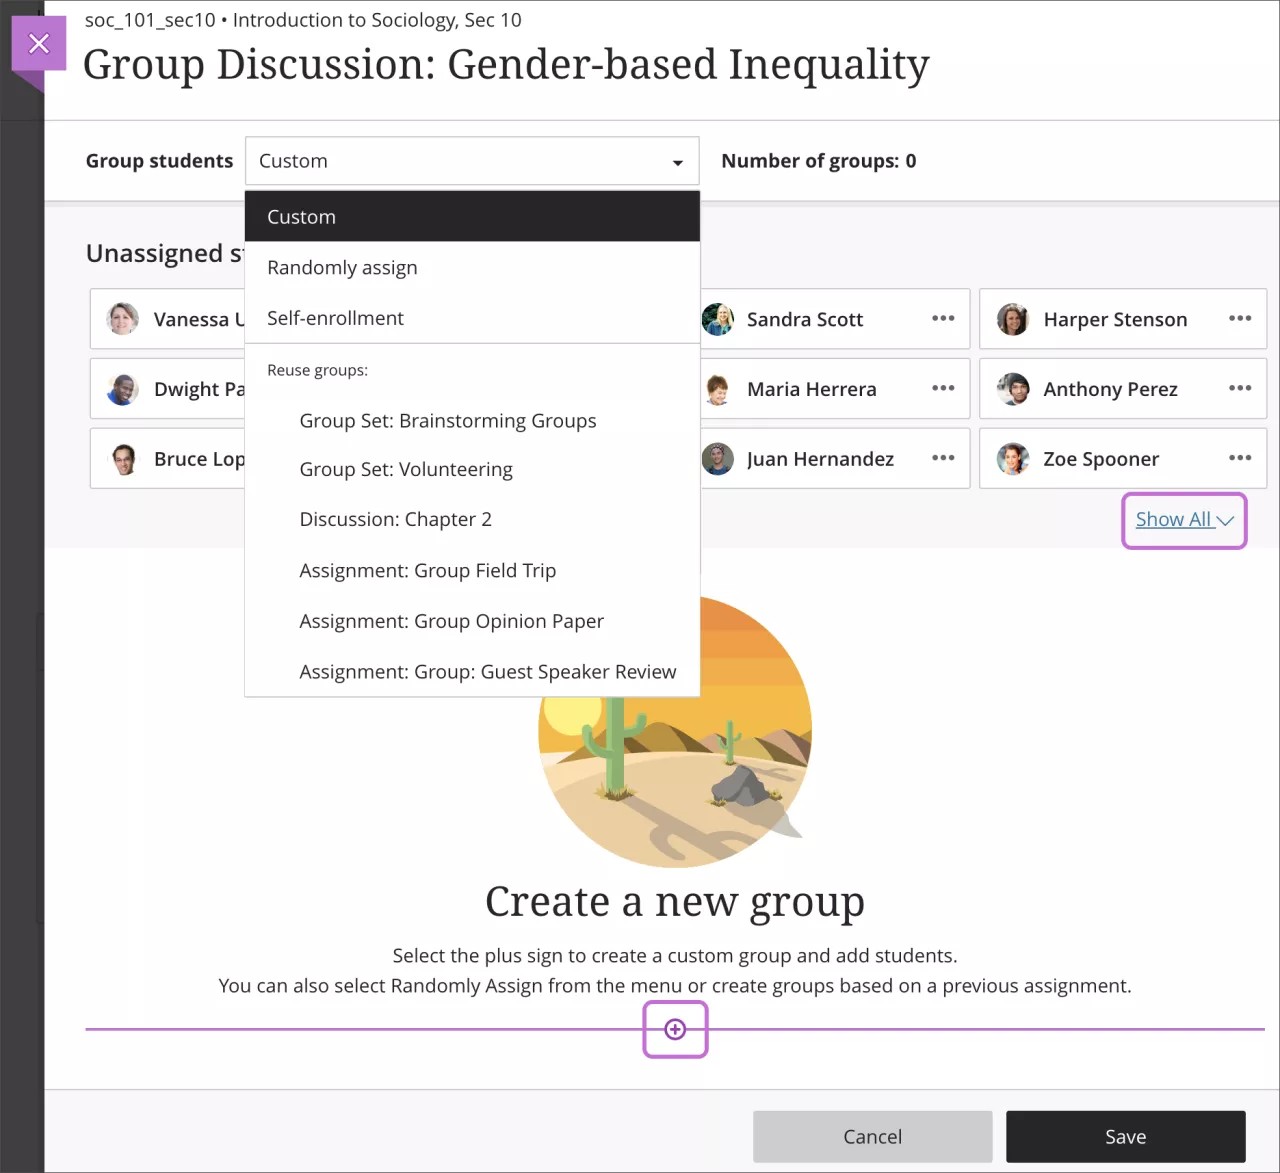
You can divide your students among groups in these ways:
- Custom
- Randomly assign
- Self-enrollment
- Reuse groups
To remove all students from groups, select Unassign All at the top of the page. Unassign All disappears after groups start their discussions.

You can't move individual students out of groups after they start their discussions. However, you can move unassigned students into groups after discussions have started.
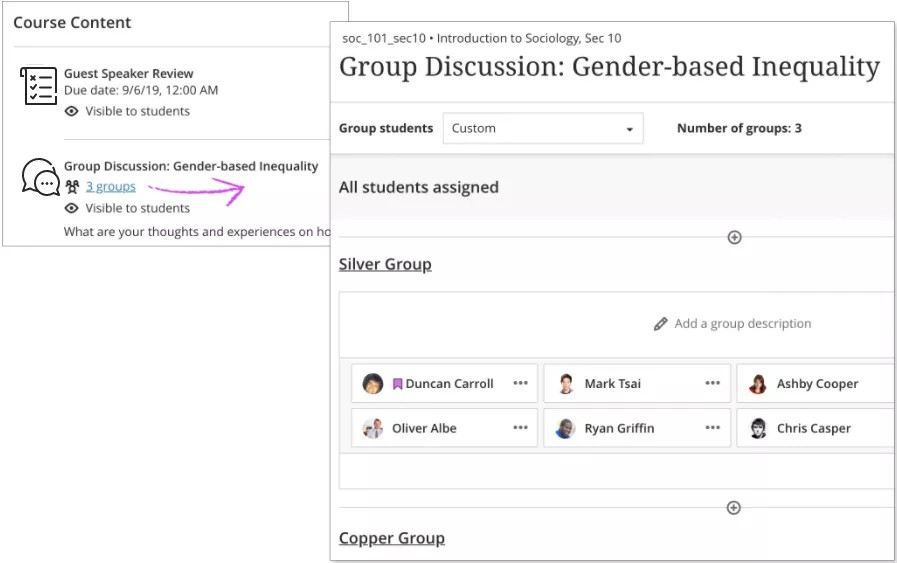
View groups
After you create a group discussion, you can view groups from the Course Content or Discussions page. Select the groups link under the discussion title to open the groups page.
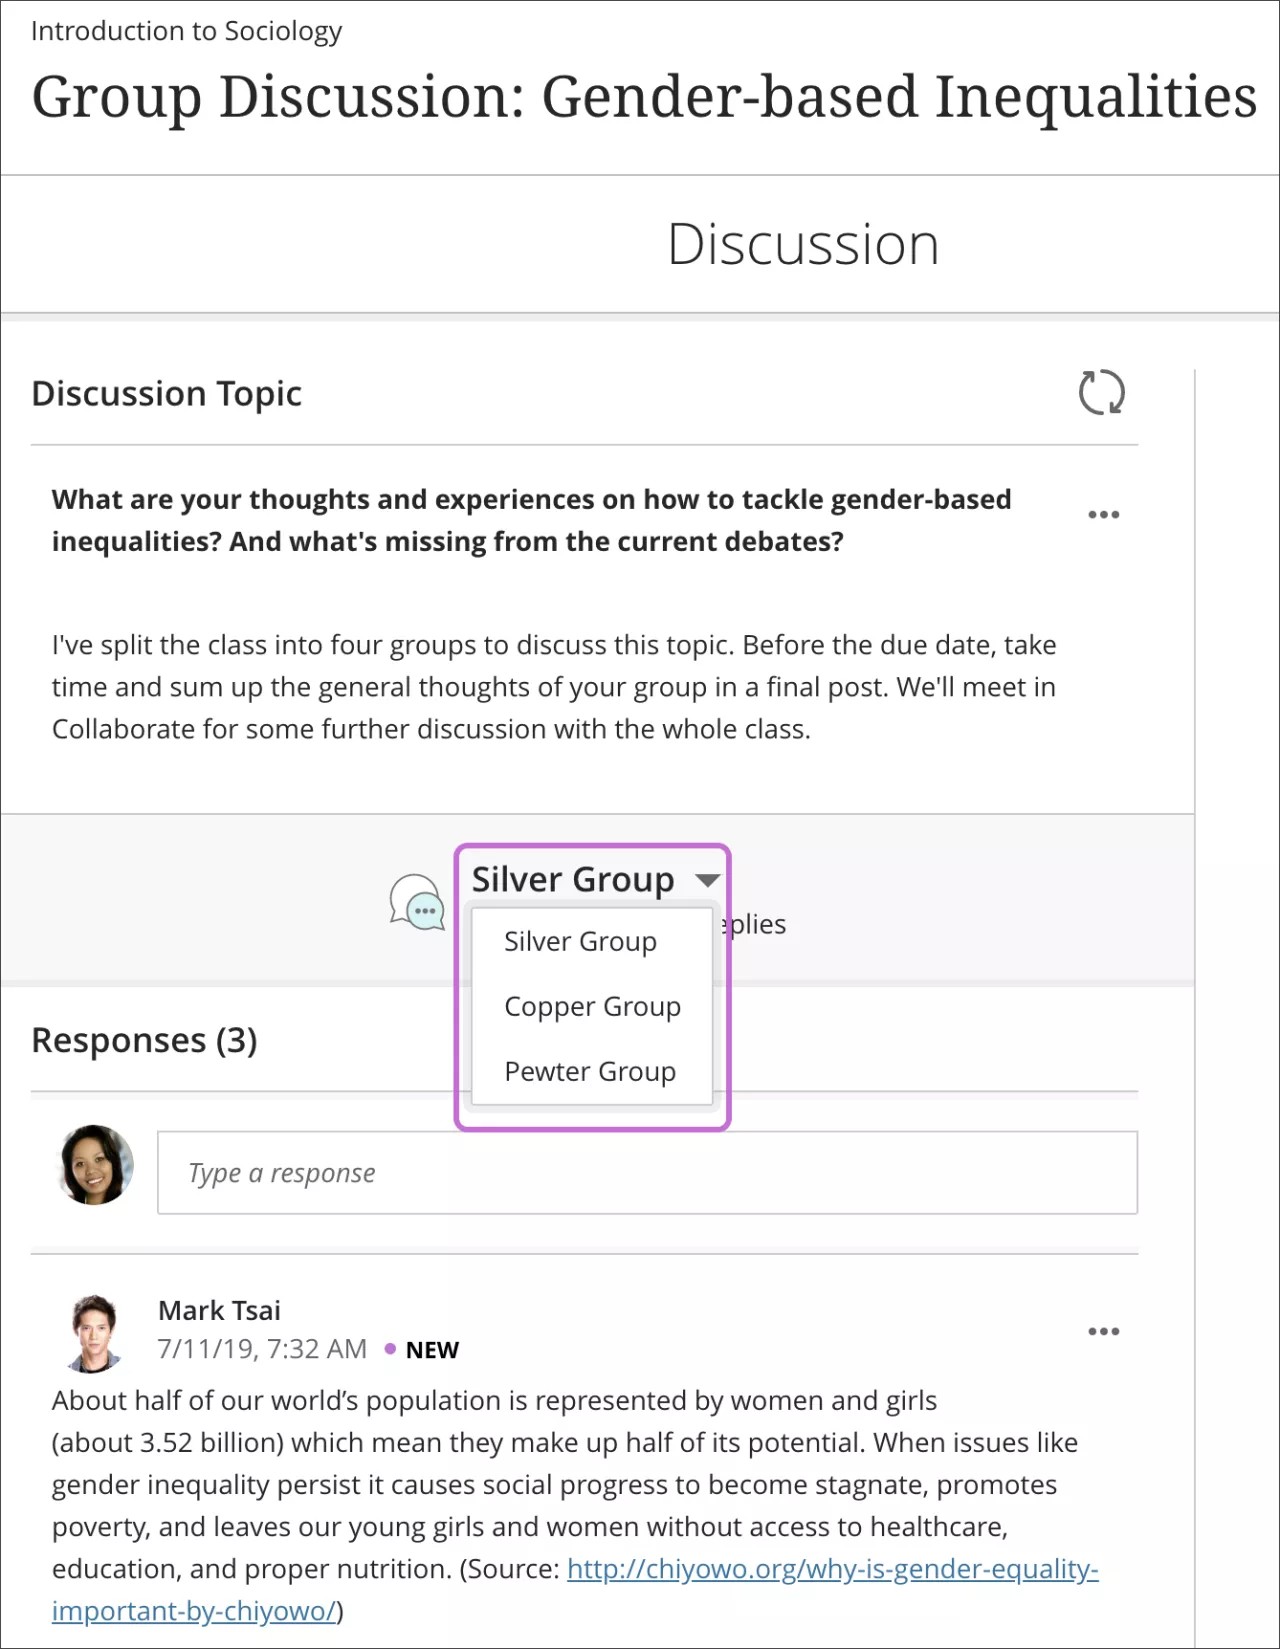
View a group discussion
Select a group discussion title on the Course Content or Discussions page. To view each group's discussion, select a group name from the menu at the top of the page.
Grade a group discussion
Graded group discussions can guide a student's ability to tactfully and clearly express personal views among a select group of peers. A grade can also hold the student accountable to further the group's conversation and development of discussion ideas.
To enable grading on a group discussion, select the Graded discussion check box in the Discussion settings panel. Choose your grade settings and a participation deadline.
You have the option to enable or disable grading at any time, even after groups have started the discussion. If you remove the grading option in the discussion after you assign grades, all discussion content remains but the grades are lost.
Select Assign to groups and assign students groups for the discussion.
Grade from a discussion
You assign grades for each group member individually in a group discussion. You can't assign a grade to a discussion group as a whole. Any feedback you include with a grade is visible to only that student.
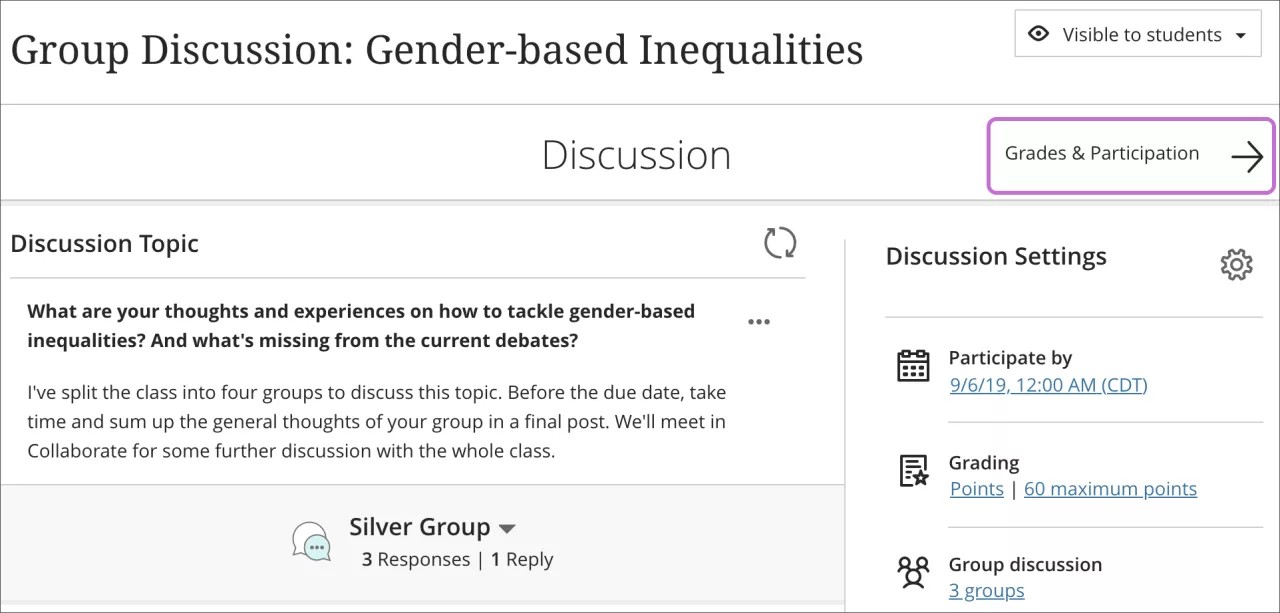
From a group discussion, select Grades & Participation to view who's participated.
On the Grades & Participation page, students are listed with their groups. To view other groups, select a group name from the menu at the top of the page.
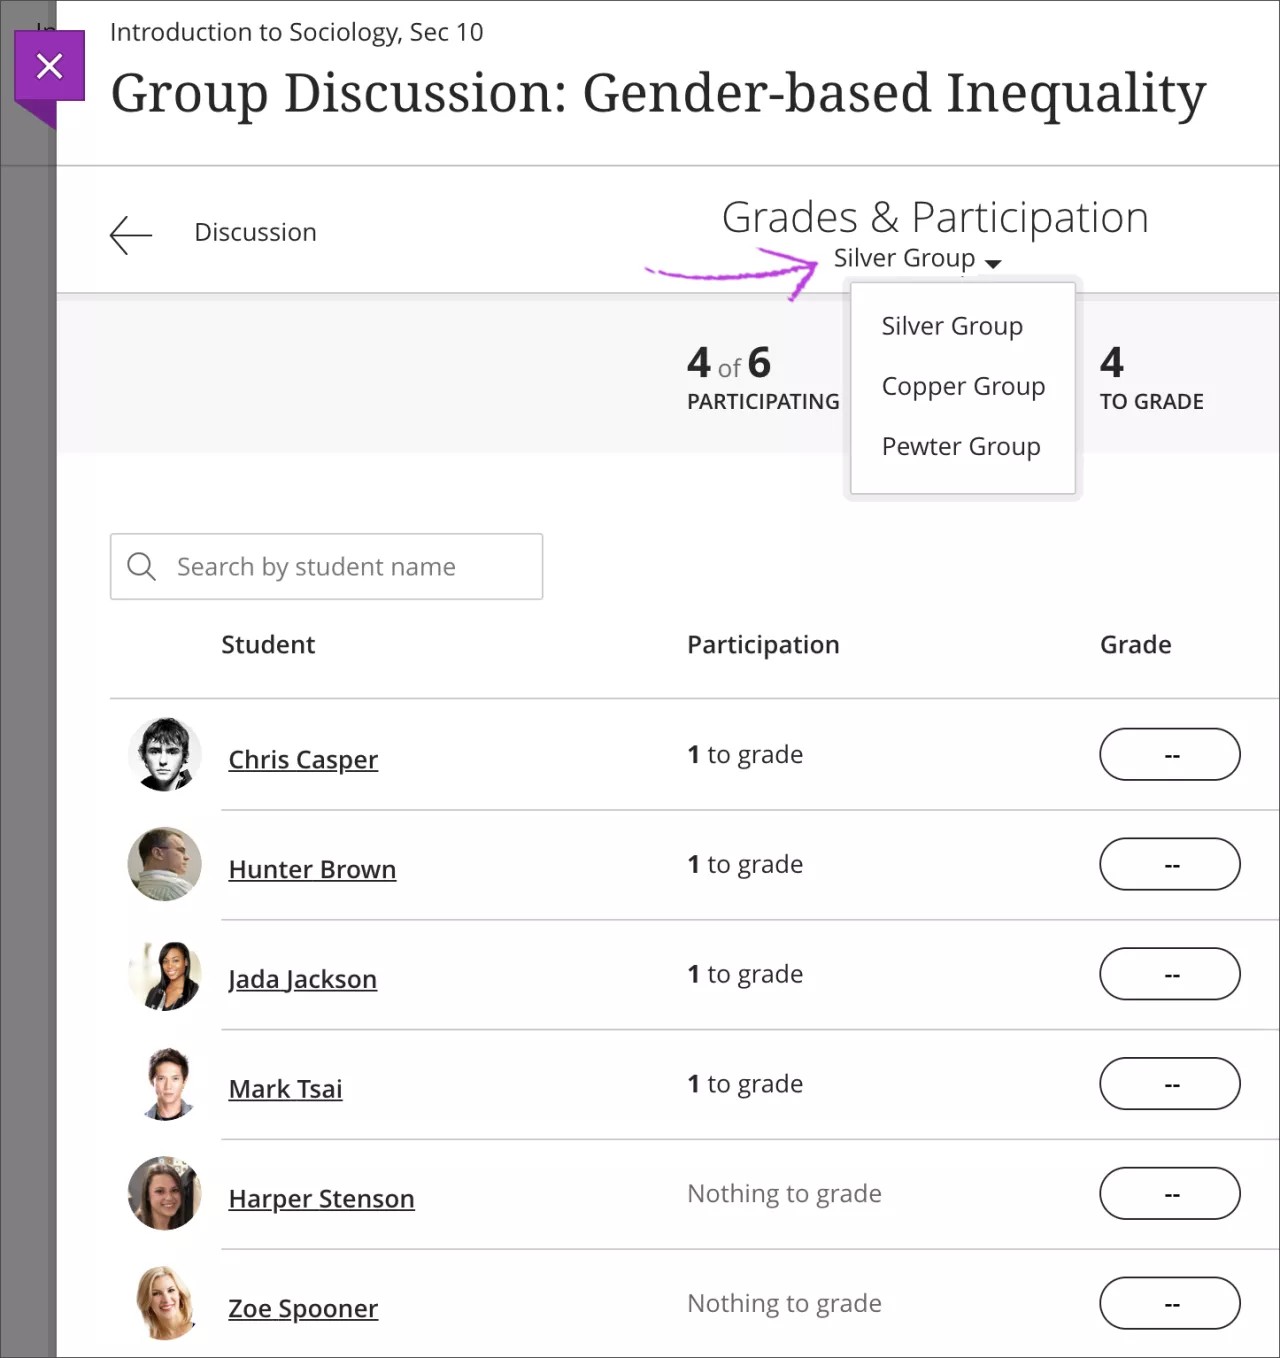
Select students' names in the list to view their posts. Assign a grade and include optional feedback. When you're finished, select Post to release grades and feedback to students.
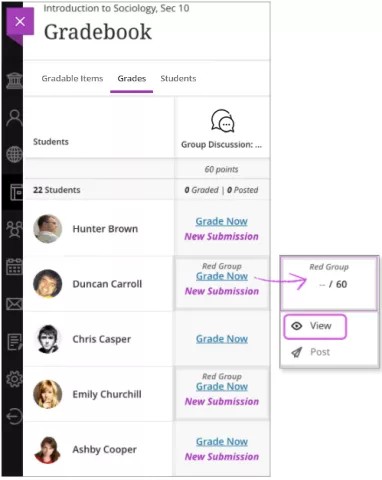
Grade from the gradebook
You can also access group discussions from the gradebook. In Grades view, find the student's group discussion cell. When you select a group member's cell, all other group members are highlighted in the grid. Open the cell's menu and select View to open the student's contributions, along with responses and replies. Assign a grade and feedback. You can post the grade or return to the grid.
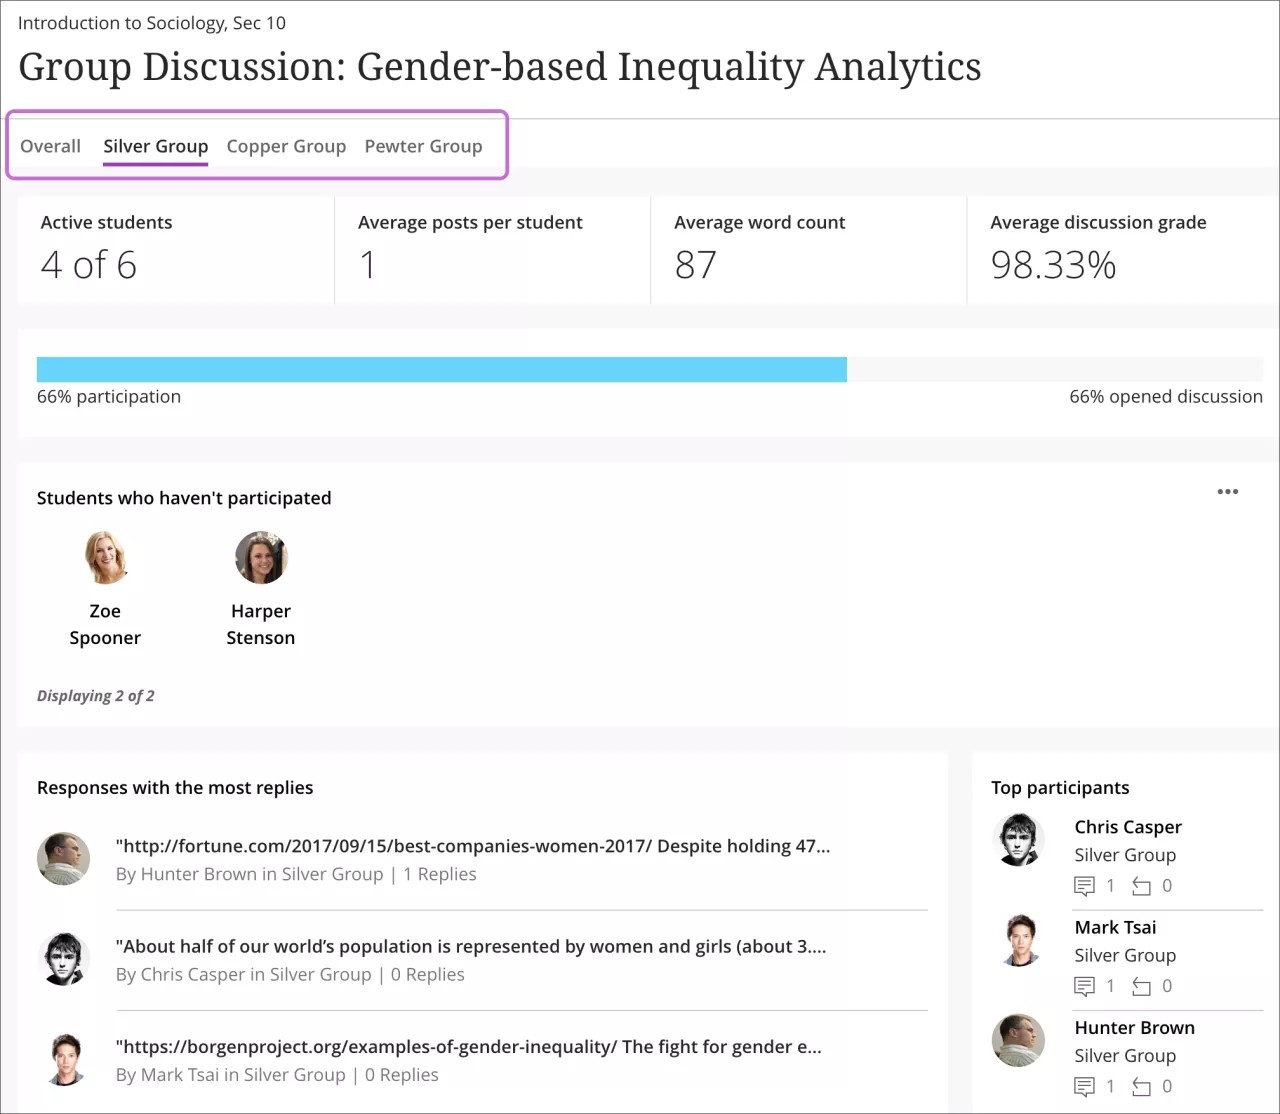
View group discussion statistics
You can also view discussion statistics for groups. Open a group discussion's menu and select View Analytics. The Overall tab near the top of the page displays discussion statistics for the entire class. You can also open tabs with details for each group.