Nämä tiedot koskevat vain alkuperäistä kurssinäkymää. Oppilaitoksesi määrittää, mitkä työkalut ovat käytettävissä.
If you have a heavy grading workload, the Needs Grading page can help you determine what needs attention first. You can view all items ready for grading or review.
For courses with many enrolled students and gradable items, you can use the Needs Grading page to organize your grading workload. You can review and grade these gradable items:
- Individual assignment attempts
- Group assignment attempts
- Test attempts
- Blog and journal entries
- Wiki page saves
- Discussion posts
You can customize the view of items with a Needs Grading status. You can sort, filter, hide, and grade the most urgent items first. For example, you can sort by due date to ensure you grade your final tests by your institution's deadline.
When you allow multiple attempts, you may not need to grade some of the attempts. You can hide the attempts that don't need grading to further organize your grading workload.
If you allowed students to submit a test after the due date, a Late label appears in the Date Submitted column. The Needs Grading icon also appears in the Grade Center column. You must manually review late submissions to remove the Needs Grading status. When you access a late submission and select Save and Exit, the automatically graded test grade is released to students and the grade appears in the Grade Center column. The test no longer appears on the Needs Grading page.

Access the Needs Grading page
Control Panel > Grade Center section > Needs Grading page
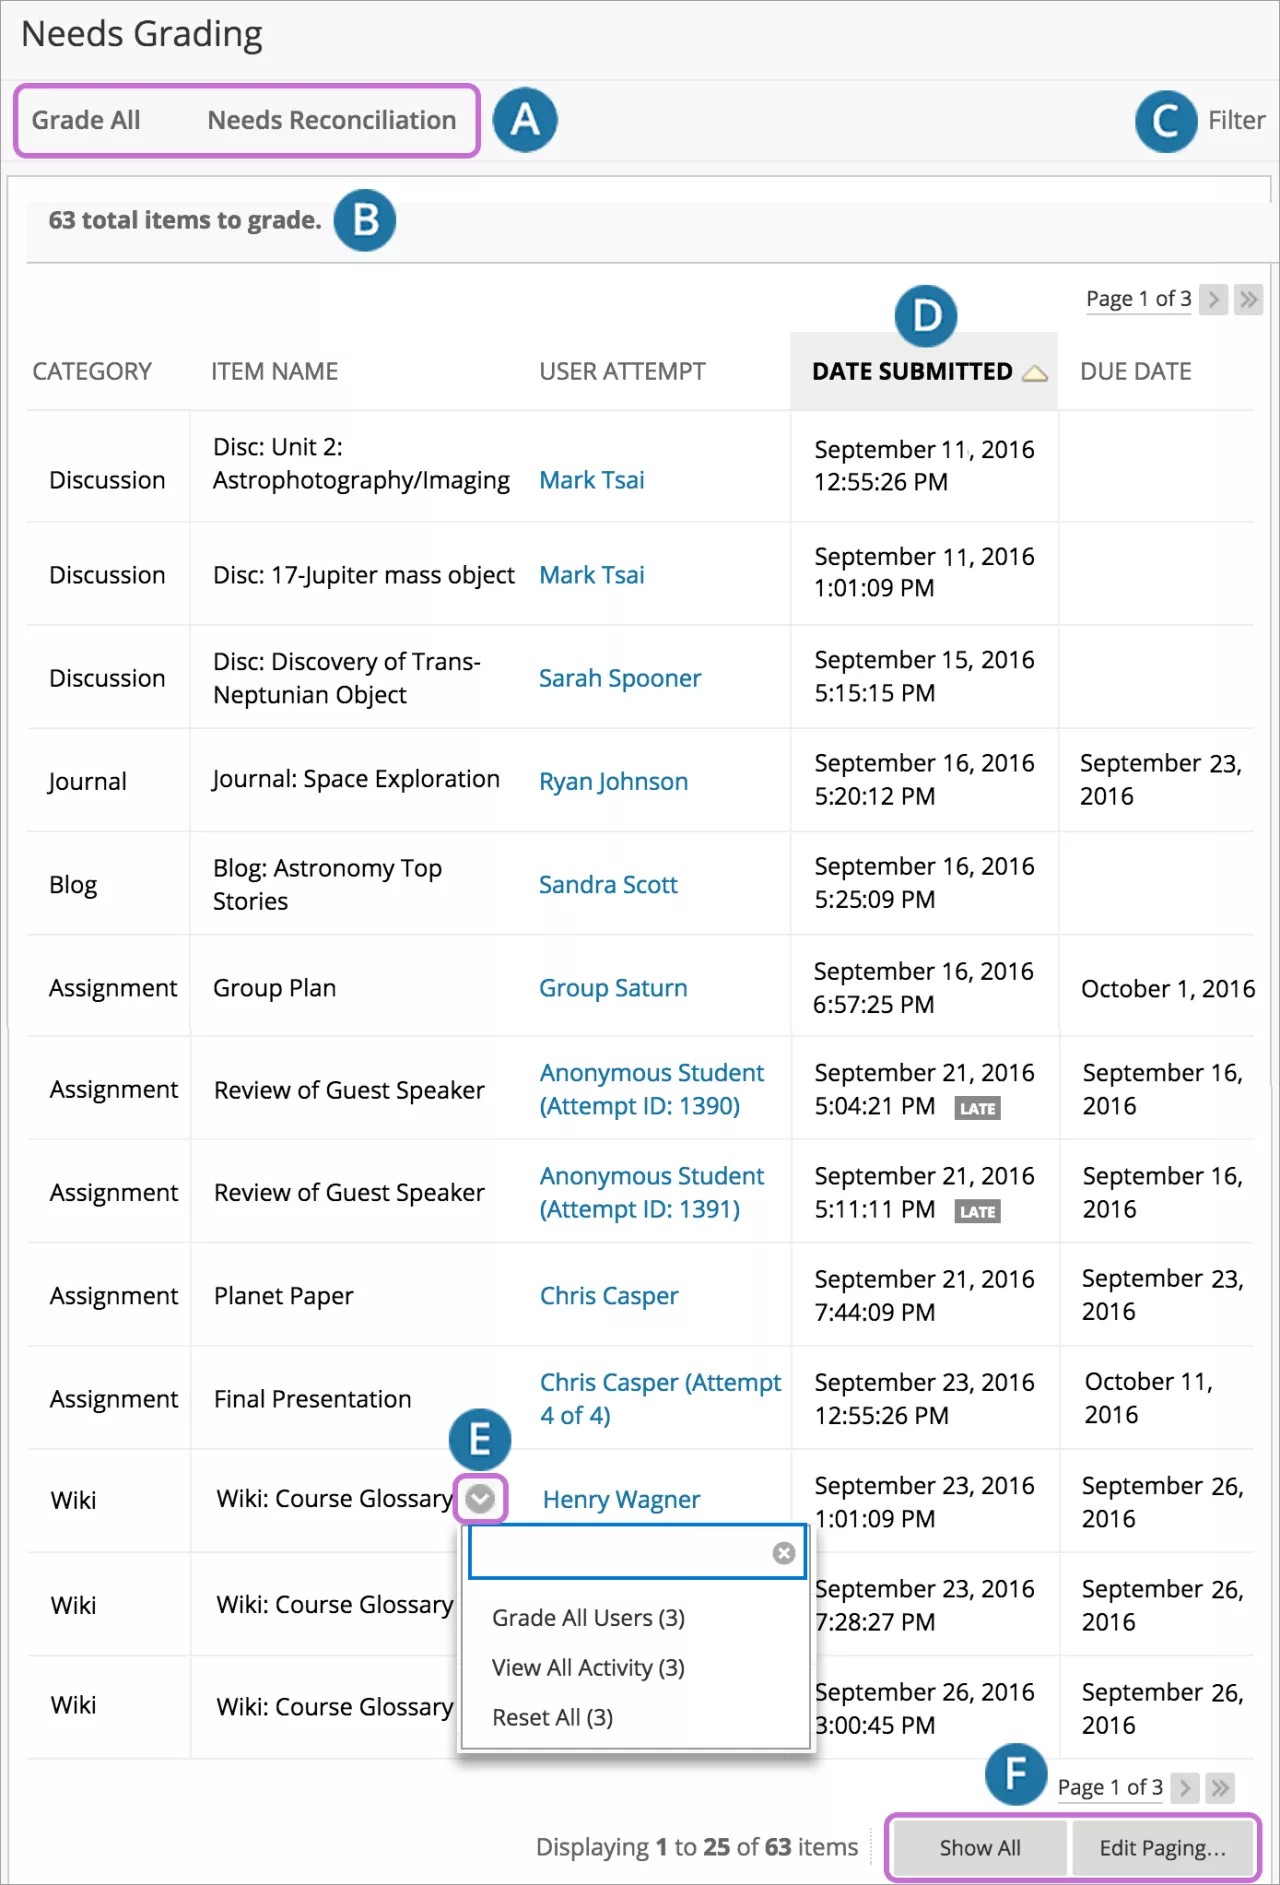
- Select Grade All to begin grading. The items appear in the order they appear on the Needs Grading page.
Tests with a grading status of Attempt in Progress don't appear on the Needs Grading page.
If you're the final grader in the delegated grading workflow, a Needs Reconciliation tab appears next to Grade All.
- The total number of items to grade appears above the list of items. After you grade attempts, they don't appear on the Needs Grading page. The number of items updates to reflect the current number that needs to be graded. If you filter the list, the number reflects how many items match the current filter settings. For example, "12 of 17 total items match current filter."
- Apply filters to narrow the list by category, item, user, and date submitted. If you apply a filter, only the filtered items appear in the list and in the queue. For example, make selections in both the Category and User menus to display tests submitted by a particular user. Select Go. The filtered list remains in effect until you edit the filter choices or log out. Select the X to collapse the Filter field.
- Sort columns to organize your list. To sort a column, select the column title. The sorted list remains in effect until you change it or log out. These columns appear on the Needs Grading page:
- Category: Sort attempts to group all like items together, such as assignments.
- Item Name: Sort attempts by alphabetical order or reverse alphabetical order.
- User Attempt: Sort attempts by a student's name. The number of attempts for the item is listed in parentheses. For example: "Mary Johnson (Attempt 2 of 2)." Select a user's name to access an attempt.
- Date Submitted: Sort attempts by the date and time students submitted the attempts. If you allowed students to submit a test after the due date, a Late label appears in the column. You must manually review the submissions to remove the Needs Grading status.
- Due Date: If you provided a due date when the item was created, sort attempts by due date and grade items that are due first.
- Access an item's menu and make a selection. For example, for assignments, you can select Grade All Users or Grade with User Names Hidden. Interactive items such as blogs have the option to Reset All, which clears the activity counter and moves the item out of needs grading status. A total number of attempts for the selected item is listed in parentheses.
- Select Show All to display up to 1,000 items on one page. Select Edit Paging to change the number of items to view per page.
Grading multiple attempts
When you allow multiple attempts, you may not need to grade all of them. The Needs Grading page automatically displays only the attempts that need grading based on which attempt you chose to grade—first or last.
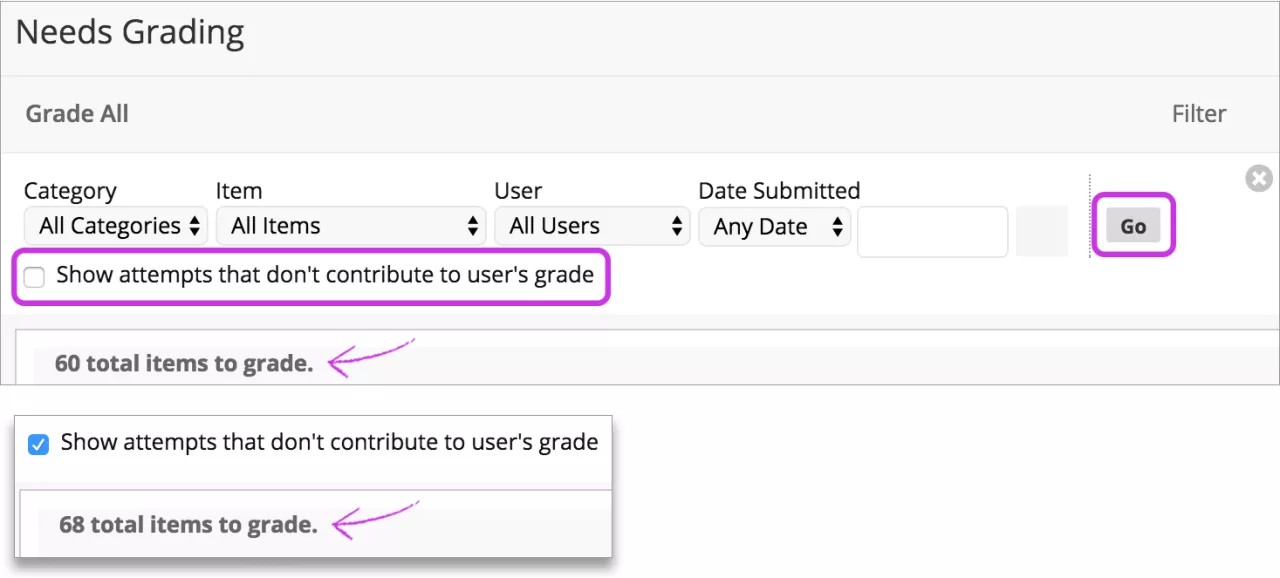
You can choose to display all of the attempts from each student or group. Select the check box for Show attempts that don't contribute to user's grade and then select Go. The total number of items you need to grade increases to include the previously hidden attempts. When you change the setting, Learn will remember the preference in all your sessions and courses.
You won't see the "Show attempts that don't contribute to user's grade" check box if your institution uses an older version of Blackboard Learn.
For each student or group, all attempts appear. Each attempt that you don't need to grade appears with the Does not contribute to user's grade icon. If you enabled anonymous or delegated grading for an assignment, multiple attempts are managed in the same ways. To protect anonymity, students' names and attempt statuses aren't revealed.
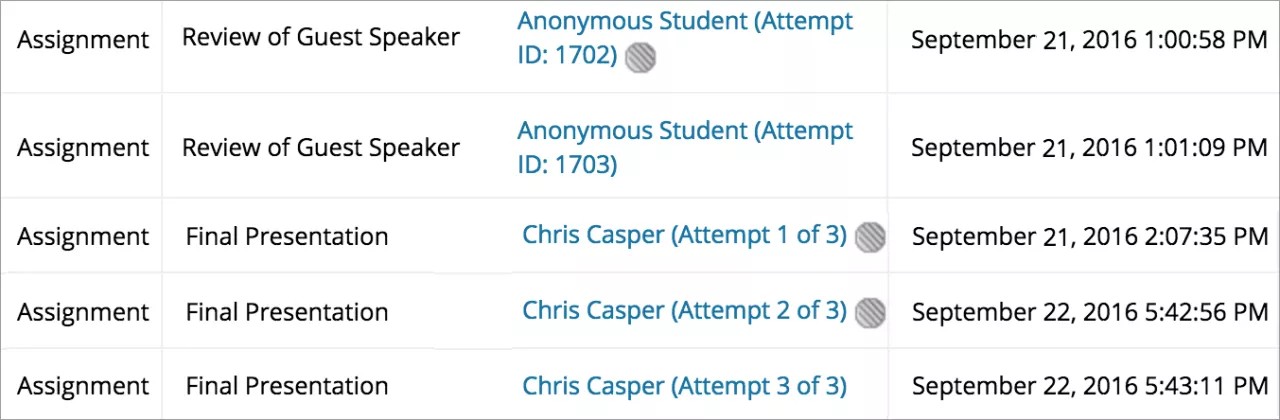
When you select an attempt with the icon, the Does not contribute to user's grade icon appears again on the grading page. You can navigate to the attempt that appears with only the Needs Grading icon.
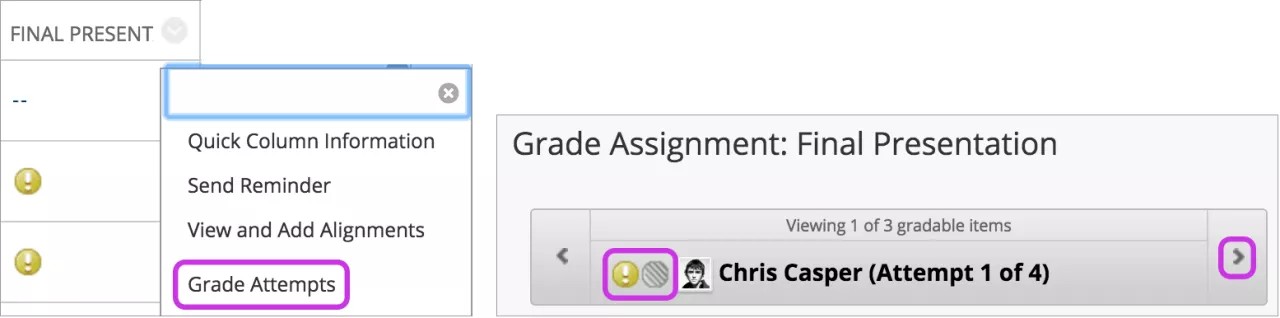
Important: If you allow four attempts and choose to use the last attempt for the grade, you'll see whatever attempt is last as the one to grade. So, if a student has made three attempts, the third attempt is currently the one to grade. If you grade that attempt, the student can still make another attempt. The next attempt will appear as ready to grade because it's the fourth and last attempt.