Nämä tiedot koskevat vain alkuperäistä kurssinäkymää. Oppilaitoksesi määrittää, mitkä työkalut ovat käytettävissä.
Criteria are the parts that define rules you create to release content. You can apply one or more criterion to each adaptive release rule. For example, one rule may make content available after a specific date. Another rule, with multiple criteria, may make content available to a course group after a specific date.
You can add four types of criteria when you create rules:
- Date
- Membership
- Grade
- Review Status
Add date criteria
Use date criteria to keep students focused. You can control when content is released rather than releasing all course content at the beginning of the term. You can display content after a specific date, until a specific date, or within a timeframe.
Example: Content is covered in a specific order. You want content available only after it's discussed in class.
Example: Release your final exam during your institution's scheduled exam week.
You can add more criteria to a rule, in addition to the date criterion, to further narrow the availability of an item.
Use these steps to add a date criterion to an advanced adaptive release rule. You add the same basic information when you create a basic adaptive release rule.
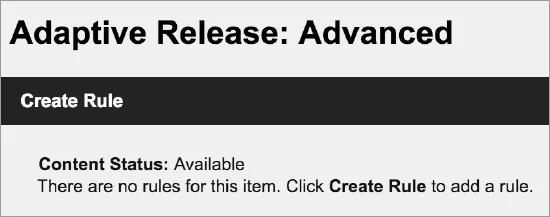
- Access an item's menu and select Adaptive Release: Advanced.
- On the Adaptive Release: Advanced page, select Create Rule.
- On the Add Rule page, type a name for the rule and select Submit.
- Select Create Criteria and select Date.
- On the Date page, make your date selections.
- Select Submit.
You can set a date and time in only one of these areas: adaptive release or test exceptions. If you set a date and time in one area and then set a date and time in the other area, the first setting is overwritten.
Add membership criteria
Use membership criteria to release content to specific students and course groups.

Example: Make content available to specific students
A student requests to earn more points. You agree to add an extra credit assignment, but decide not to offer it to the rest of your students. You release it to the single student with a membership criterion.
Example: Make content available to groups
You have three groups in your course and assign each group a different assignment. You ask the groups to learn their topics and then present the material to the class. You provide materials specific to each group's assignment as content items. You release each content item to one group only.
When a group presents the material to the class, you may then change the release rule on that content item so that it becomes available to the entire class.
You can add more criteria to a rule, in addition to the membership criterion, to further narrow the availability of an item.
Use these steps to add a membership criterion to an advanced adaptive release rule. You add the same basic information when you create a basic adaptive release rule.
- Access an item's menu and select Adaptive Release: Advanced.
- On the Adaptive Release: Advanced page, select Create Rule.
- On the Add Rule page, type a name for the rule and select Submit.
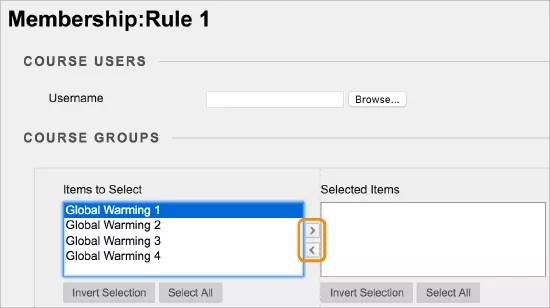
- Select Create Criteria and select Membership.
- On the Membership page, make your selections:
- In the Username box, type one or more usernames, separated by commas or browse the system.
- All groups in the course appear in the Items to Select box, even those that are unavailable. Move groups from Items to Select to Selected Items.
- Select Submit.
Add Grade Center criteria
Use Grade Center criteria to release content based on item attempt, item score, or a calculated column.
Example: Make content available based on Grade Center attempt
Use Grade Center criteria if you want to make content visibility dependent on attempts made by students on tests or assignments. You prepare a pretest for students to complete before review materials are made available.
Use attempt-based criterion for end-of-term surveys. Some institutions require that an end-of-term survey is attempted at least once before the final exam is made available.
Example: Make content available based on Grade Center score or calculated column
Many courses rely on progression, where students must learn one topic before they move to another. If you want students to earn a passing grade on Assignment 1 before they review the next chapter, you can add a Grade Center criterion.
You can also establish a range of values for content release. You can release an extra credit item to students who scored between 60 and 80. Then, release a different item with more intense remediation for students who score below 60.
You can add more criteria to a rule, in addition to Grade Center criteria, to further narrow the availability of an item.
You can only select one Grade Center item for each Grade Center criterion. But, you may add multiple Grade Center criteria to a single advanced adaptive release rule. For example, within a single rule, you can specify a criterion that makes Project A available after Survey 1 is complete. Then, create another criterion that makes Project A available after a score greater than 70 on Test 2 is recorded. In this example, only students who have completed Survey 1 and scored higher than 70 on Test 2 may view Project A.
Use these steps to add a Grade Center criterion to an advanced adaptive release rule. You add the same basic information when you create a basic adaptive release rule.
- Access an item's menu and select Adaptive Release: Advanced.
- On the Adaptive Release: Advanced page, select Create Rule.
- On the Add Rule page, type a name for the rule and select Submit.
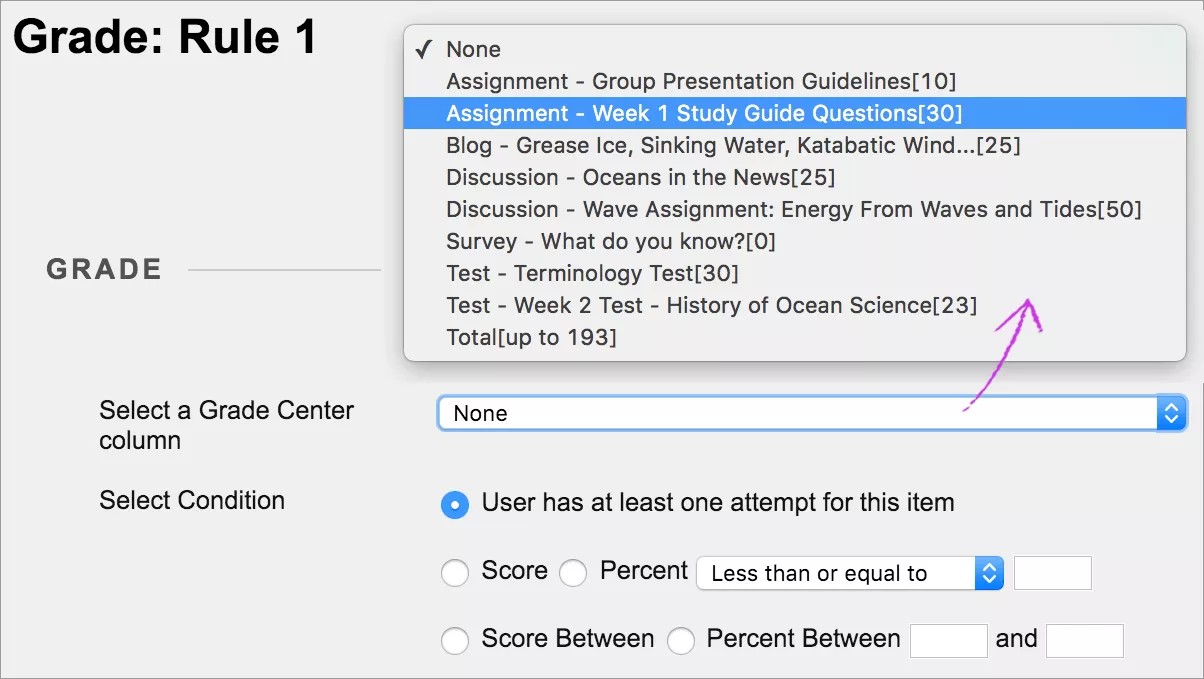
- Select Create Criteria and select Grade.
- On the Grade page, select the Grade Center item for this criterion. Grade Center items are listed by their categories, such as assignment or discussion. Possible points are included to help you determine the score range.
- In the Select Condition menu:
- Select User has at least one attempt for this item to release the content based on a submitted attempt rather than the score achieved.
- In the Score menu, select Less Than, Greater Than, or Equal To. Type a numeric score in the box for the score threshold. Your score can include up to two decimal places.
- Select Score Between or Percent Between. Type the range of values in the boxes.
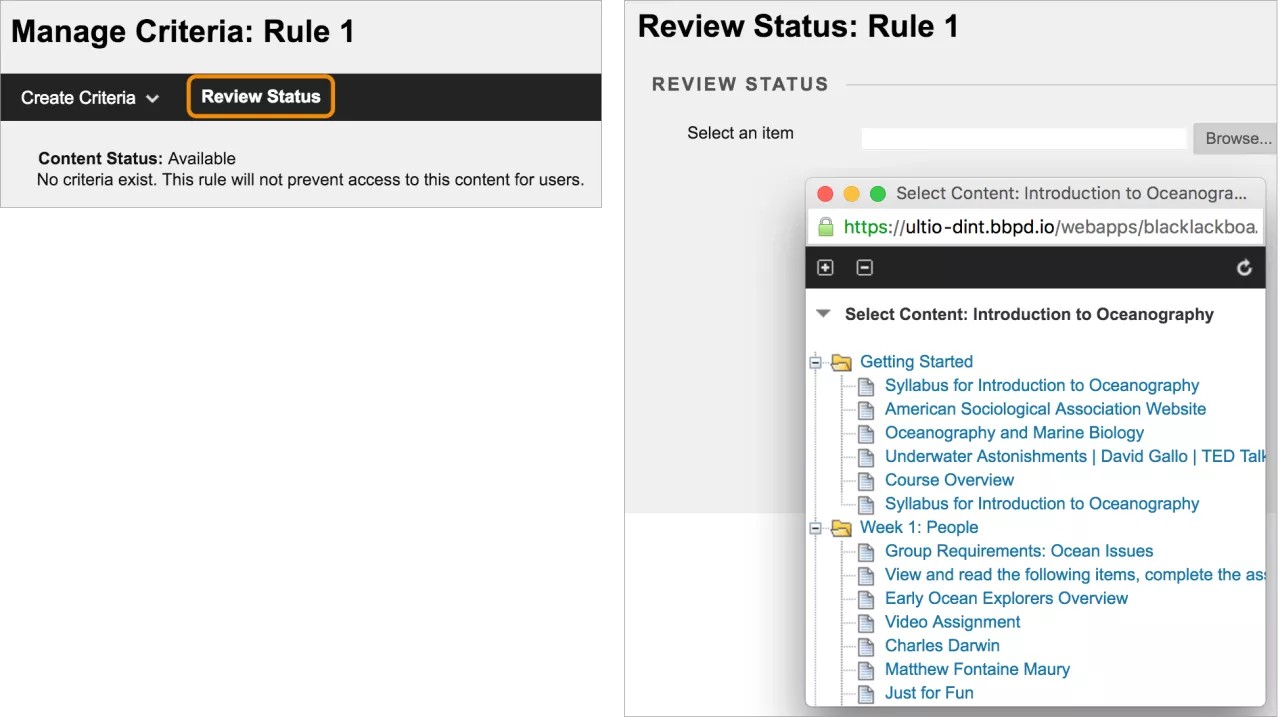
Add review status criteria
You can use review status criteria to release content based on a student's review of a specific content item.
Example: Create a criterion that makes Assignment 1 available only after students have marked Homework 1 as reviewed.
You can add more criteria to a rule, in addition to review status criteria, to further narrow the availability of an item. You can apply review status to a learning module, but not to the individual files within a learning module.
Use these steps to add a membership criterion to an advanced adaptive release rule. You add the same basic information when you create a basic adaptive release rule.
- Access an item's menu and select Adaptive Release: Advanced.
- On the Adaptive Release: Advanced page, select Create Rule.
- On the Add Rule page, type a name for the rule and select Submit.
- Select Review Status.
- On the Review Status page, select Browse to open the course map and select an item. Review status will be turned on for this item. Students must mark the item reviewed before the content is available.