Types of containers
You can create four types of containers to present content in an organized and engaging way.
- Content areas are the top-level containers that provide your course structure. Typically, courses contain multiple content areas.
- Folders can contain content items and other containers, such as a lesson plan or other folders.
- Learning modules can contain content items and other containers. You can add a table of contents and require sequential viewing of its content.
- Lesson plans can hold lesson profiles, instructional objectives, and the content items students need to complete a lesson.
You create folders, learning modules, and lesson plans within an existing content area or another container.
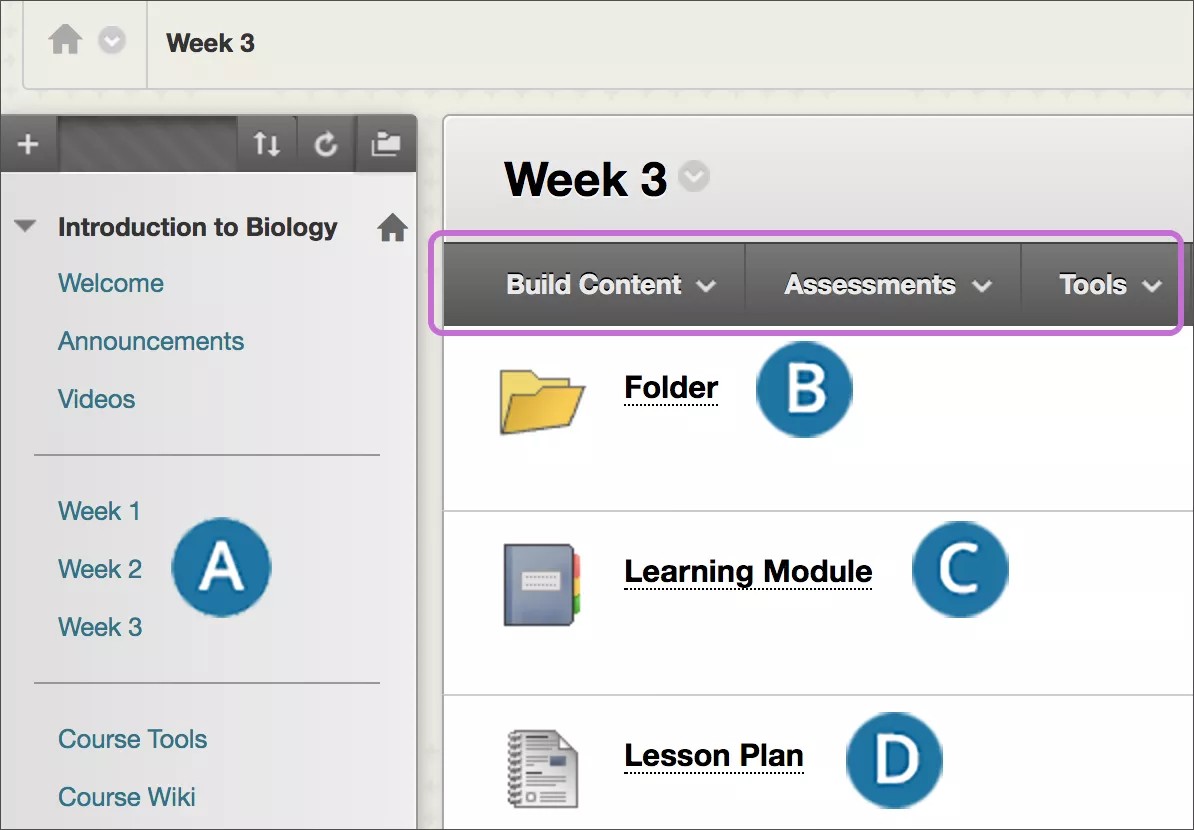
Within the containers, add materials and links to tools with the Build Content, Assessments, and Tools menus.
Plan your content areas
The content areas you create appear on the course menu and provide the overall structure of your course.
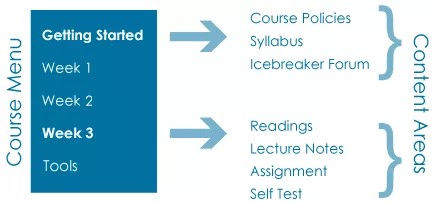
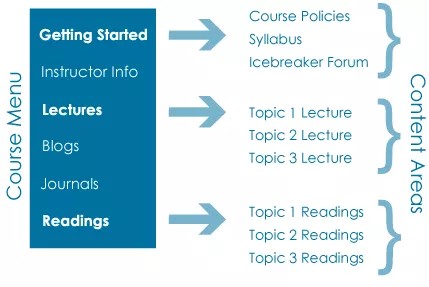
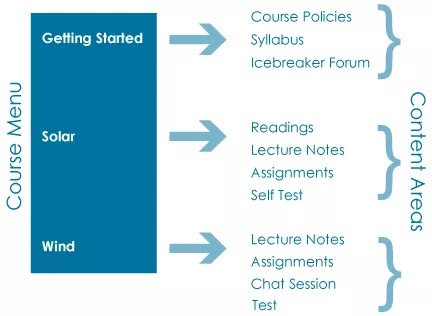
Plan how you will organize your entire course and envision how your course menu will look and function. Three common organizational approaches are chronological, by content type, and by subject area.
Chronological: Each content area contains a week's worth of readings, assignments, lecture notes, and discussions.
By content type: Each content area contains similar content types, such as all the lectures for the entire course.
By subject area: Each content area contains lecture material and readings on a specific subject, along with assignments, discussions, and tests.
Create a content area
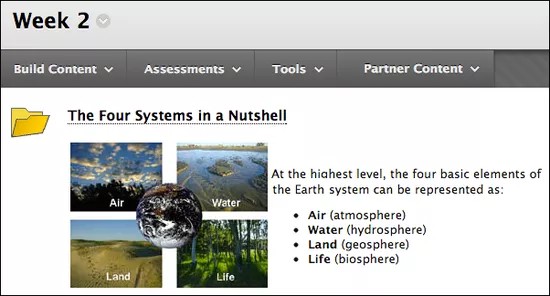
Content areas only appear on the course menu where you create, link, and manage them. In a content area, you can add content items, file attachments, links to websites, tests, assignments, and multimedia. You can also add other containers to organize your content.
Be sure Edit Mode is ON so you can access all of the instructor's functions.
Select the Add Menu Item above the course menu to open the menu. Select Content Area and type a name.
Select the Available to Users if you're ready for students to see it. You can create content areas ahead of time and make them unavailable to students. Then, make them available at the appropriate time.
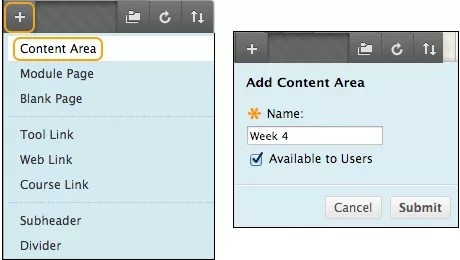
After you submit, a link to the new content area appears on the course menu. A newly created content area is an empty container. Select the link to the content area to add content.
If you create a Content Area and leave it empty, it will not appear for students even if you make that Content Area available for students. Once you add content to it, will appear for students.
New courses contain several default content areas, such as "Information" or "Content." These default content areas are empty, and you can choose to add content to them, rename them, or delete them. Delete links you won't use so students see an uncluttered course menu.
More on the types of content you can add
For course menu items that allow guest or observer access, you must open the item's menu and permit their access.
Video: Add a Content Area
Watch a video about adding a content area
The following narrated video provides a visual and auditory representation of some of the information included on this page. For a detailed description of what is portrayed in the video, open the video on YouTube, navigate to More actions, and select Open transcript.
Video: Add a content area explains how to add a content area to the menu.
Create a content folder
Folders are a type of container that you can use to organize content. You create folders in existing content areas, learning modules, lesson plans, or other folders. After you create a folder, you can add content and additional sub-folders to it. For example, in a content area, you can create folders for each week of your course. Then, you can add content items, assignments, file attachments, links to websites, tests, assignments, multimedia, and additional folders. Students can select any of the items and don't have to follow a sequential order.
Use folders to reduce scrolling and help students find materials easily. You want to limit the number of nested folders used so that students can access content with as few steps as possible.
You can add a description that outlines the contents of the folder. You can also add images and bullets to the description to provide variety and visual cues.
Be sure Edit Mode is ON so you can access all of the instructor's functions.
In your course, select Build Content to access the menu and select Content Folder. Type a name, optional description, and select the appropriate options for availability, tracking, and display dates. Display dates don't affect a folder's availability, only when it appears.
After you submit, a link to the new folder appears. A newly created folder is an empty container. Select the folder to add content.
Link to a container on the course menu
You can't create a folder, lesson plan, or learning module directly on the course menu. However, you can create a course link to a container on the course menu.
Be sure Edit Mode is ON so you can access all of the instructor's functions.
Select the Add Menu Item above the course menu to open the menu. Select Course Link and browse for the container you want to add to the course menu.
Type a title and select the Available to Users check box if you're ready for students to see it.
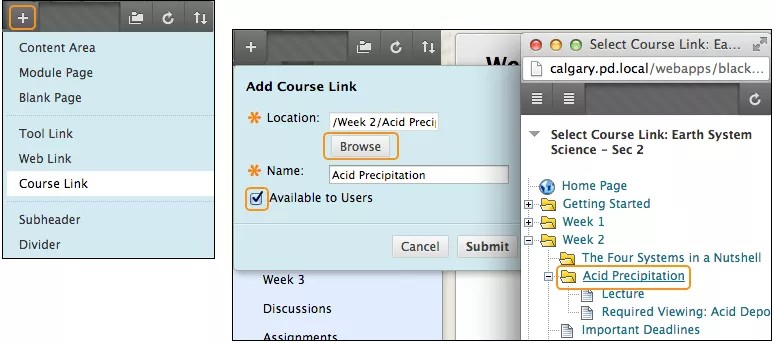
After you submit, a link to the container appears on the course menu. You can reorder the links and add subheaders and dividers. You can also show and hide links from students.