Data Source Keys are labels made up of alpha-numeric strings that allow different types of data from a single data source to be grouped together so that they can be handled in a single operation. Using Data Source Keys breaks up your data to optimize system resources and meet business rules.
Data Source Keys are created as needed and can be saved for future use. They can be used in almost infinite ways to categorize data and to associate data with specific systems so that data may be visually managed within Blackboard Learn. Data Source Keys are stored in the Blackboard database and are referenced in data feeds and integration configurations.
Data Source Keys function in conjunction with your SIS integration to help manage data once it has been uploaded into Learn via an SIS integration configured to use a specific Data Source Key.
Data Source Key best practices
Because Data Source Keys are meant to enable granular identification and management of data, it is worth considering how your naming conventions match your institution's data flow and how you wish to break that data into 'chunks' or sets and the lifecycle of those chunks. The larger your overall data sets and the longer you keep the data in Learn, the more important it is to be able to identify targeted portions of that data.
Data Source Keys can be used in many ways to categorize data, but here are some general tips for creating and applying Data Source Keys to data:
- Keep a consistent naming convention for the Data Source Keys to prevent confusion when it is time to modify or remove data.
- Avoid creating multiple Data Source Keys for entries that will remain for a long period of time (such as Students or Faculty). Doing so may create unnecessary complications or problems.
- When archiving and removing courses at the end of a semester, it is best to disable them first for a short period of time before archiving and removing them from the system. This will allow a short period to confirm that they have been archived safely before removing them and help prevent accidental deletion of courses that have not been safely preserved if desired.
When assigning data sources to course and organization categories, child categories must belong to the same data source as the parent category when the category tree is inserted. If child categories do not appear in the same data source as the parent, the child-parent relationship will not be maintained.
Naming conventions
To ensure logical application and knowledge transfer, create a system for naming Data Source Keys so that they can be easily identified. The following naming convention represents a relatively simple way to break up the data sets to enable the two most common workflows.
Legal characters for Data Source names
Data source keys should consist only of the letters A-Z, numbers 0-9, periods, and underscores (_).
Data Source ID
A simple ID should be assigned for the source system, for example SIS for a student information system, or HRMS for a human resources management system. By combining this ID with an ID for each type of set, a flexible naming scheme can be derived to support typical workflows.
Type bound sets
Type bound sets include a component that is derived from the type of feed. For example, if the string 'Course' is used to mean "Course" then that string is included to indicate the type of the data set, for example SIS.COURSE.
Term bound sets
Term bound sets are used to group data that are related, but should not overlap time periods in the database. For example, it might be desirable to feed spring courses into the database while fall courses are still active. Using a key that distinguishes the two sets based on their term will prevent Snapshot operations on one set from interfering with data in the other. For example, SIS.SPRING2030 and SIS.FALL2030.
Type and term bound sets
You may want to use a combination of type and term bound identification. The most common example is student enrollment at an institution with a fixed academic calendar-enrollment is bound to a specific semester for example, SIS.COURSE.FALL2030.
Example: A school wants to process student and instructor lists, course section listings, and enrollments over the course of several semesters. In general, from semester to semester, the student and instructor lists will encompass the same basic data set. However, the courses and enrollments will need to be processed on a per-semester basis. That is, from semester to semester, active students and staff will be treated as a single logical set (with fluid membership) while courses and enrollments will be treated as logically distinct sets that do not intersect from semester to semester.
One solution is to use type-bound keys for students and instructors, and type and term bound keys for courses and enrollment. A Data Source Key is created called SIS.USERS that is used to identify the set of users over time. This way, all active students and instructors may be processed as a single set of data.
Separate Data Source Keys are created for courses, enrollment, instructors and students, all which are both type and term bound:
SIS.COURSE.FALL2030
SIS.COURSE.SPRING2031
That way, all user feeds may use the SIS.USERS Data Source Key, while courses and enrollment can use the SIS.COURSE.* keys, allowing for searches and data visualization using the described data sets.
As another example, different sets can be applied to different users:
MEDSIS.USERS
SIS.USERS
ALUMNI.USERS
Data state management from Administrator Panel
Learn administrators can change the Data Source Key and enable or disable by bulk the following items:
- Users
- Courses
- Organizations
- Enrollments
Users with permission can change the data source key or status from the administrator panel.
- Select Integration, which displays editing options: Enable, Disable, Modify Data Source.
- Select Modify Data Source to edit data source key or select Enable or Disable to change the status.
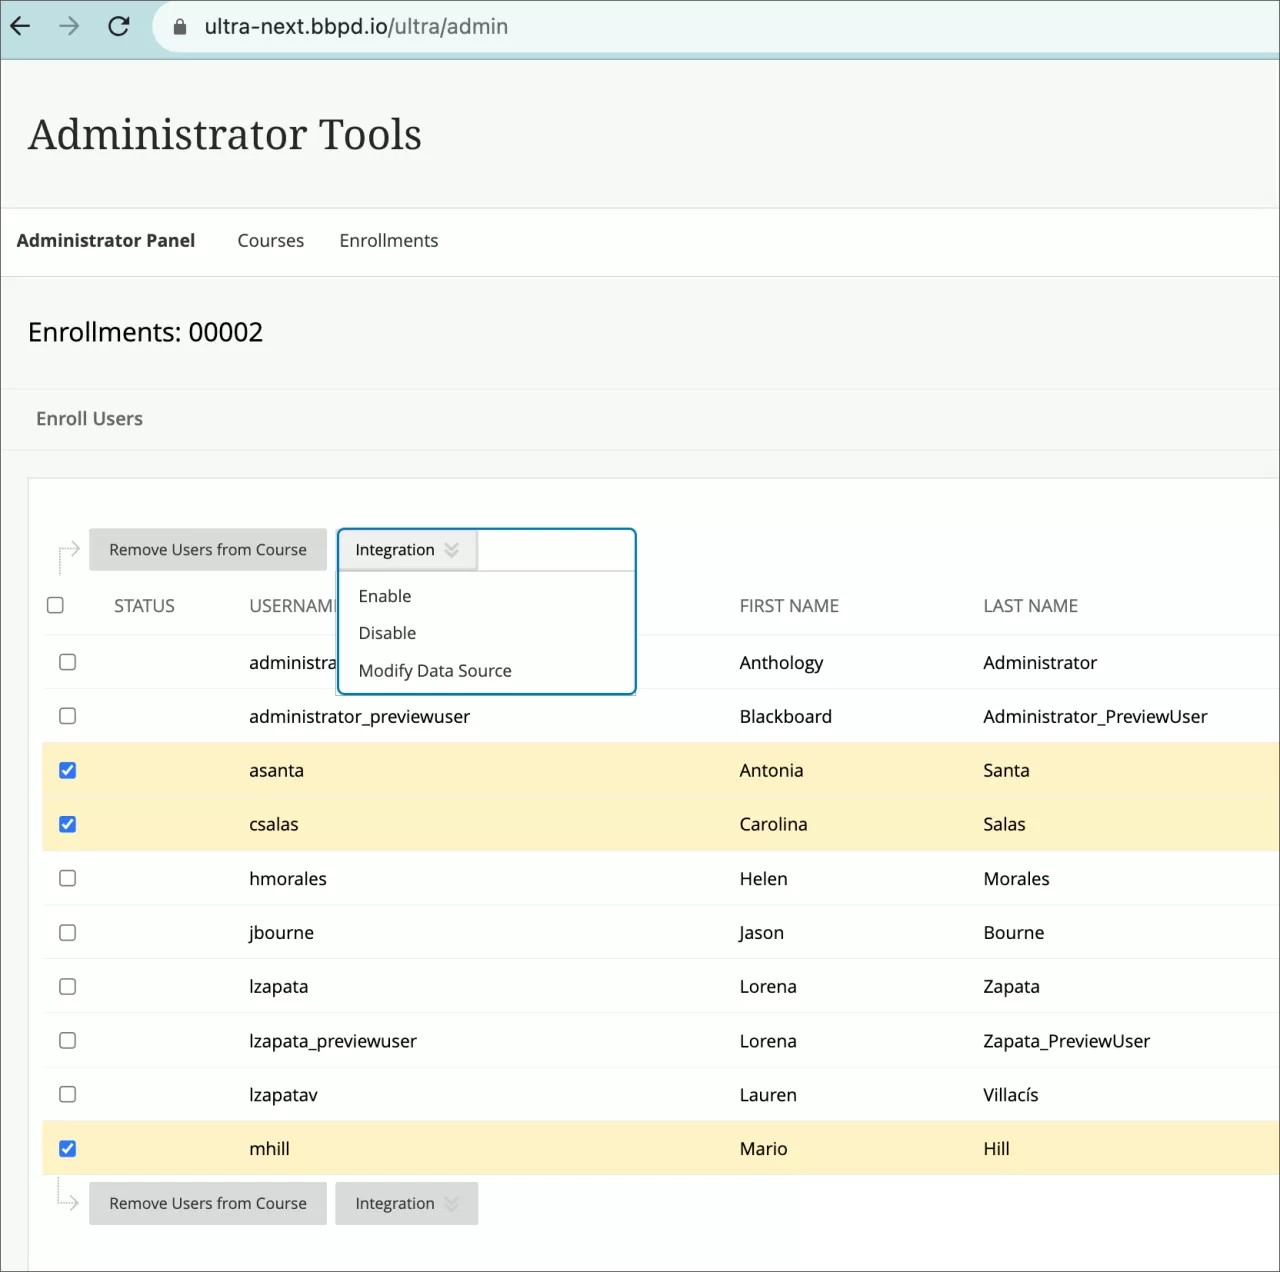
You can also do this by individual item by selecting the menu drop down and Modify Data Source.
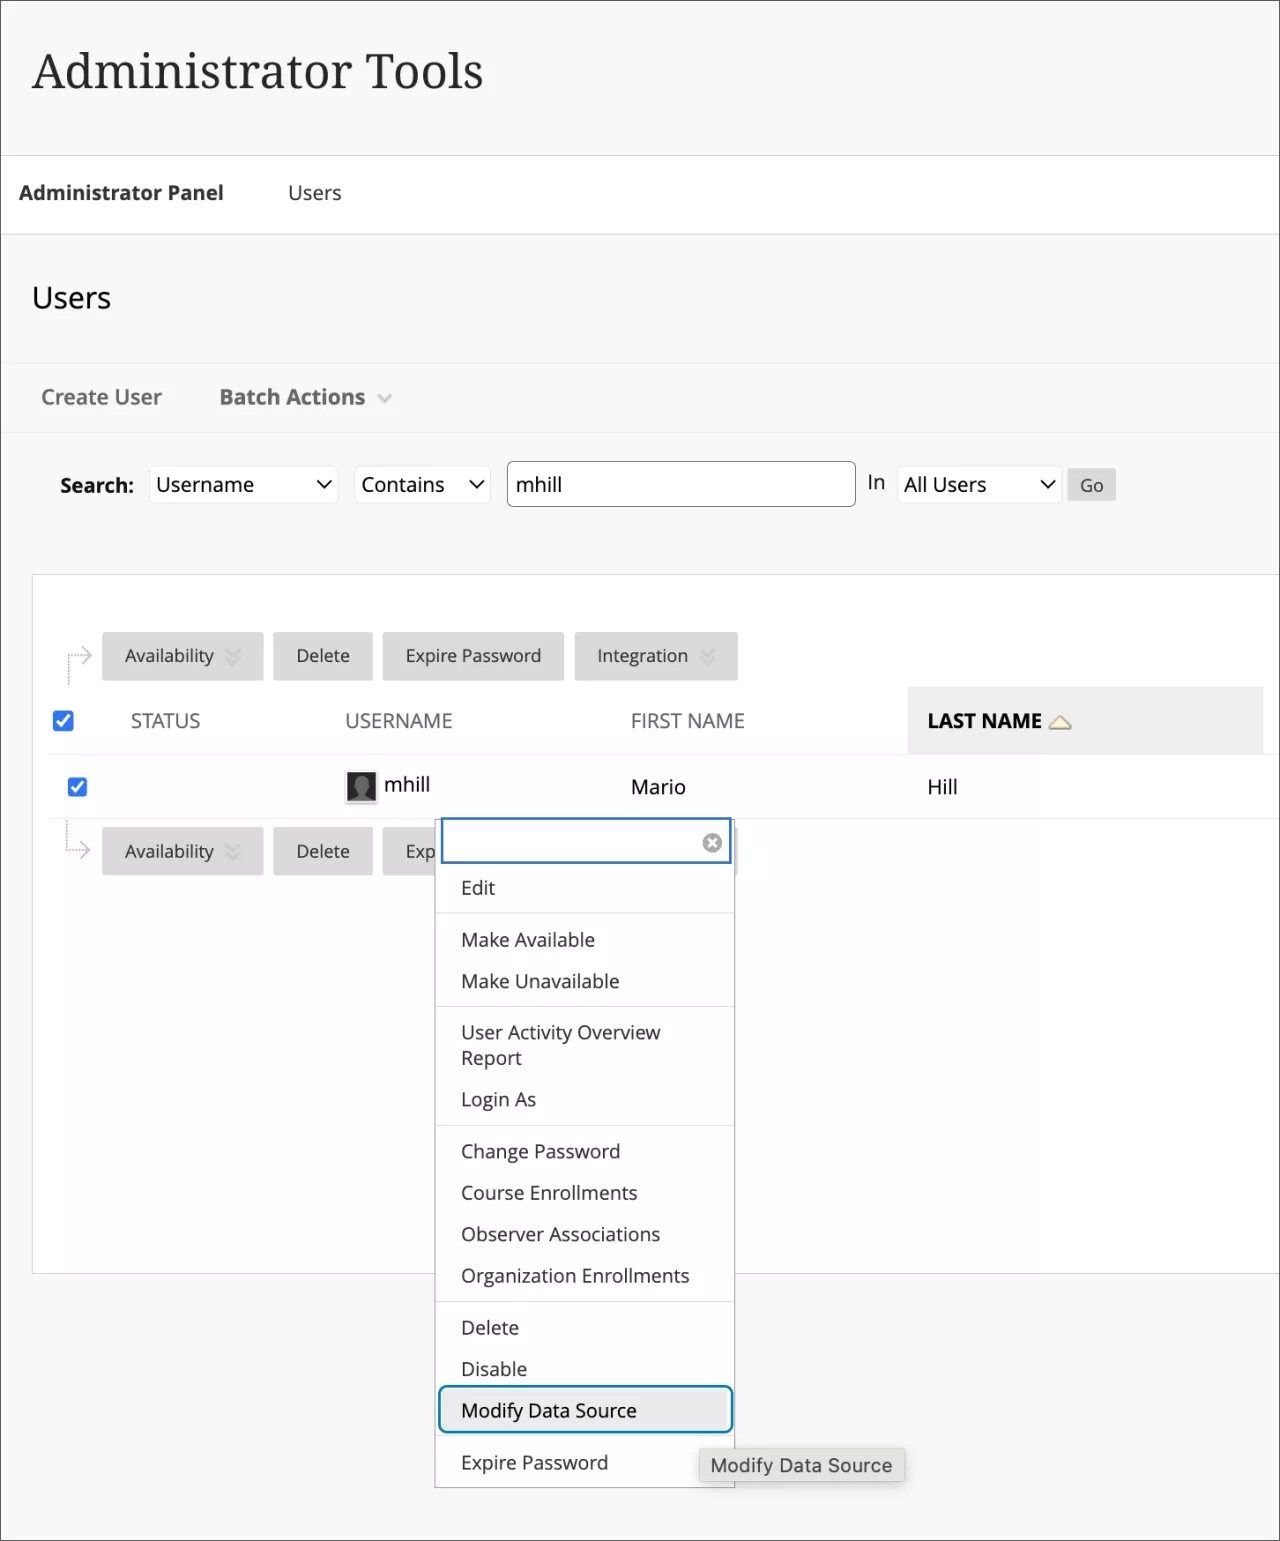
Each time the administrator changes the row status or data source key, the administrator is asked to confirm the change.
When the administrator disables a user, course, or enrollment, no changes are applied to it. The administrator needs to enable the item first so that changes can be made.
For administrators: This feature is available for all Ultra and Original courses/organizations, users, and enrollments' administrator pages. There are no configurations needed.
DSK management
Create DSKs using the Data Source Administration page
- On the Administrator Panel, in the Building Blocks section, select Data Integration.
- Select Data Sources > Create Data Source.
- Type a unique key and optionally add a description.
- Select Submit.
Manage records
All management of Data Source Keys and associated records is possible via the Data Source Administration page.
View associated records
After you have created a Data Source Key, used an integration to populate data in Learn, and associated a Data Source Key with that data, go to the Data Source Key management page. On the Administrator Panel, in the Building Blocks section, select Data Integration.
Select Data Sources, and then find the Data Source Key. A window displays containing a list of Learn objects and their status (Enabled or Disabled) counts.
Disable records
After you use an integration to create objects in Learn and associate them with a Data Source Key, you may choose to disable the objects when access to those objects supported by that data is no longer required. Disabling an object leaves its data in Learn while eliminating access to that object. For example, an enrollment may be disabled and the data for that enrollment (and related activity data) are retained in Learn, but the user with whom that data is associated may no longer access the course or organization. Similarly, a user who has been disabled will no longer have access to Learn and a disabled course will no longer be available to students or instructor, yet in both all cases the data is retained in Learn. If the user or course is re-enabled, it will appear as if nothing had changed.
To disable objects, go to the Administrator Panel. In the Building Blocks section, select Data Integration > Data Sources. Open the menu for the Data Source Key you want to edit and select Disable.
Purge records
After you use an integration to create objects in Learn and associate them with a Data Source Key, you may choose to purge the objects when access to those objects and the associated data is no longer required. Purging an object completely removes that object's data in Learn, freeing resources for future use.
You must disable a record before you can purge it.
Go to the Data Source Key management page on the Administrator Panel. In the Building Blocks section, select Data Integration > Data Sources. Open the menu for the Data Source Key you want to remove and select Purge.
Delete DSKs
To delete a Data Source Key, go to the Administrator Panel. In the Building Blocks section, select Data Integration. Locate the Data Source Key you want to delete, open its menu, and select Delete.
You can delete a DSK only if no associated records exist. If associated records exist, you first must disable and purge those records as outlined in this topic.
Are there illegal characters for Data Source Key names?
Yes. Data source keys should consist only of the letters A-Z, numbers 0-9, periods, and underscores (_).
Are Data Source Key names case sensitive?
No. Data Source Key names are not case sensitive.
Learn more
Installation, configuration, and management of integrations topics for specific integration types