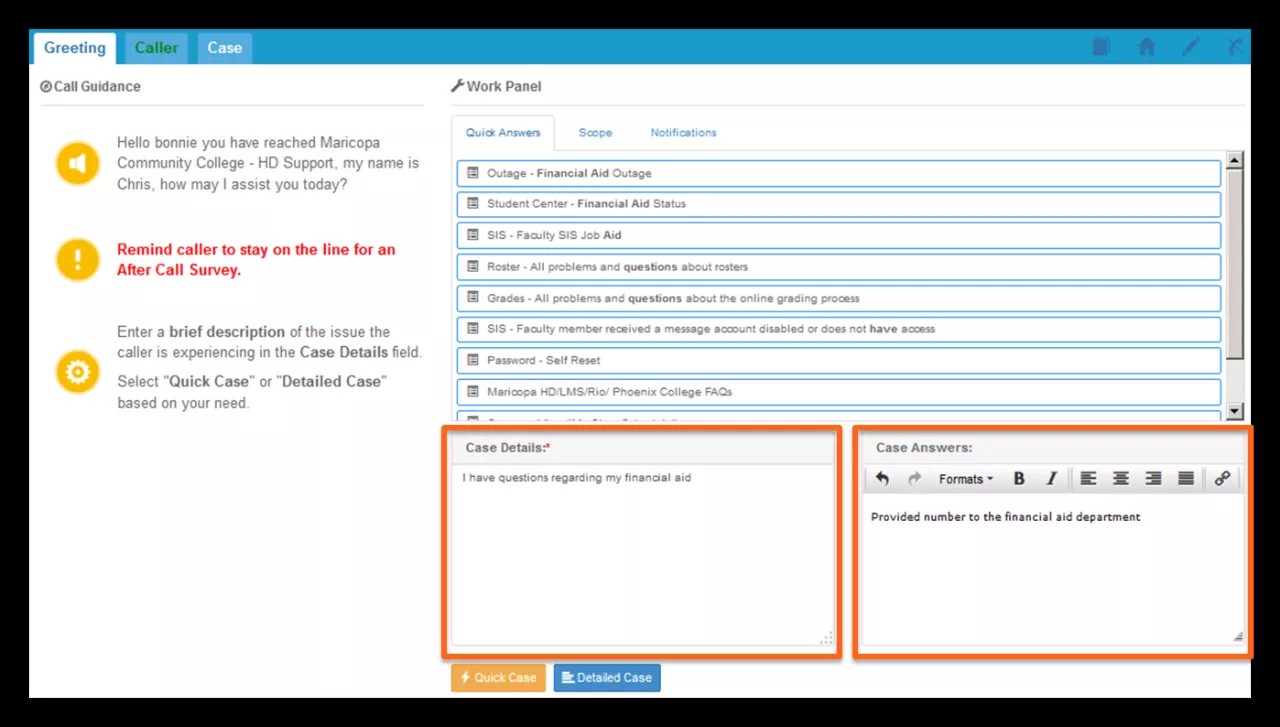
Greeting Tab Overview
The Greeting Tab is the Advisor Desktop default landing page.
There main areas of this tab are:
- The Call Guidance area
- The Work Panel area, which includes sub-tabs and two additional subsections
- The sub-tabs include:
- Quick Answers
- Scope
- Notification
- Case Details and Case Answers boxes
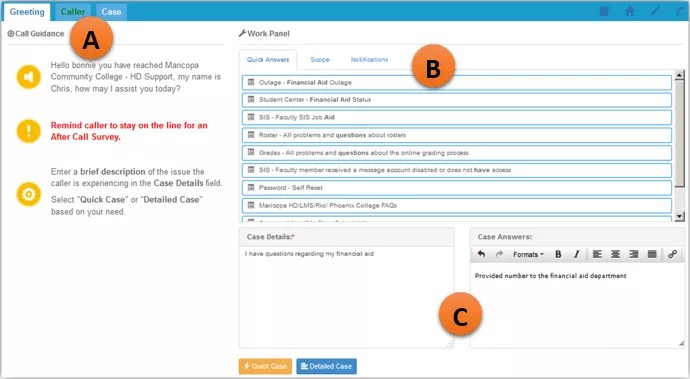
A. The Call Guidance area displays the scripted greeting for your interaction.
B. The Quick Answers / Scope / Notification area contains three sub-tabs that advisors can navigate between.
- The section will default to the Notification tab if there are notifications (important messages) that should be read.
- If there are no notifications, the section will default to the Quick Answers tab.
- The scope tab is for informational purposes about the scope of the services that are being offered (information that may be helpful to advisors).
C. The Case Details box is where advisors document a caller's issues.
D. The Case Answers box is where advisors will insert selected KB articles (from Quick Answers), or type in some response or answer to the issue.
Quick Cases
Quick cases are created only for general interactions. A general interaction can be defined as an interaction that DOES NOT require looking up a student's account.
Example Quick Cases:
- Phone number request
- General information about school
- Navigation of websites
Creating a Quick Case
- Type in keywords regarding the Contact's issue/request in the Case Details box and select enter.
- Knowledge Base articles relating to the issue/request (based on keyword or content matches) will populate in the Quick Answers area.
- Select a matching article from the Quick Answers area in order to review whether or not the article will address the issue/request.
- If the article is an internal article, it will provide information that you can relay to the student.
- If the article is an external article, and it applies to the issue, select the Select Article option to pull the information in to the Case Answers box, or type some other content directly in to the Case Answers section to address the issue/request.
- Click the Quick Case button
- Once you click the Quick Case button, a small pop-up window will appear.
- Provide the information needed by choosing the request type fields and options that correspond to the issue/request and submit.
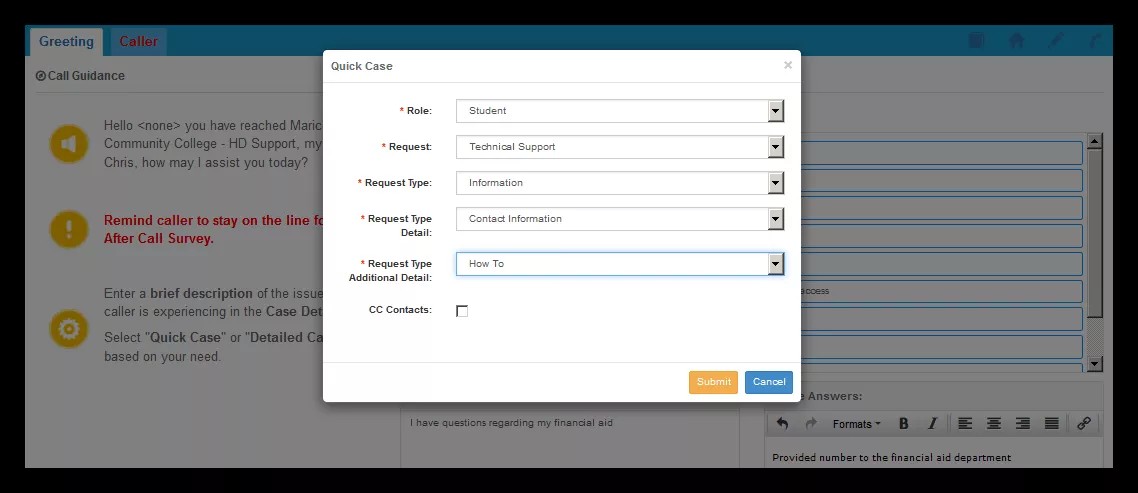
- The Quick Case will then be created and solved with the Case Answer that was provided (the information populated in to the Case Answers box, whether that is a pulled in Knowledge Base article or content manually typed in). You will be presented with a confirmation that provides details about the Quick Case.
Detailed Cases
Detailed Cases are created for interactions that require looking up a student's account, or that do not otherwise meet the criteria for a Quick Case. For a Detailed Case, you may immediately select the Detailed Case button, or you may select it after entering information in to the Case Answers.
Scenarios that would call for a Detailed Case:
- Password reset
- Verifying registration
- Course related issue
- ID request
Creating a Detailed Case
Select the Detailed Case button.

You will be directed to the Caller Tab, which will allow you to search for or create the Contact that you are advising.