Course, user, enrollment, and organization data is added manually to each hierarchy level node it belongs to. For this and security reasons it is best practice to plan out your institution's framework and management structure prior to creating the hierarchy. Does your institution administration prefer distributed management or central management? What roles will you give users and do they match their role at the institution?
- Central management refers to a team of administrators managing all levels of the hierarchy. Each team member has system administrator permission. This gives each administrator full access to all levels of the hierarchy.
- Distributed management is typically seen at institutions where each campus wants to manage their operations differently from one another. For this purpose system administrators can delegate administration to the hierarchy level node that represents each campus to other users.
Create hierarchy level nodes
- From the Administrator Panel, under Communities, select Institutional Hierarchy.
This opens the hierarchy at the institution level node. Enrollments and courses cannot be added at this level.
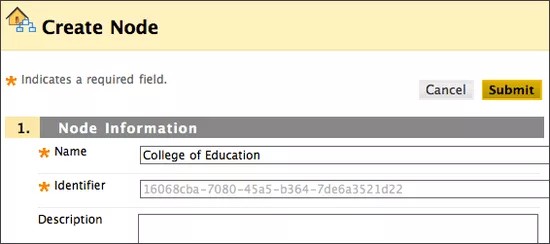
- Select Create Node.
- Type a Name for the node and optionally a Description.
An Identifier must be created for each node. One will automatically be created if you don't type one.
- Select Submit.
After a hierarchy level node has been created administrators, courses, organizations, and users can be added to it.
Delete and edit nodes
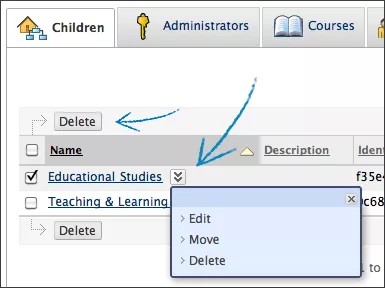
- Navigate to the hierarchy level node you want to delete or edit.
- Open the node's menu, and select Delete or Edit.
Move hierarchy level nodes
You can move nodes to different hierarchy levels. When a node moves it keeps the administrators, courses, organizations, users, and descendant nodes added to it.
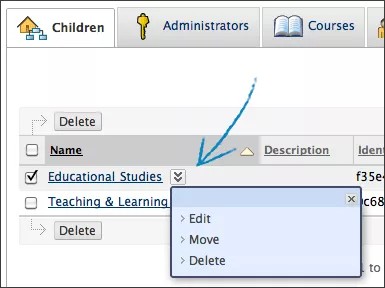
- Navigate to the hierarchy level node you want to move.
- Open the node's menu, and select Move.
- Search for the hierarchy level node you want to move the current node to.
- Select Submit.