This information applies only to the Original Course View.
Groups Management
Looking for the latest release notes? View release notes for Groups Management.
With Groups Management, you can perform these actions:
- Easily see which students are in which groups, including students who aren't in any groups.
- Easily see and modify group memberships. Avatars help distinguish users.
- Choose and manage membership for groups sets with an improved workflow.
- Import and export groups and group memberships.
- Sort columns, perform bulk actions for deleting groups, and create Grade Center smart views for one or more groups on the All Groups page.
- Optionally, manage tool availability for all groups on the All Groups page.
More on how students use groups
More on how instructors use groups
All Groups page
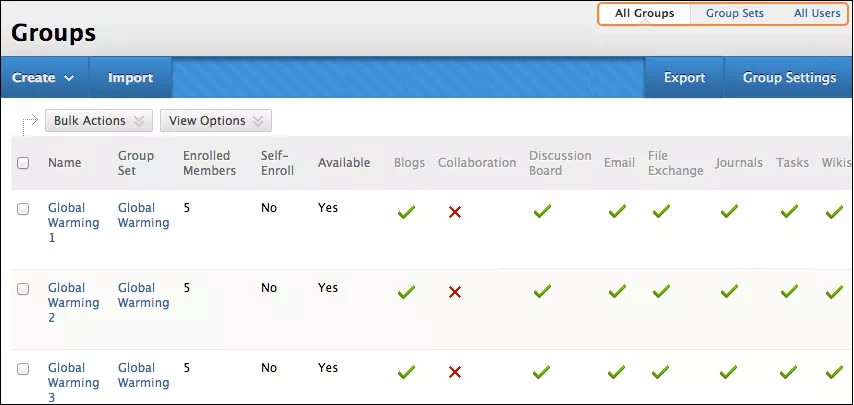
Use the links at the top of the page to sort your view by groups, group sets, or users. All Groups is the default view and has sortable columns that contain details about all of the groups in a course.
After group creation, instructors have the option to make tools available or unavailable. Clear the checkmark in a tool's column to make it unavailable-an X appears. Select the X in a tool's column to make it available-a check mark appears. Use the View Options function to show or hide tool availability.
With the Bulk Actions function, instructors can select groups for deletion or create smart views in the Grade Center for each group. A smart view is a focused look at the Grade Center. It shows only the columns that match a set of criteria, and the view is saved for continued use. When the Grade Center includes many students and columns, instructors can use smart views to quickly find data.
All Users page
On the All Users page, instructors can view which groups students belong to, search for users, add multiple users to a group, and delete users from groups.

Select group members
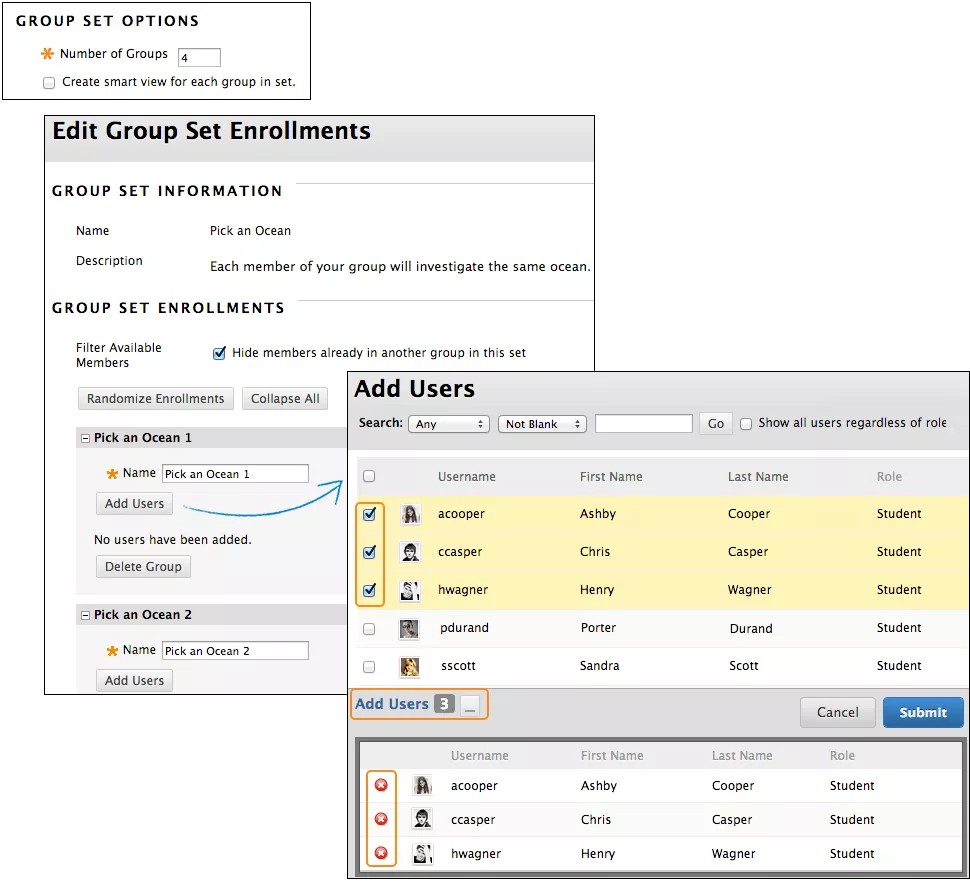
Whether instructors are creating one group or a group set, they search for and select group members from the new All Users page.
The selected group members appear in the bottom area with a number showing the total count. Select the Show List function, represented by a full square, to open the Add Users area to view the selections. When the area opens, the square icon collapses. To remove a user, select the X.
Import and export groups
Instructors can export a CSV (comma-separated value) file containing their existing groups and group members, reorganize as needed offline, and then import them.
Instructors can use the import and export functions to add new users and groups, but they cannot remove users or groups. During these processes, instructors can't add new users to their courses.
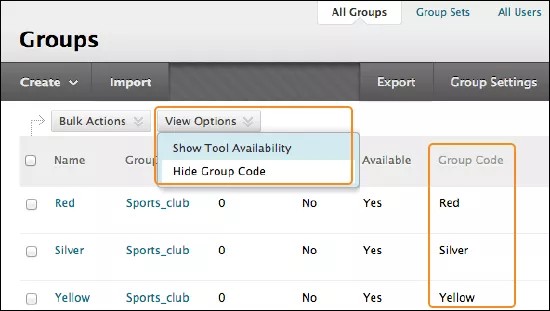
Groups codes are unique identifiers used strictly for import purposes. You may reveal a column in the interface to see the group codes, but you can't edit group codes while in your course. Group codes also appear in downloaded CSV files. You can edit the group codes in the CSV file when importing existing users to a group to ensure the users are added to the correct group. Group codes provide a unique way to identify each group in case they have the same name.
When viewing all groups, use the View Options list to show and hide the Group Code column.
Enable and disable groups management
You can't uninstall, disable, or change the availability of Groups Management.