Case Page Overview
The Case page is the default landing page for any user with any Case role and permissions. The page will load upon selecting Case from the page selector when you are on another page. The page offers the ability to search for, create, view, and manage (work on) Cases according to the role group configured on your account.
Case Page Layout
The Case Page default view contains the following areas:
- Search and filters area
- Results list area (which may be expanded to a full page list view)
- Action button area
- Active load area
Search and Filters Area
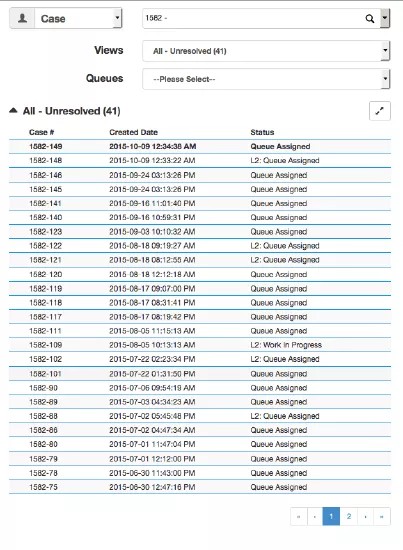
In the search and filters area, you can search for Cases by entering a case number, using advanced filter selections, selecting a View (pre-set filters), or selecting a Queue.
- Enter a case number and hit enter, or select the Search icon to search for a specific Case
- For advanced filters, select the drop-down icon to the right of the Search icon, enter in search criteria (use one or more criteria), and select Search
- Note: select the advanced filter icon and click the Search button to get a list of all cases in the institution
- Select a View from the Views drop-down to obtain a list of all cases that meet the criteria of the selected View
- Select a Queue from the Queues drop-down to obtain a list of all the cases that have been assigned to, or routed to the selected Queue
Results List Area
All Cases that meet the search or filter criteria, or are included in the selected View or Queue, will list in the results list area.
- The Case page will load with the first View (All - Unresolved) pre-selected, and the cases that match the View criteria will list in the results list area.
- The default number of items displayed in the results list can be increased or reduced using the Manage Settings function on the Profile page OR by manually adjusting the number of items to view per page on the expanded page list view.
- The default setting is 10 items per page; pagination is available with lists if the number of resulting items in the list exceeds the number of items per page.
If the Service Desk is opened in another tab or browser window (same browser), only 10 items will list per page no matter what has been set under the Profile settings.
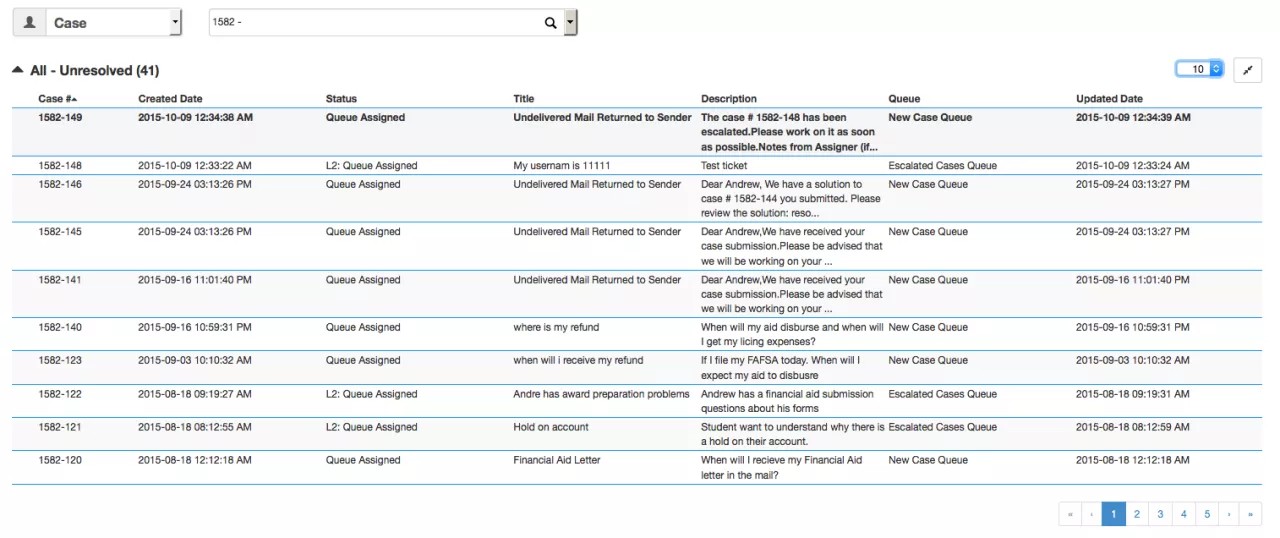
Expanded Page View
Use the expand/collapse icon to expand the results list to the full page list view. The full page list view of the Case list offers the ability to:
- Sort the list by clicking the arrow next to each column header where the arrow is available
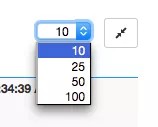
- Increase/reduce the number of Cases you would like to view per page (10, 25, 50, 100)
- Scroll through pages (if more than one page exists)
- Select a Case (collapses the list and loads the Case in the active load area)
Return to the default Case page view by clicking the collapse icon from the full page listing view.
If you indicated a preferred number of items per page on the expanded page list view, the same number of items will be displayed in the results area when you collapse to the Case page.
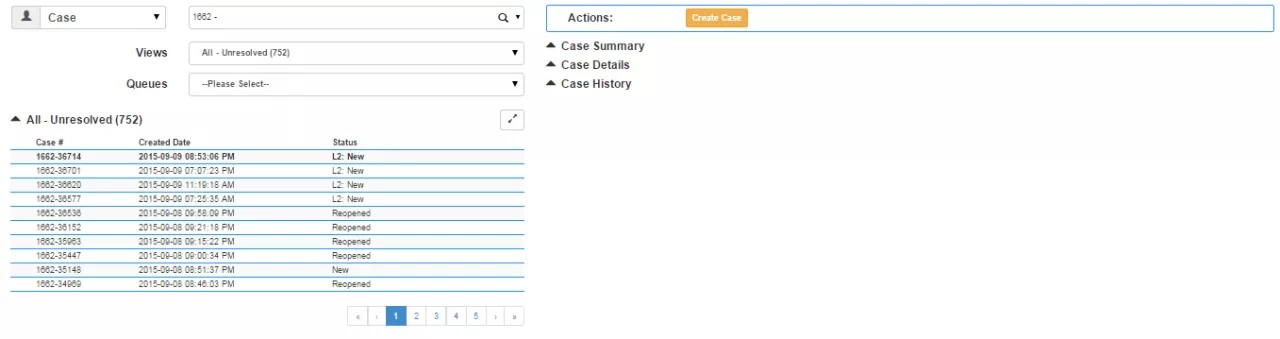
Action Button Area
The action button area will display the action options that you may select based on:
- Your role and permissions
- Actions that are configured
- The current status of the case in the active load area
Action buttons do not consistently appear in the same position. If there are more actions buttons than space to list the buttons out horizontally, a "More Actions" option will display. Selecting this option will present a drop-down of the additional actions available (again, based on roles and permissions, and the status of the cases in the Active Load Case Area).

Selecting an Action button will prompt an Action overlay on which you may:
- Add comments (internal and/or external as applicable to the action)
- Access to the Knowledge Base
- CC other Contacts or Advisors if applicable to the action
- Suppress external notifications (emails)
Active Load Area
The active load area on the Case page will display the first or only case listed in the results list area unless some other case has been manually selected in the results case list. Once a case has been selected (the first or only case listed, or by manually selecting the case), the active load area will include the following sections:
- Case Summary
- Case Details
- Case History
Each of these sections may be collapsed or expanded.
The Case Summary will include:
- The case (ticket) number
- The status of the case
- The name of the constituent Contact the case was created on behalf of (the name if selected expands a Contact Details drop-down that displays the profile information of the Contact as well as an option to navigate to Advisor Desktop)
- A Contact link that will redirect the user to the Contact page with the Case Contact loaded in the active load area as the selected contact
- The date created and the date modified
- The name of the assigned Advisor, if assigned to an Advisor
- The name of the person who entered the case (or System if system generated)
- The name of the Queue, if Queue Assigned
The Case Details will include:
- A listing of the Case template fields and the values entered (option selections or text entered) when the Case was created
- The last item listed will be an Attachments item - any attachments uploaded to the case will list with this item
The Case History will include:
- A listing of the log items to the Case History
- Column headers of the table include:
- Performed By - will list the display name of the Advisor who performed the action, or System if a system performed action
- Action - will list the action performed
- Action Date - will list the date the action was performed
Use the Case History to troubleshoot issues you may experience with the Case.
- Read the Comments posted
- Follow the Rule routing
- See who took what Action
- See the Comments that accompanied the action (including escalation information passed on with the Case escalation)
- Trace the status transitions
Searching for Cases
On the Case page, you can search existing cases by the following methods:
- Entering the Case number in the main search bar and selecting the search icon (or pressing Enter)
- Selecting a View from the Views drop-down menu (as set up for the Department)
- Selecting a Queue from the Queues drop-down menu (as set up for the Department)
- Selecting search criteria from the other search options available (you may need to scroll down in the search criteria listing to see all the search options and to select the Search button)
Refer to the image above in Results Search Area.
Case Actions
Once a Case has been selected from the results area, the information related to the Case will load in the active load area. The action button area will offer all Action selections available to you (based on your role and permissions and the action configurations set up for the Department).
| Action | Description |
| Suggest Solution | Allows you to suggest a solution to resolve the Case. |
| Escalate | Allows you to escalate a Case (assigns Case to queue based on categorization). |
| Post External Comment | Allows you to send a message to the Contact (does not update the Case status). |
| Post Internal Comment | Allows you to include comments to the Case that will not be visible to the Contact but will be included in the Case History. |
| Grab | Allows you to move the Case to a condition of being assigned to you, so that you may take an action on the case. Note: Always Grab before taking another Action. |
| Edit | Allows you to edit the information set on Case template and manage attached files. |
| Queue Assign | Allows you to manually assign the Case to an available Queue. |
| Assign to Advisor | Allows you to manually assign the Case to an Advisor. |
| Need More Info | Allows you to send an email requesting more information from the Contact. |
- Select an Action
- Use the Knowledge Base to help you find the best information to insert in the comment area
- Indicate other Advisors to be CC'd on the Action email notification
- Add an alternate Contact email address
- Suppress external email notifications if one is configured on the Action
- Add attachments
- Submit the Action

The ability to perform steps 6-9 above will depend on the configuration of the Action.
Successfully submitted Actions will update the Case History with the Action that has been successfully completed.
Depending on configuration:
- The Action may or may not trigger email notifications (either to the Contact, or Advisors)
- The Action may or may not be visible as a log item in the external facing Self-Help Portal
Creating a Case
To create a Case on the Case page:
- Select the Create Case button.
- The Case blank template will load in the active load area
- Select a profile (or leave the pre-populated Contact if correct)
- If not correct, select Remove, and then Select Contact to add the correct Contact
- Search for Contacts by user name, first name, last name or email
- Enter the Case information requested in the Case Details section
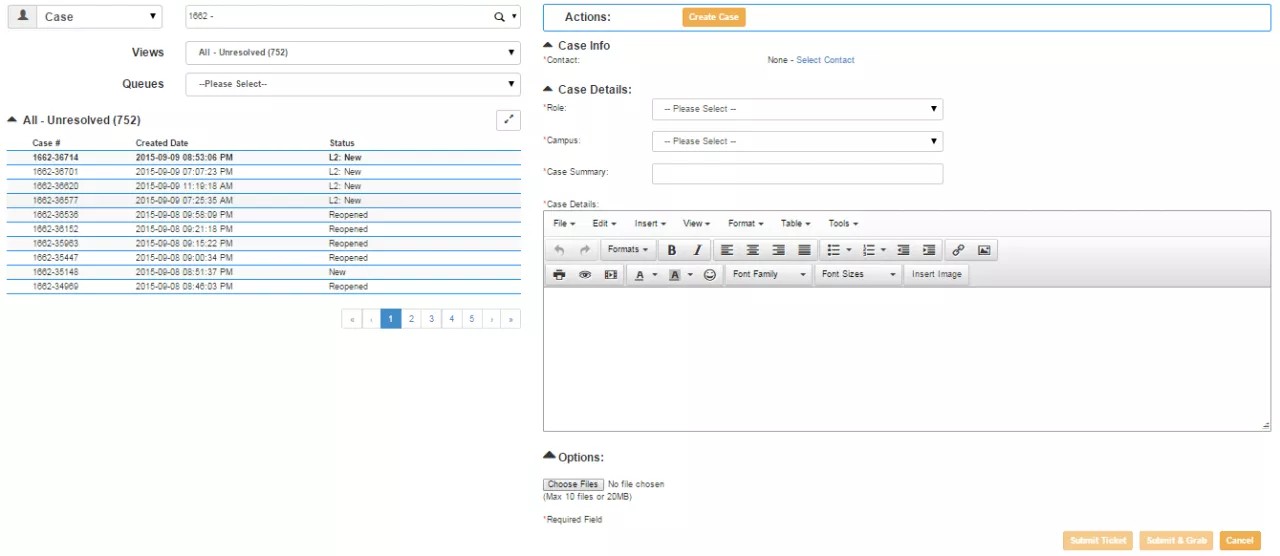
- Select a profile (or leave the pre-populated Contact if correct)
- After completing the Case with all required information, select the Submit Ticket button
- If you would like to immediately work on the Case, select Submit & Grab
- If successful, you will be presented with a success message indicating the Case number, which may be searched for and viewed on the Case page, and on the Contact page when viewing the list of cases created on behalf of the selected Contact