A journal provides a personal space for you to communicate privately with your instructor or students, depending on your role.
You can use a journal as a self-reflective tool to share your opinions, ideas and concerns related to your course. You can also discuss and analyze course related material using journals.
If you’re a student, your instructor can grade your journal contributions or use them solely for communication. In either instance, you can make multiple entries in a journal.
Journal on Blackboard Learn app is only available for Ultra course view.
Create journals
If you're an instructor, you can create both graded and non-graded journals. Here are the steps to create a journal:
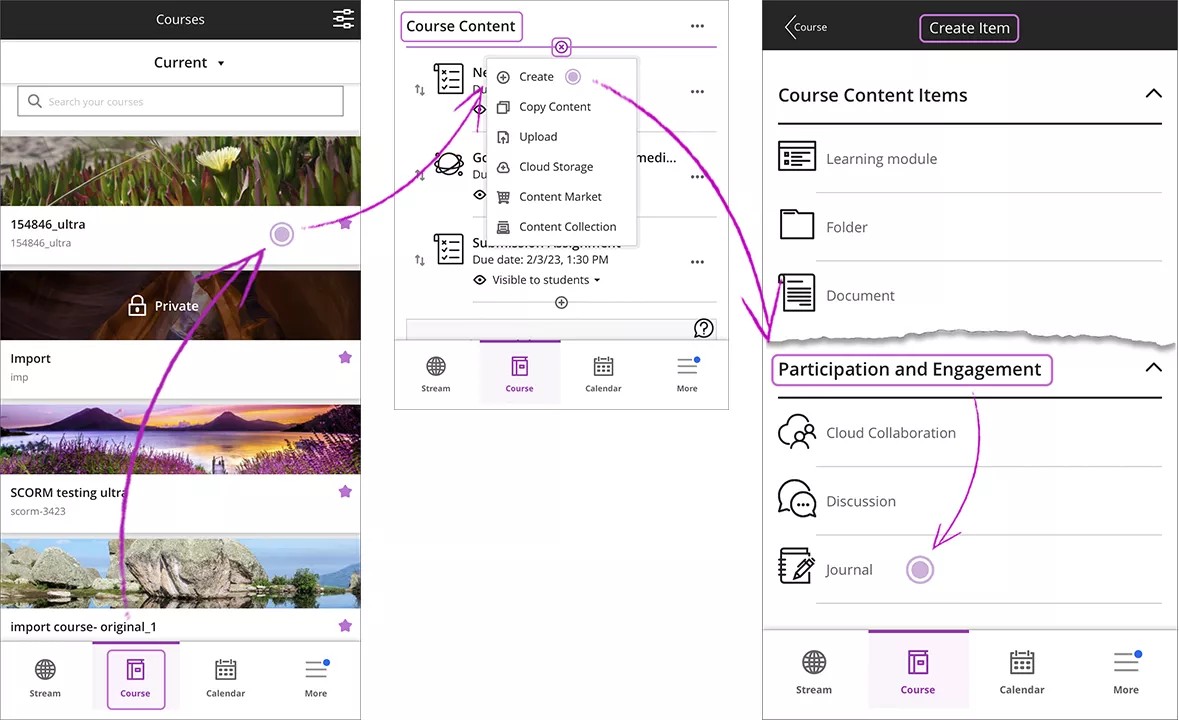
- Go to the bottom menu and select Course, then choose a course.
- In the Course Content section, select the plus sign wherever you want to add a journal.
- In the menu, select Create to open the Create Item panel.
- Go to the Participation and Engagement section and select Journal.
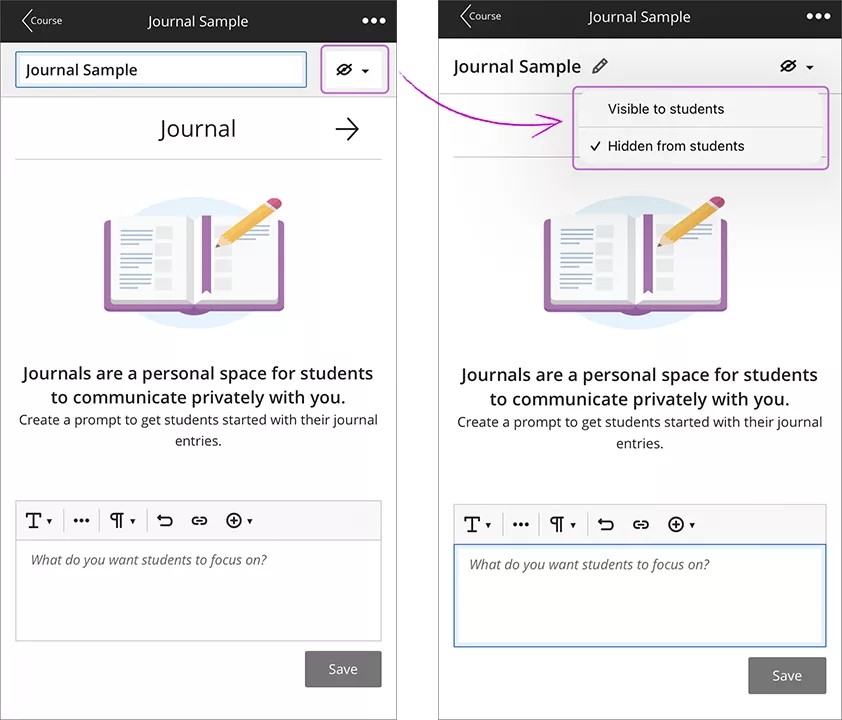
- When the New Journal page opens, you can add a title for the journal.

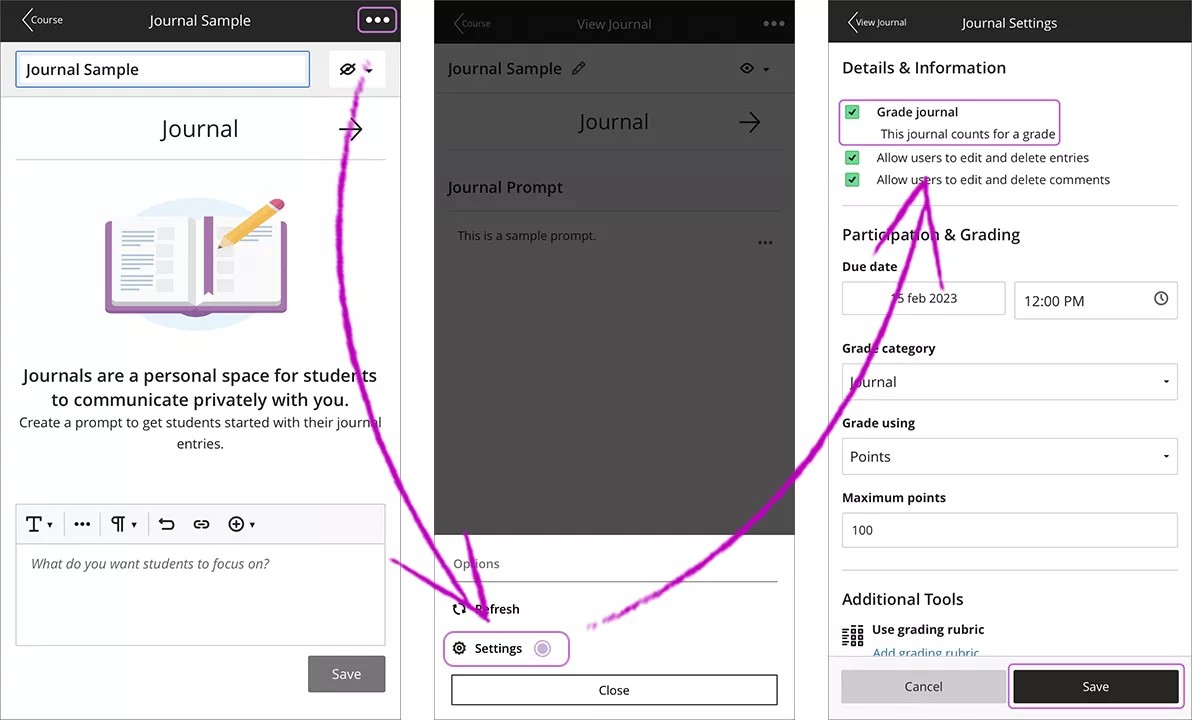
- You can add a prompt to get students started with their journal entries in the text box at the bottom of the screen.

To change the visibility of a journal, follow these steps:
- In the New Journal page, select the eye icon next to the journal title.
- Choose whether you want to hide the journal from students or leave it visible to them.
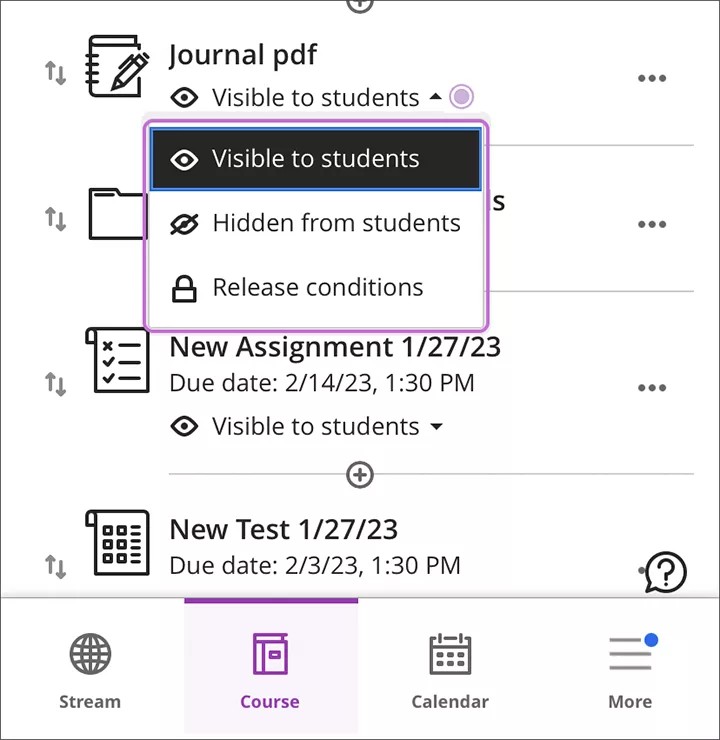
- If you want to make further changes to the visibility or release conditions of the journal, you can also do so from the Course Content section.
If you want to set up the journal as gradable activity, follow these steps:
- Go to a journal and select the three horizontal dots menu in the top right corner.
- Choose the Settings option to open the Journal Settings page.
- Check the box labeled Grade journal.
- In the Participation & Grading section, you can customize the default grade settings to fit your needs.
- Once you're done, select the Save option to apply the changes.
If you’re a student, you'll get a notification every time your instructor adds a graded or non-graded journal for you.
Access journals
To view a journal, follow these steps:
- Go to the bottom menu and select Course, then choose a course.
- In the Course Content section, find and select a journal.
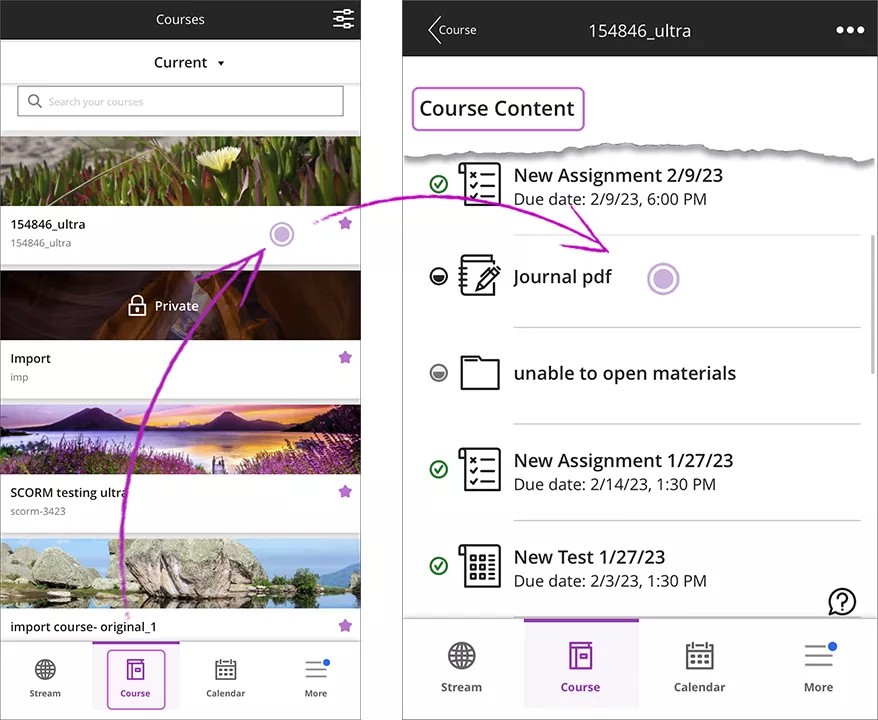
Keep in mind you can access the journal by selecting the journal notifications.
Add an entry / comment / feedback
You can add your opinion, comments, feedback, and reflections as entries on the journals, depending on your role.
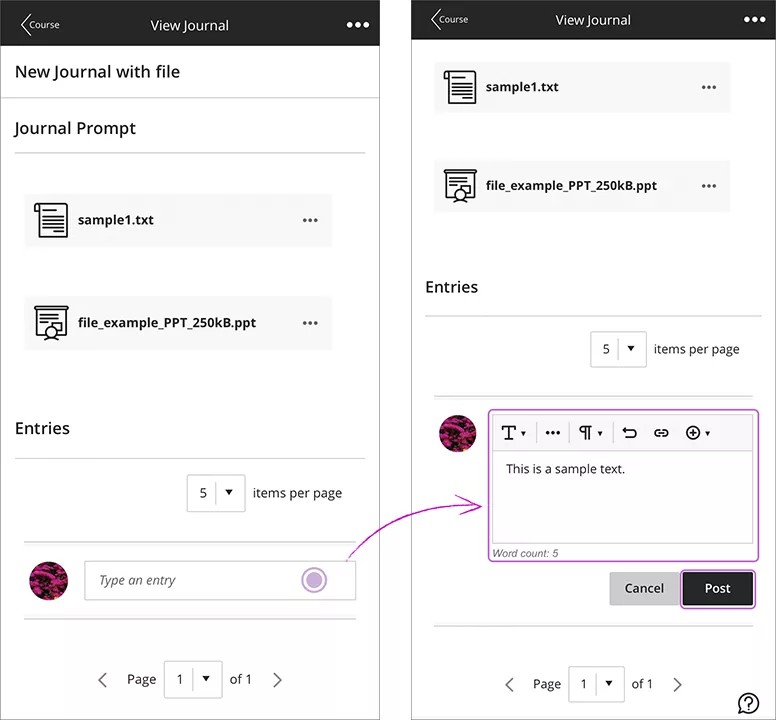
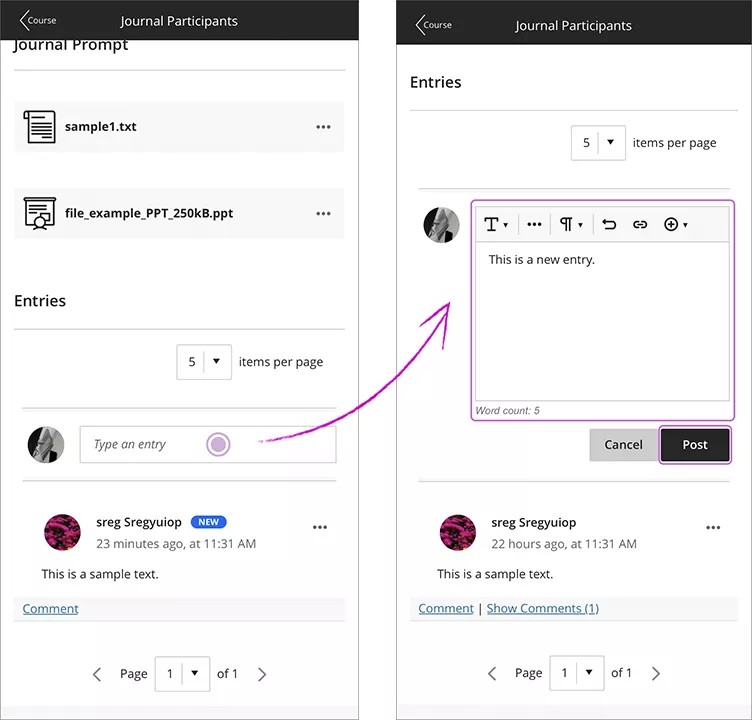
If you're a student, follow these steps:
- Go to a journal.
- Select the Type an entry option in the text box.
- Publish your entry by selecting the Post option.
If you’re an instructor, you'll get a notification every time your students add an entry on your journal.
As an instructor, you can also add comments and feedback to your students entries. For this purpose, follow these steps:
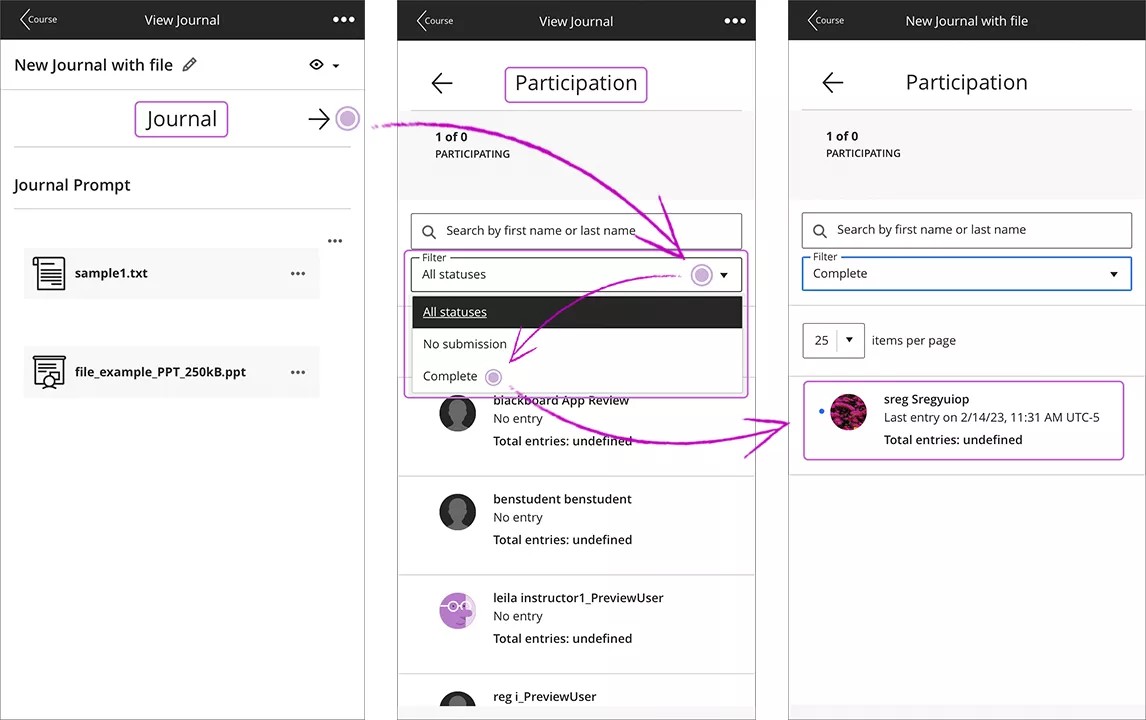
- Go to a journal.
- Select the right arrow next to the Journal text to go to the journal's Participation page.
- Expand the filter menu and select Complete to find the students who submitted an entry.
- Choose a student's name to open the student's journal page.
- Select the Type an entry option in the text box if you want to add a new entry.
- Publish your entry by selecting the Post option.
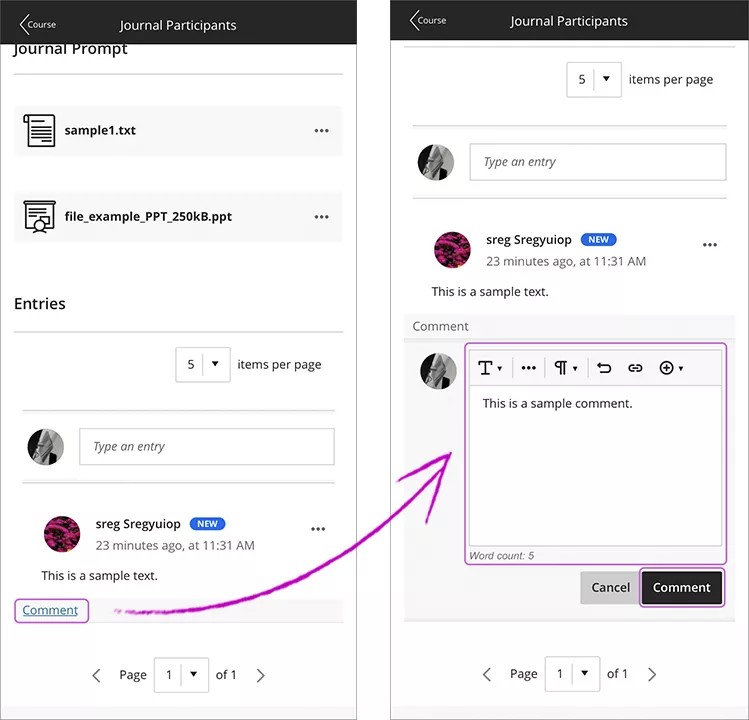
- If you want to comment an already submitted entry, select Comment.
- Publish your comment by selecting the Comment button.
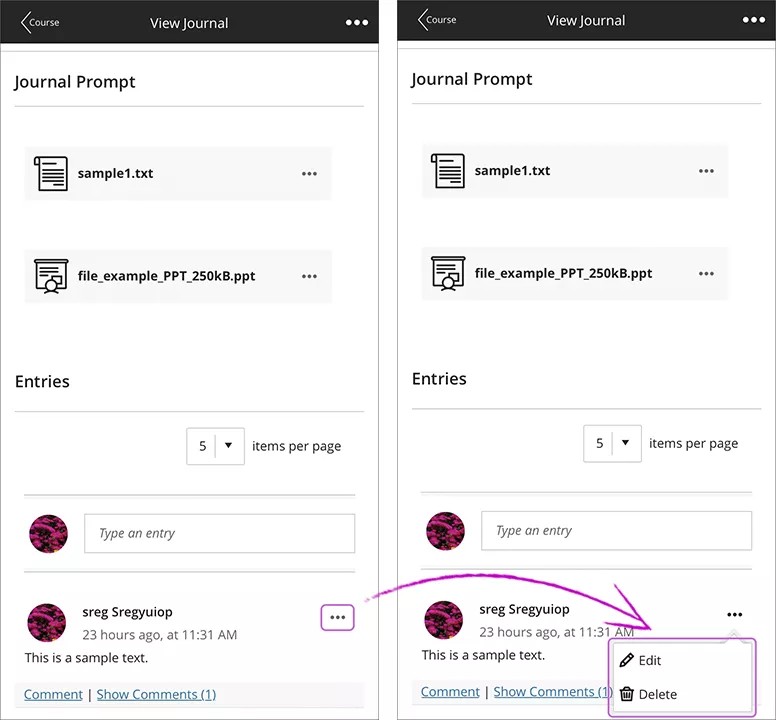
Remove / edit your entries
After adding your entries on a journal, you can also edit and delete it if required.
- Select the three horizontal dots menu on the top right of your entry.
- Edit your entry by selecting on the ‘pencil’ icon.
- You can also delete the entry by selecting on the ‘dustbin’ icon.
Feedback and grading
For instructors:
In graded journals, you can add a feedback and grade your student’s work by following these steps:
- Go to a graded journal.
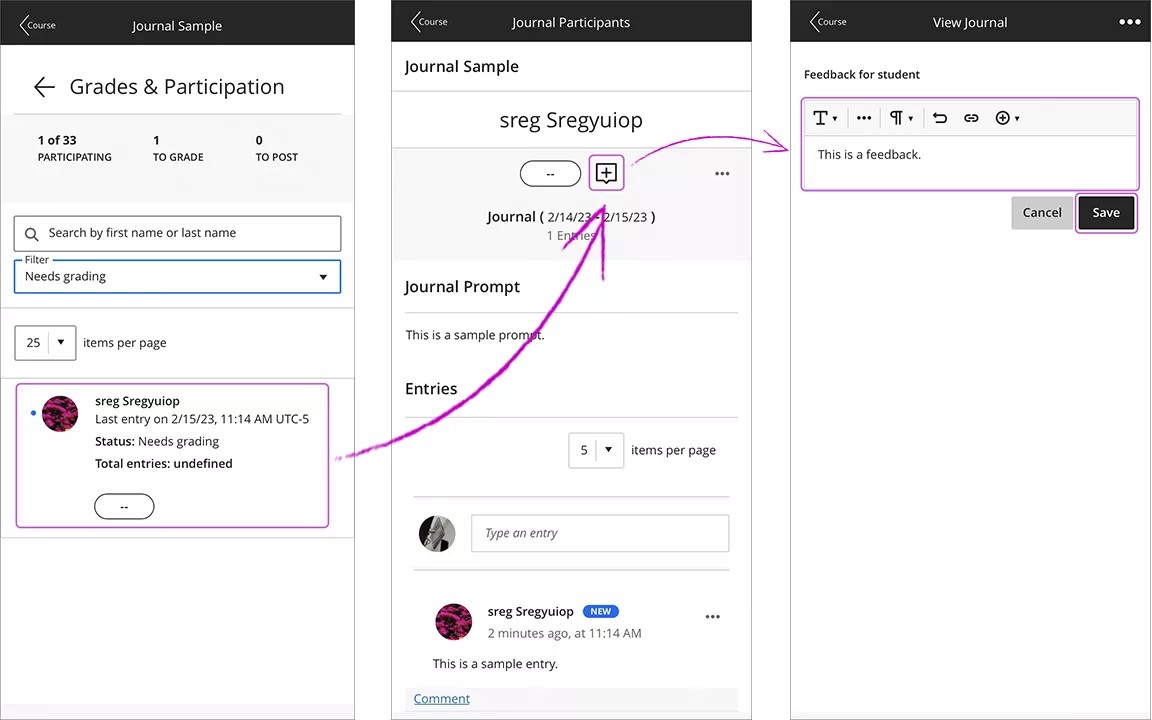
- Select the right arrow next to the Journal text to go to the journal's Grades & Participation page.
- Expand the filter menu and select Needs grading to find the students who submitted an entry and haven't received a grade yet.
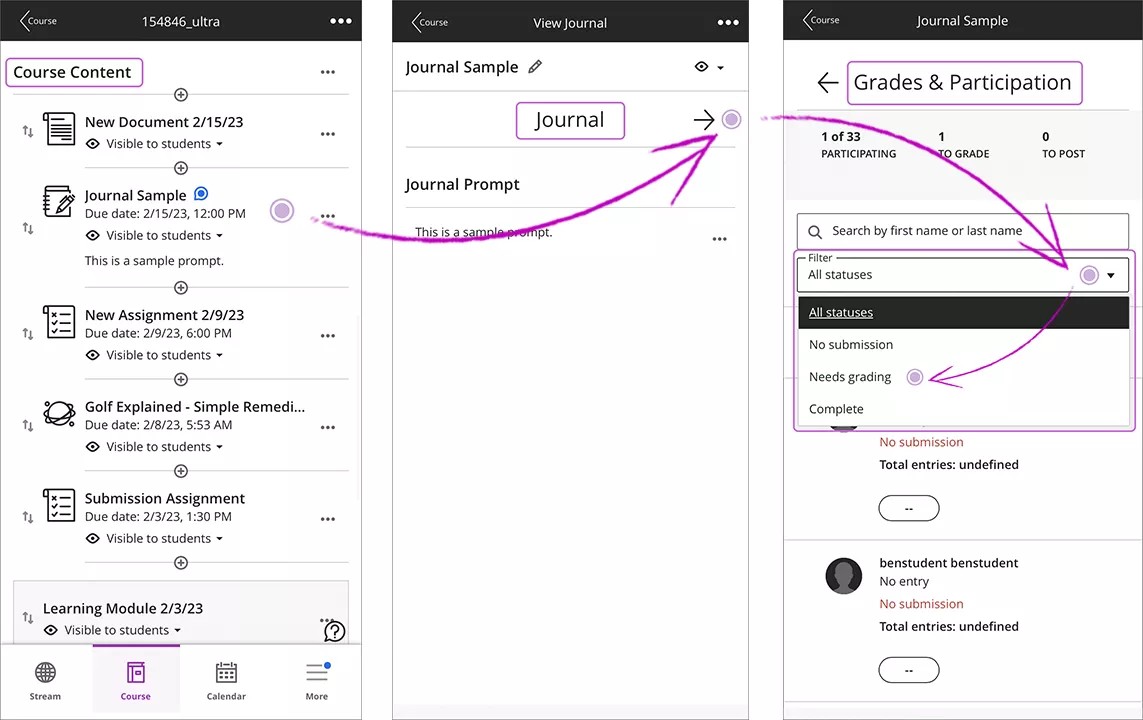
- Choose a student's name to open the student's journal page.
- Select the plus sign icon to add a feedback.
- Add your feedback in the text box. Once you're done, select the Save.
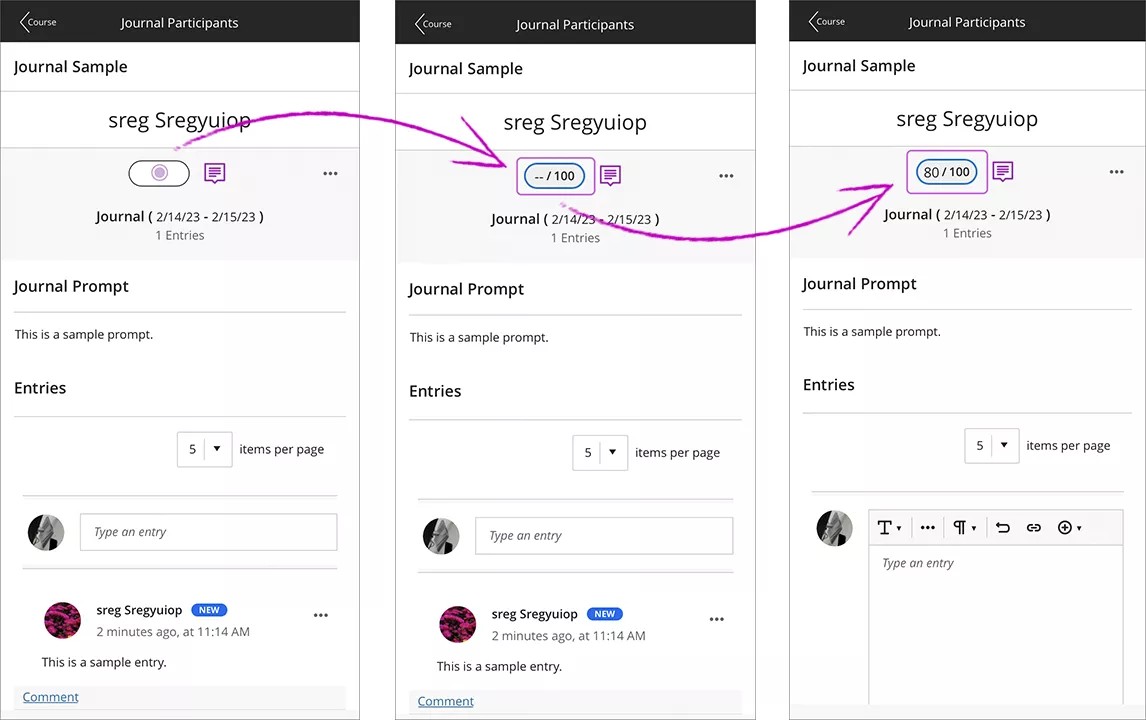
- Select the blank space next to the plus sign icon to add a grade.
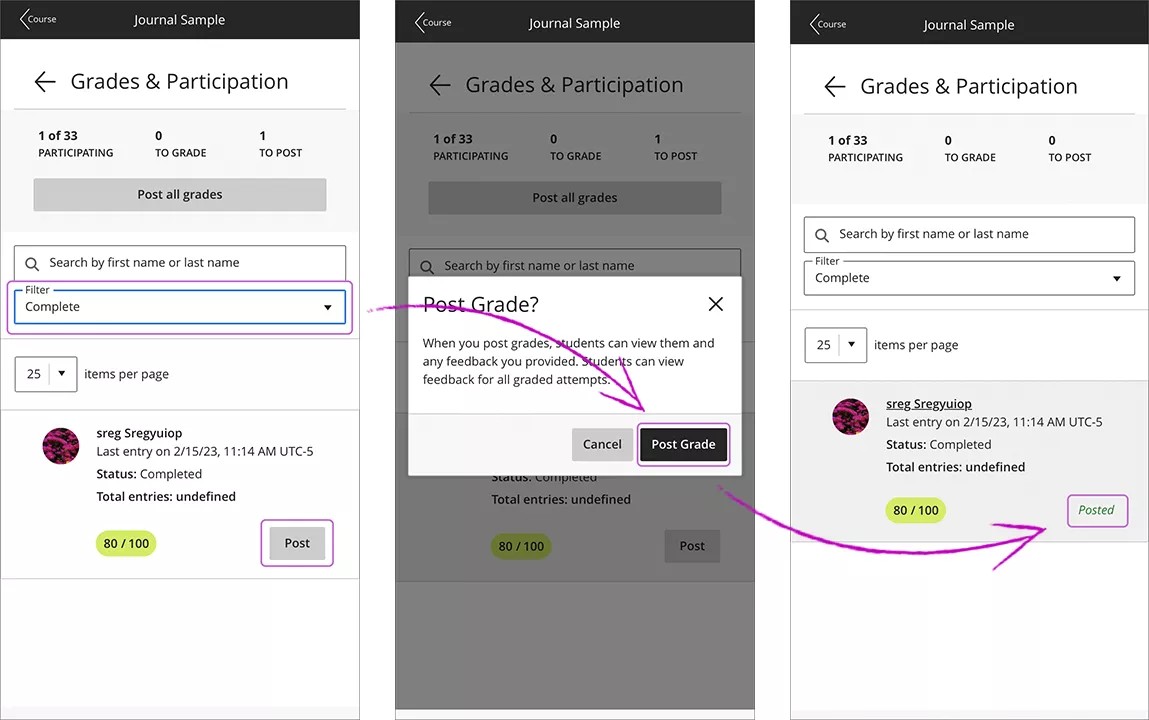
- Once you're done, in the Grades & Participation page, expand the filter menu and select Complete. Then, select Post on and Post Grade to publish the grade and feedback.
For students:
Your instructor can initiate a graded journal with you. Once you add your entry to the journal, your instructor can grade you for the work. You can view your instructor’s feedback and grading details on the journal screen by following these steps:
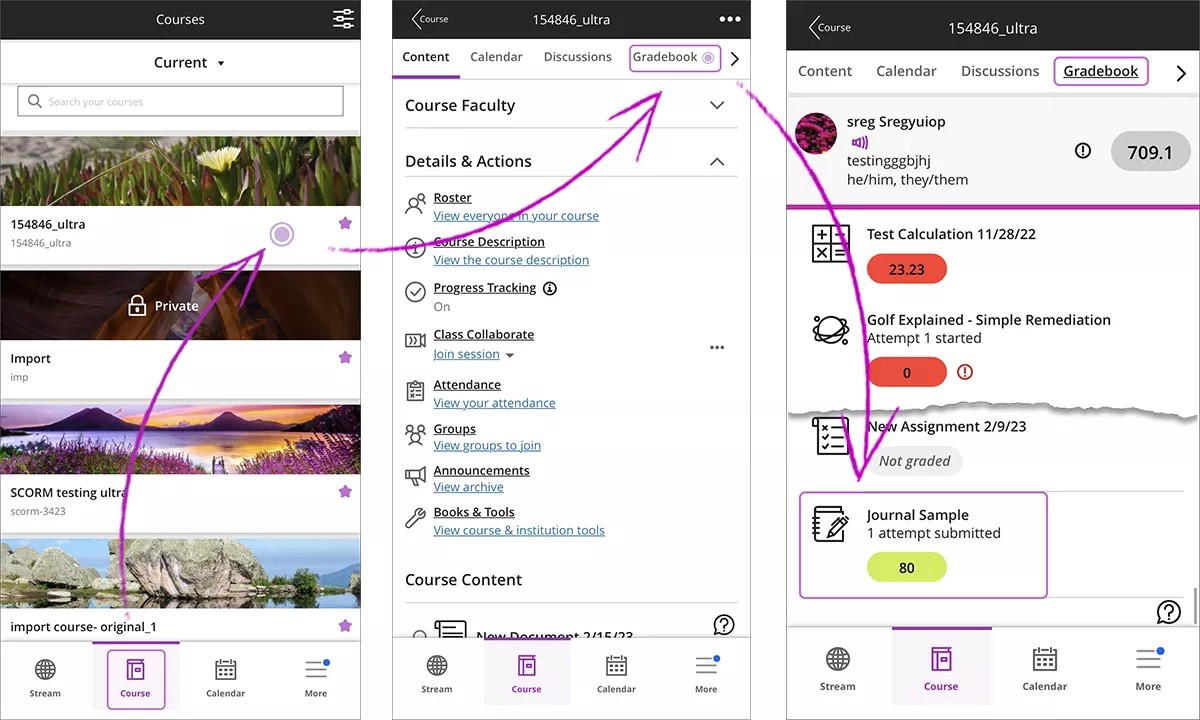
- Go to the bottom menu and select Course, then choose a course.
- Select the Gradebook option in the top menu.
- In the Gradebook, find and select the journal to review your grade and feedback.