
Find out more about Anthology Illuminate
Access reports
- Go to data.blackboard.com.
- Sign in with your Institutional or Anthology Illuminate Account.
- Select the top-left menu.
- On the vertical left-sidebar navigation panel, select the area of reporting you want to access.
- Each reporting area has a list of available reports and a description of the questions each report answers.
- Select a report to access it.
Reports can have multiple tabs of information. Navigate through them to access all the available data.
Reset password
You can reset your password by the following method if you have a Anthology Illuminate account. If you're using your Institutional account to login, you'll need to contact your system administrator.
Go to your data.blackboard.com and select Sign In > Sign in with your Anthology Illuminate account.
Alternatively, go to your Snowflake Reader account and select the Login using Auth0 button.
Select your SaaS Hosting Region.
From the Anthology Illuminate account sign-in modal, select Don't remember your password?
Fill out the email field with the user email with a Anthology Illuminate account already provisioned.
Select SEND EMAIL.
A confirmation message appears on the page.
Check your inbox for an email from Anthology Illuminate. Note: If you can't find the email in your inbox, check your spam or junk folder.
In the email, select CONFIRM. You'll be redirected to the Change Password page.
From the Change Password page, set your new password. After you enter and confirm your new password, you'll see a message confirming the password change.
Go back to your Snowflake Reader account, or data.blackboard.com sign-in.
Your account must be created and activated by Anthology Provisioning for this process to work.
Language settings
Choose your preferred language
You can select your preferred language from the available language pack:
- Select the Language choice drop-down menu.
- From the drop-down list of available languages, select your preferred language.
There are terms that aren't currently localized and will remain in English after you've selected another language. The localized version of these terms will be delivered in a progressive manner throughout 2022 and 2023.
Supported languages:
- cy_GB: Cymaraeg (Cymru)
- en_AU: English (Australia)
- en_GB: English (United Kingdom)
- en_US_k12: English for K-12 (United States)
- en_US_pro: English for Pro-Ed (United States)
- es_ES: Español (España)
- de_DE: Deutsch (Deutschland)
- fr_FR: Français (France)
- it_IT: Italiano (Italia)
- ja_JP: Japanese
- ko_KR: Korean
- nb_NO: Bokmål (Norge)
- nl_NL: Nederlands (Nederland)
- pt_BR: Português (Brasil)
- pl_PL: Polski (Polska)
- sv_SE: Svenska (Sverige)
- tr_TR:Türkçe (Türkiye)
- zh-CN: Chinese Simplified
- zh_TW: Traditional Chinese
Change your calendar's language
Anthology Illuminate Reporting date picker calendars match your system's language and may differ from your browser's language.
Update your system settings to view your calendar in another language:
Set up institutional accounts
Institutional Authentication is a single-sign-on service for Anthology Illuminate that provides seamless authentication between Blackboard Learn SaaS and Anthology Illuminate. This gives an increased level of security and control over the Anthology Account authentication methods and enables additional features in Anthology Illuminate.
Find out more in Institutional Authentication
Reset controls
- Inside a report tab, go to the control you want to reset.
- Select the More Options icon.
- Select Reset.
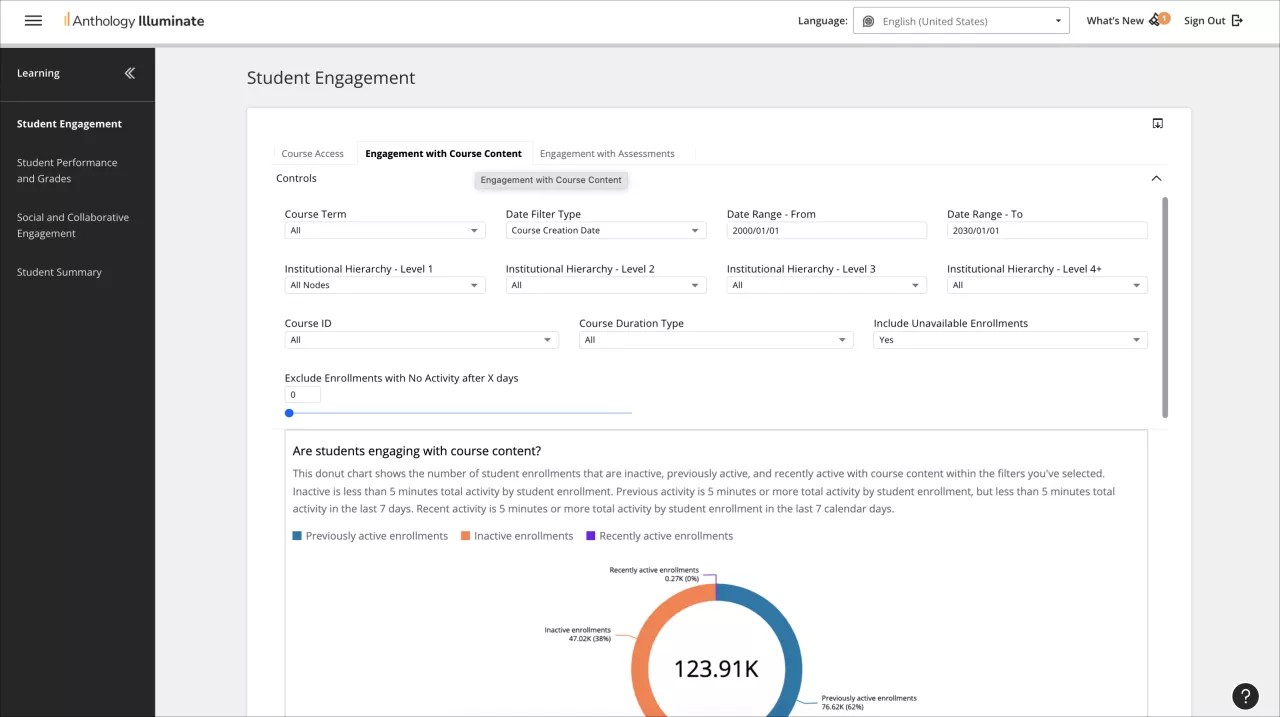
Get Detailed Data with Visual Filtering
Visual filtering allows you to filter course and student data by selecting categories in other data visualizations in the same report tab.
Visual filtering adds filters on top of your selected filters in the Controls section and other filters in the report tab.
Apply a visual filter
- Select a category in any data visualization inside the report tab by which you want to filter course and student data.
- The selected category will be highlighted.
- Go to the course and student data to see it filtered by your selected category.
Review and delete visual filters
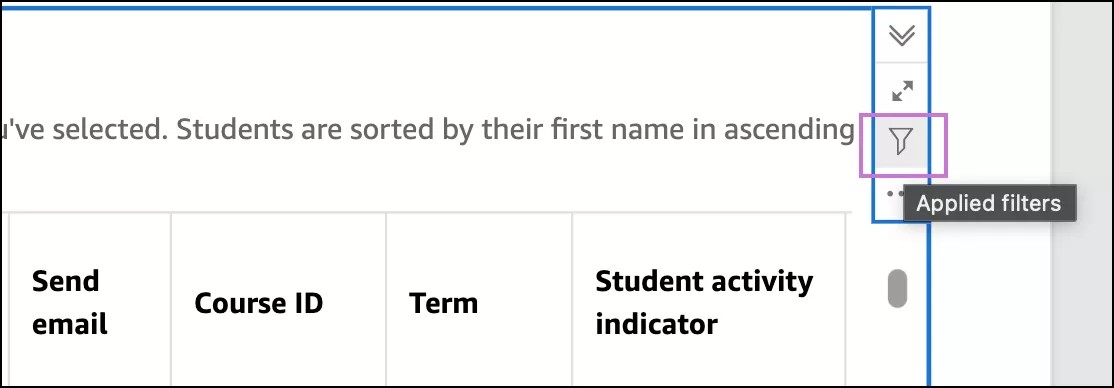
- Select the chart or table you want to review or delete the visual filters from.
- In the top-right corner option menu, select the filter icon.
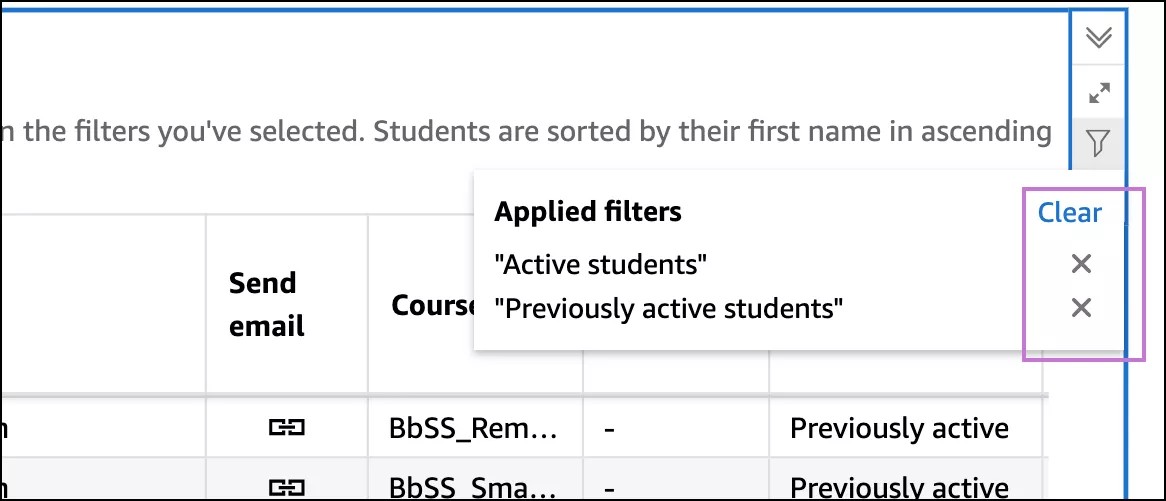
- Select the remove icon next to the filter you want to remove.
- To clear all applied visual filters, select Clear.
A combination of visual filters can result in no data displayed. Remove a visual filter to go back.
Video example of visual filtering
Maximize data visualizations
- Inside a report tab, select the data visualization you want to maximize.
- Select the maximize icon on the right-hand panel.
- To minimize the visualization, select the minimize icon on the right-hand panel.
Export to CSV
- Inside a report tab, select the data visualization you want to maximize.
- Select the More Options icon on the right-hand panel.
- Export to CSV.
Print a report
- Inside a report tab, select the icon in the top right corner.
- Select Print.
- Choose the settings for your print.
- Select Go to preview.
- Check that all looks as you want or change what you need by selecting Configure.
- Select PRINT in the top left corner.
Download a report in PDF
- Inside a report tab, select the icon in the top right panel.
- Select Generate PDF. Wait a few minutes while generating the PDF file.
- When the PDF is ready, select Download Now.
- Or select again the icon in the top right corner and choose View Downloads. A panel will open with the PDF files generated, select Click to download.
Reporting data refresh frequency
Overnight, aligned to the timezone of the Blackboard Learn instance.
Reporting in Sleep Mode
As a continuous effort to optimize Illuminate Reporting, we implemented a new process called Sleep Mode to ensure the efficient use of resources while making sure you continue accessing and experiencing reporting in the best way possible.
It’s usual that in some periods, you access our set of pre-built reports with more frequency than others, when those periods of inactivity extend beyond 30 days, the reporting area will be temporarily placed in a dormant state until you’re back. You will always be able to wake the system up whenever you need to.
How it works:
If Illuminate Reporting has not been used for a period of 30 days, it will enter in Sleep Mode.
That means that the nightly provisioning, to keep the data up to date, is paused until new activity.
- Once the system is on Sleep Mode and you sign in to Illuminate, you will see an informative message in the reporting area letting you know the status: Sleep mode on. Reports are not visible when the system is in sleep mode. Wake it up to view updated reports.
- Next to the informative message, you will find the Wake Up button to reactivate the reporting area, whenever you need:

- Right after hitting the Wake Up button, you will see a confirmation message: Waking up in progress... This may take a few minutes or hours to complete. Please, check back later.

- The awakening process can take a few hours, depending on the size of your institutional dataset. Please, start the reactivation process and check back in a few hours.
- After the system has woken up, you can explore our set of reports as usual.
Reporting isn’t working
If you experience issues with Anthology Illuminate Reporting here are some things, you can try:
- Check your Internet connection: If Anthology Illuminate won't open or load for you, check your network connection. Make sure you're connected to the internet.
- Check Anthology Illuminate's status: If your Internet connection is ok, check status.blackboard.com to see if Anthology Illuminate is down. If it is listed, this is a known issue, and we are working to resolve it. Watch that page for updates.
- Contact your institution's support or help desk: If you don't see an issue and the problem continues, contact your institution's support or help desk. If you don't know how to contact your institution's help desk, you can look up your university with our Support Service.