Messages
You can send messages to your instructors, other classmates, and group members. Messages activity remains inside the system, and you don't have to worry about email addresses that may be incorrect or outdated. Your institution controls your options for messages within Learn and can set restrictions on what you can do, or turn off messages completely. Some institutions allow instructors to set course-level controls for messages.
Topics on this page include:
Messages for all courses
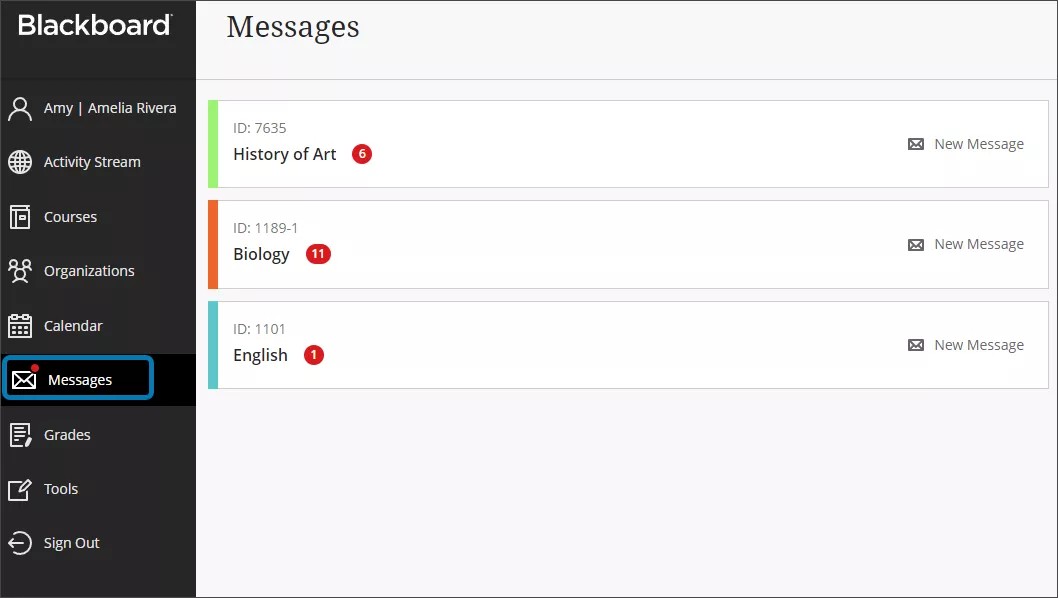
In the base navigation, select Messages.
Don't miss any action. If you have a mix of Original and Ultra courses, you can access messages for both on this page. Unread messages are indicated with a number within a red circle and appear first.
Access messages across time. You can view messages for current, previous, and future courses. Use the arrows to navigate to another time period.
Ready to share? If allowed by your institution, select the New Message icon beside your course on the Courses page to send a message to one person, multiple people, group, or a class. In the Ultra Course View, begin typing and recipient names pop up. In the Original Course View, select To. A list of all course members appears. In the first box, select the recipients and select the right-pointing arrow to move them to the Recipients box.
New message alerts
New messages appear on the global messages page.
Your instructor can choose to send a copy of a course message to your email inbox. You only receive the email copy of a course message when you have a valid email address listed in your profile, so keep your profile up to date!
Unread message notifications
An identifiable number count highlights any new messages received. When you select the Messages page on the base navigation, a red number count changes to a red pill icon to reduce distraction. When you navigate away from this page, the system now displays the unread message count again. Courses with unread messages appear first in the list of the Messages page.
Messages inside a course
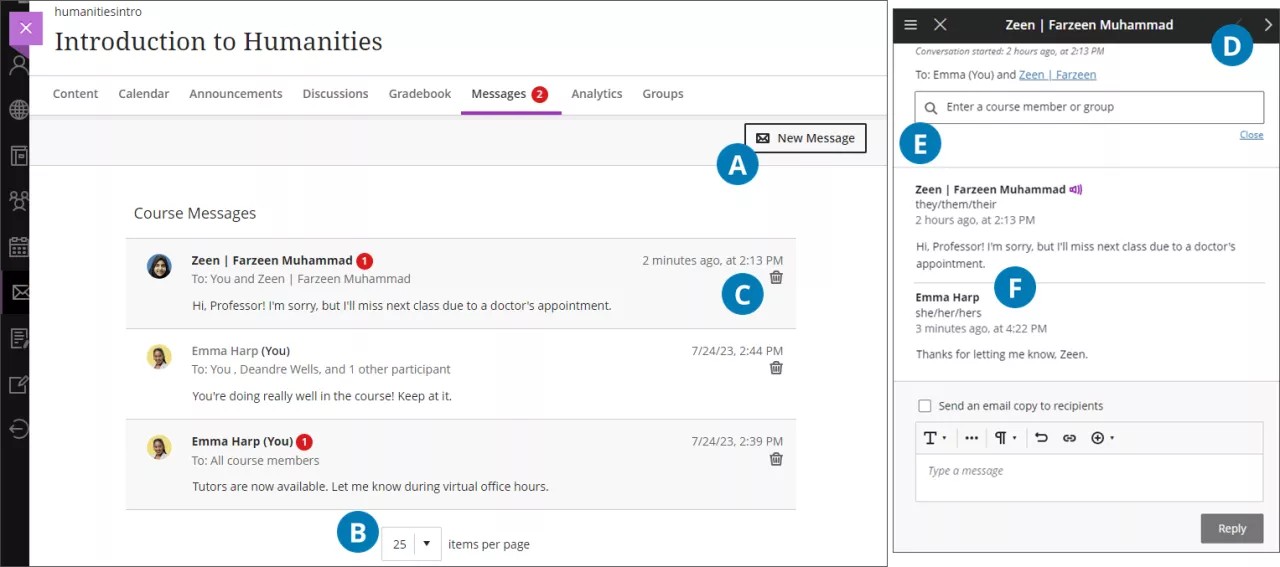
In a course, select the Messages page on the navigation bar. The number of unread messages that you have is indicated within a red circle. All your course messages and responses are on the Messages page. You can easily review the entire list and open a message to read all the responses.
Your unread messages appear first in the list and have a red circle next to the sender's name. Each message displays the profile picture of the sender. Under the sender's name, you can view how many participants are included or if the message is for the whole class.
A. Send a message. If allowed by your institution, select the New Message button to send a message. Send to one person, multiple people, group, or the entire class.
B. Select how many messages per page. If you have many messages, you can increase how many messages display on one page.
C. Delete a message. Use the Delete button to delete a message. If more responses come in, you'll get them. You can't edit or delete individual responses in a message.
D. Navigate to another message. Messages open in a panel with all the responses. Use the View Previous Messages and Next Message buttons at the top to view the previous or next message in the list.
E. Add more people. If allowed by your institution, when you create or respond to a message, select the Add Participants button to add additional people unless the message was sent to the entire class. The original recipients see a note in the next message that you added new people or the whole class. The new recipients see the message from the point they were added.
F. Follow a conversation. Messages are threaded. When you select anywhere within a message, the panel for that message displays every sent and received message within that conversation. On your course's Messages page, the most recent message in a thread is what's displayed. Your own messages are indicated with a (You) that appears by your name.
Send a message
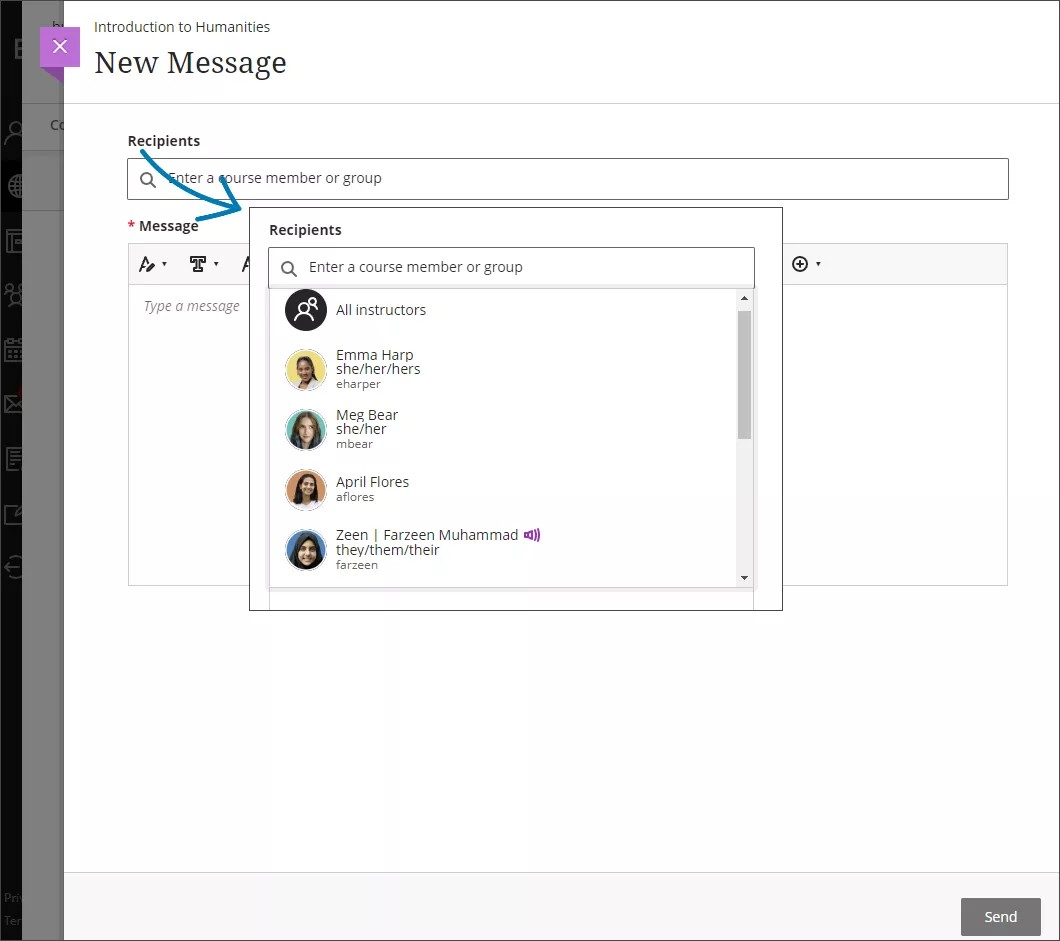
If allowed by your institution, when you select the New Message button on the Messages page, the New Message panel opens.
Start typing to add recipients. As you type, matching recipient names appear in a menu for easy selection. You can continue to add as many names as you want or send to the whole class.
Lead with the most important info. Messages don't have titles. Recipients need to rely on the first part of your message as they choose what to read.
In the editor, select the plus icon to view the menu of options. You'll find the option to attach a file. To use your keyboard to jump to the editor toolbar, press ALT + F10. On a Mac, press Fn + ALT + F10. Use the arrow keys to select an option, such as a bulleted list.
Send an email copy. You can send an email copy of a course message. Course members may be more likely to see, read, and act on course messages when they receive a copy in their inboxes. Email copies are only delivered if recipients have valid email addresses in their Learn profiles. When you select this option, all recipients of the message receive an email copy. Recipients can view your message in their email inboxes, but won't be able to send an email to reply.
Add styles and include attachments. The text box allows you to adjust the appearance of the text in your messages. You can also choose to attach a file or embed a link to other media within your message, if your institution has enabled the option.
Read-only messages
Your institution can choose not to allow students to reply to or create messages in their courses. Your instructors don't control this setting.
You may only be allowed to read the messages other roles send, such as instructors and teaching assistants. You also won't be able to forward messages you receive.
In the read-only state, the plus sign to add a message is removed from your global Messages page and the Ultra course Messages page.
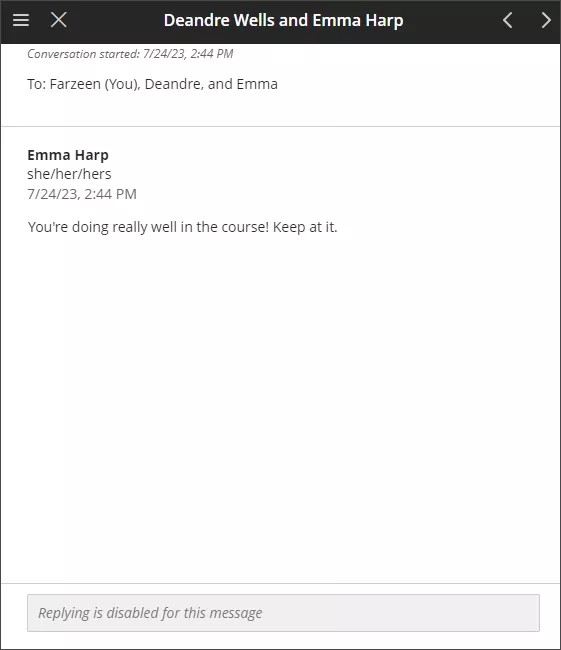
When you view an individual Ultra course message, you see a message in the Reply box that states: Replying is disabled for this message.
Watch a video about Messages
The following narrated video provides a visual and auditory representation of some of the information included on this page. For a detailed description of what is portrayed in the video, open the video on YouTube, navigate to More actions, and select Open transcript.
Video: Messages in Blackboard Learn shows you how to view and send course messages.


